Patio Heaters Items 31879, 37878 - Instruction Manual - Omcan
←
→
Transcription du contenu de la page
Si votre navigateur ne rend pas la page correctement, lisez s'il vous plaît le contenu de la page ci-dessous

Patio Heaters
Models PH-CN-0042-S, 0042-P
    Items 31879, 37878
  Instruction Manual

        Revised - 08/10/2021

       Toll Free: 1-800-465-0234
           Fax: 905-607-0234
      Email: service@omcan.com
            www.omcan.com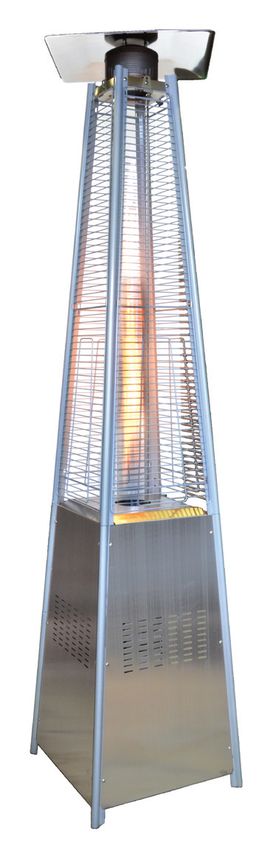
Table of Contents
                       Model PH-CN-0042-S / Model PH-CN-0042-P

Section                                                                                          Page

General Information --------------------------------------------------------------------------- 3 - 4

Safety and Warranty --------------------------------------------------------------------------- 4 - 8

Technical Specifications -------------------------------------------------------------------------- 9

Installation -------------------------------------------------------------------------------------- 9 - 12

Operation ------------------------------------------------------------------------------------- 12 - 15

Maintenance --------------------------------------------------------------------------------- 15 - 16

Troubleshooting ----------------------------------------------------------------------------------- 17

Parts Breakdown ---------------------------------------------------------------------------- 18 - 19

Notes ------------------------------------------------------------------------------------------- 20 - 22

Warranty Registration ---------------------------------------------------------------------------- 23

                                                    2
General Information
Omcan Manufacturing and Distributing Company Inc., Food Machinery of America, Inc. dba Omcan
and Omcan Inc. are not responsible for any harm or injury caused due to any person’s improper or
negligent use of this equipment. The product shall only be operated by someone over the age of 18, of
sound mind, and not under the influence of any drugs or alcohol, who has been trained in the correct
operation of this machine, and is wearing authorized, proper safety clothing. Any modification to the
machine voids any warranty, and may cause harm to individuals using the machine or in the vicinity of
the machine while in operation.

CHECK PACKAGE UPON ARRIVAL

Upon receipt of an Omcan shipment please inspect for external damage. If no damage is evident on the
external packaging, open carton to ensure all ordered items are within the box, and there is no concealed
damage to the machine. If the package has suffered rough handling, bumps or damage (visible or concealed),
please note it on the bill of lading before accepting the delivery and contact Omcan within 24 hours, so we may
initiate a claim with the carrier. A detailed report on the extent of the damage caused to the machine must be
filled out within three days, from the delivery date shown in the shipping documents. Omcan has no recourse
for damaged products that were shipped collect or third party.

Before operating any equipment, always read and familiarize yourself with all operation and safety
instructions.

Omcan would like to thank you for purchasing this machine. It’s of the utmost importance to save
these instructions for future reference. Also save the original box and packaging for shipping the
equipment if servicing or returning of the machine is required.
---------------------------------------------------------------------------------------------------------------------------------------------------
Omcan Fabrication et distribution Companie Limité et Food Machinery d’Amerique, dba Omcan et
Omcan Inc. ne sont pas responsables de tout dommage ou blessure causé du fait que toute personne
ait utilisé cet équipement de façon irrégulière. Le produit ne doit être exploité que par quelqu’un de
plus de 18 ans, saine d’esprit, et pas sous l’influence d’une drogue ou d’acohol, qui a été formé pour
utiliser cette machine correctement, et est vêtu de vêtements de sécurité approprié. Toute modification
de la machine annule toute garantie, et peut causer un préjudice à des personnes utilisant la machine
ou des personnes à proximité de la machine pendant son fonctionnement.

VÉRIFIEZ LE COLIS DÈS RÉCEPTION

Dès réception d’une expédition d’Omcan veuillez inspecter pour dommages externes. Si aucun dommage
n’est visible sur l’emballage externe, ouvrez le carton afin de s’assurer que tous les éléments commandés
sont dans la boîte, et il n’y a aucun dommage dissimulé à la machine. Si le colis n’a subi aucune mauvaises
manipulations, de bosses ou de dommages (visible ou cachée), notez-le sur le bond de livraison avant
d’accepter la livraison et contactez Omcan dans les 24 heures qui suivent, pour que nous puissions engager
une réclamation auprès du transporteur. Un rapport détaillé sur l’étendue des dommages causés à la machine
doit être rempli dans un délai de trois jours, à compter de la date de livraison indiquée dans les documents
d’expédition. Omcan n’a aucun droit de recours pour les produits endommagés qui ont été expédiées ou cueilli
par un tiers transporteur.

                                                                        3
General Information
Avant d’utiliser n’importe quel équipement, toujours lire et vous familiariser avec toutes les opérations
et les consignes de sécurité.
Omcan voudrais vous remercier d’avoir choisi cette machine. Il est primordial de conserver ces
instructions pour une référence ultérieure. Également conservez la boîte originale et l’emballage pour
l’expédition de l’équipement si l’entretien ou le retour de la machine est nécessaire.
---------------------------------------------------------------------------------------------------------------------------------------------------
Omcan Empresa De Fabricacion Y Distribucion Inc. Y Maquinaria De Alimentos De America, Inc. dba
Omcan y Omcan Inc. no son responsables de ningun daño o perjuicío causado por cualquier persona
inadecuada o el uso descuidado de este equipo. El producto solo podra ser operado por una persona
mayor de 18 años, en su sano juicio y no bajo alguna influencia de droga o alcohol, y que este ha sido
entrenado en el correcto funcionamiento de esta máquina, y ésta usando ropa apropiada y autorizada.
Cualquier modificación a la máquina anúla la garantía y puede causar daños a las personas usando la
máquina mientras esta en el funcionamiento.
REVISE EL PAQUETE A SU LLEGADA
Tras la recepcion de un envio Omcan favor inspeccionar daños externos. Si no hay daños evidentes en el
empaque exterior, Habra el carton para asegurararse que todos los articulos solicitados ésten dentro de la
caja y no encuentre daños ocultos en la máquina. Si el paquete ha sufrido un manejo de poco cuidado, golpes
o daños (visible o oculto) por favor anote en la factura antes de aceptar la entrega y contacte Omcan dentro
de las 24 horas, de modo que podamos iniciar una reclamación con la compañia. Un informe detallado sobre
los daños causados a la máquina debe ser llenado en el plazo de tres días, desde la fecha de entrega que se
muestra en los documentos de envío. Omcan no tiene ningun recurso por productos dañados que se enviaron
a recoger por terceros.
Antes de utilizar cualquier equipo, siempre lea y familiarizarse con todas las instrucciones de
funcionamiento y seguridad.
Omcan le gustaría darle las gracias por la compra de esta máquina. Es de la mayor importancia para
salvar estas instrucciones para futuras consultas. Además, guarda la caja original y el embalaje para el
envío del equipo si servicio técnico o devolución de la máquina que se requiere.
Safety and Warranty
Please read and understand this entire manual before attempting to assemble, operate or install the product.
This manual contains important information about the assembly, operation and maintenance of this patio
heater. General safety information is presented in these first few pages and is also located throughout the
manual. Keep this manual for future reference and to educate new users of this product. This manual should
be read in conjunction with the labeling on the product. Safety precautions are essential when any mechanical
or propane fueled equipment is involved. These precautions are necessary when using, storing, and servicing.
Using this equipment with the respect and caution demanded will reduce the possibilities of personal injury or
4Safety and Warranty
property damage. The following symbols shown below are used extensively throughout this manual. Always
heed these precautions, as they are essential when using any mechanical or fueled equipment.
DANGER
Failure to comply with the precautions and instructions provided with this heater can result in death, serious
bodily injury and property loss or damage from hazards of fre, explosion, burn, asphyxiation, and/or carbon
monoxide poisoning. Only persons who can understand and follow the instructions should use or service this
heater.
DANGER
FOR YOUR SAFETY
If you smell gas:
1. Shut off gas to the appliance.
2. Extinguish any open flame.
3. If odor continues, keep away from the appliance and immediately call you gas supplier or fire department.
DANGER
• EXPLOSION - FIRE HAZARD.
• Keep solid combustibles, such as building materials, paper or cardboard, a safe distance away from the
heater as recommended by the instructions.
• Provide adequate clearances around air openings into the combustion chamber.
• Never use the heater in spaces which do or may contain volatile or airborne combustibles, or products such
as gasoline, solvents, paint thinner, dust particles or unknown chemicals.
• During operation, this product can be a source of ignition. Keep heater area clear and free from
combustible materials, gasoline, paint thinner, cleaning solvents and other flammable vapors and liquids.
Do not use heater in areas with high dust content. Minimum heater clearances from combustible materials:
three (3) feet from the sides & two (2) feet from the top.
DANGER
• EXPLOSION - FIRE HAZARD.
• Never store propane near high heat, open flames, pilot lights, direct sunlight, other ignition sources or
where temperatures exceed 120 degrees F (49°C).
• Propane vapors are heavier than air and can accumulate in low places. If you smell gas, leave the area
immediately.
• Never install or remove propane cylinder while heater is lighted, near flame, pilot lights, other ignition
sources or while heater is hot to touch.
• This heater is red hot during use and can ignite flammables too close to the burner. Keep flammables at
least 3 feet from sides & 2 feet from top. Keep gasoline and other flammable liquids and vapors well away
from heater.
• Store the propane cylinder outdoors in a well ventilated space out of reach of children. Never store the
propane cylinder in an enclosed area (house, garage, etc.). If heater is to be stored indoors, disconnect the
5Safety and Warranty
propane cylinder for outdoor storage.
DANGER
• CARBON MONOXIDE HAZARD.
• This heater is a combustion appliance. All combustion appliances produce carbon monoxide (CO) during
the combustion process. This product is designed to produce extremely minute, non-hazardous amounts
of CO if used and maintained in accordance with all warnings and instructions. Do not block air flow into or
out of the heater.
• Carbon Monoxide (CO) poisoning produces fu-like symptoms, watery eyes, headaches, dizziness, fatigue
and possibly death. You can’t see it and you can’t smell it. It’s an invisible killer. If these symptoms are
present during operation of this product get fresh air immediately!
• For outdoor use only.
• Never use inside house, or other unventilated or enclosed areas.
• This heater consumes air (oxygen). Do not use in unventilated or enclosed areas to avoid endangering
your life.
WARNING
Do not store or use gasoline or other flammable vapors and liquids in the vicinity of this or any other appliance.
An LP-cylinder not connected for use shall not be stored in the vicinity of this or any other appliance.
WARNING - FOR OUTDOOR USE ONLY
CARBON MONOXIDE HAZARD
This appliance can produce carbon monoxide which has no odor. Using it in an enclosed space can kill you.
Never use this appliance in an enclosed space such as a camper, tent or home.
WARNING
We cannot foresee every use which may be made of our heaters. Check with your local fire safety authority
if you have questions about heater use. Other standards govern the use of fuel gases and heat producing
products for specific uses. Your local authorities can advise you about these. If no local codes exist, follow
National Fuel Gas Code, ANS Z223.1. In Canada, installation must conform to local codes. If no local codes
exist, follow the current National standards of CANADA CAN/CGA-B 149.2.
WARNING
Improper installation, adjustment, alteration, service or maintenance can cause property damage, injury or
death. Read the installation, operation and maintenance instructions thoroughly before installing or servicing
this equipment.
6Safety and Warranty
WARNING
CALIFORNIA PROPOSITION 65
Combustion by-products produced when using this product contain chemicals known to the State of California
to cause cancer, birth defects, and other reproductive harm.
WARNING
BURN HAZARD
• Never leave heater unattended when hot or in use.
• Keep out of reach of children.
WARNING
Certain materials or items, when stored under the heater, will be subjected to radiant heat and could be
seriously damaged.
WARNING
• This product is fueled by propane gas. Propane gas is invisible, odorless, and flammable. An odorant is
normally added to help detect leaks and can be described as a “rotten egg” smell. The odorant can fade
over time so leaking gas is not always detectable by smell alone.
• Propane gas is heavier than air and leaking propane will sink to the lowest level possible. It can ignite by
ignition sources including matches, lighters, sparks or open flames of any kind many feet away from the
original leak. Use only propane gas set up for vapor withdrawal.
• Store or use propane gas in compliance with local ordinances and codes or with ANS/NFPA 58. Turn off
propane when not in use.
WARNING
• Alert children and adults to the hazards of high surface temperatures. Stay away from these surfaces to
avoid burning skin or igniting clothing.
• Carefully supervise young children when in the vicinity of the heater.
• Do not hang clothing or any other flammable materials from the heater, or place on or near the heater.
• Replace any guard or protective device removed for servicing the appliance prior to placing back in service.
• Installation and repair should be done by a qualified service person. The heater should be inspected before
use and annually by a qualified service person. More frequent cleaning may be required as necessary. It is
imperative that the control compartment, burners, and circulating air passageway of the appliance be kept
clean.
WARNING
This product contains small batteries. Swallowed small batteries can cause CHOKING HAZARD. Seek
immediate medical attention if batteries are swallowed or inhaled. Keep children away from the small batteries.
7Safety and Warranty
CAUTION
SERVICE SAFETY
• Keep all connections and fittings clean. Make sure propane cylinder valve outlet is clean.
• During set up, check all connections and fittings for leaks using soapy water. Never use a flame.
• Use as a heating appliance only. Never alter in any way or use with any device.
RESIDENTIAL USERS: Vendor assumes no liability for parts or labor coverage for component failure
or other damages resulting from installation in non-commercial or residential applications. The right
is reserved to deny shipment for residential usage; if this occurs, you will be notified as soon as
possible.
1 YEAR PARTS AND LABOUR BENCH WARRANTY
Within the warranty period, contact Omcan Inc. at 1-800-465-0234 to schedule a drop off to either
an Omcan authorized service depot in the area, or to an Omcan Service warehouse to repair the
equipment.
Unauthorized maintenance will void the warranty. Warranty covers electrical and part failures, not
improper use.
Please see https://omcan.com/disclaimer for complete info.
WARNING:
The packaging components are classified as normal solid urban waste and can therefore be disposed of
without difficulty.
In any case, for suitable recycling, we suggest disposing of the products separately (differentiated
waste) according to the current norms.
DO NOT DISCARD ANY PACKAGING MATERIALS IN THE ENVIRONMENT!
8Technical Specifications
Model PH-CN-0042-S PH-CN-0042-P
Body Material Stainless Steel Black Powder Coating
Fuel Propane
Consumption 590g / hr.
BTU 42,000 BTU
Quartz Tube
4” x 49.3” / 102 x 1251mm
Dimensions (Dia. x H)
Dimensions 20.8” x 20.8” x 90” / 527 x 527 x 2286mm
Packaging Dimensions 6.5” x 30” x 55.5” / 165 x 762 x 1410mm
Weight 50.8 lbs. / 23 kgs.
Packaging Weight 57.3 lbs. / 26 kgs.
Item Number 31879 37878
Installation
PREPARATION
Before beginning assembly of product, make sure all parts are present. If any part is missing or damaged, do
not attempt to assemble the product. Contact Omcan for replacement parts.
Estimated Assembly Time: 60 minutes.
Tools Required for Assembly (not included):
• Phillips screwdriver w/ medium blade.
• Leak Detection Solution.
ASSEMBLY INSTRUCTIONS
1. Assemble the wheel assembly to the bottom plate. Fix the wheel assembly to the bottom plate using 4pcs
bolt M6X12 and 4pcs flange nut M6.
Hardware Used:
- Wrench (x1).
- Bolt M6x12 (x4).
- M6 Flange nut (x4).
2. Unscrew the switch button, load small battery, tighten the switch button. Insert the pins of the base to the
holes of lower support, press to secure the pins. Using 4pcs screw M5x12 to secure the lower support and
base. Insert the pins of the Control Box Assy to the holes of upper support, press to secure the pins. Using
4pcs screw 3/16” to secure the upper support and Control Box Assy.
Hardware Used:
9Installation
- Philips Screwdriver (x1).
- Screw M5x12 (x4).
- 3/16” Screw (x4).
3. Assemble block belt. Fix the block belt to the 2pcs of lower support behind the front door, using 2pcs screw
M5X12.
Hardware Used:
- Philips Screwdriver (x1).
- Screw M5x12 (x2).
4. Assemble the middle support. Insert the 4pcs upper support to the lower support. Secure them with 8pcs
screw 3/16”.
Hardware Used:
- Philips Screwdriver (x1).
- 3/16” Screw (x8).
5. Assemble the flame screen to the upper support. Secure the flame screen to the upper support using 8pcs
screw 3/16”.
Hardware Used:
- Philips Screwdriver (x1).
- 3/16” Screw (x8).
6. Assemble the reflector onto the flame screen. Screw the 3pcs stud on the flame screen, put 3pcs washer
6 onto the top of stud, then put the reflector onto the stud, secure them with 3 pcs washer 6 and 3pc wing
nut.
Hardware Used:
- Wing Nut (x3).
- Washer 6 (x6).
- Stud (x3).
7. Carefully install the glass tube by lifting up and inserting through the center hole in the upper plate. Ensure
the black silicone ring is attached to the lower edge of the glass tube as illustrated. Slide the glass tube
through the hole of the lower plate cover and onto the middle plate. Check and ensure that the glass tube
is positioned properly and is completely covering the center hole of the middle plate.
WARNING! The black silicone ring must be in place prior to operating the heater.
8. Assembly the protective guard. Hang the hooks of the protective guard onto the holes in supports. Secure
the protective guards with fixing brackets with 4pcs 3/16” screws.
Hardware Used:
- Philips Screwdriver (x1).
- 3/16” Screw (x4).
- Fixing Bracket (x4).
9. Attach the three side panels to the heater using 18pcs screw 3/16”.
Note: Do not cover the front side where the control knob is.
Hardware Used:
- Philips Screwdriver (x1).
- 3/16” Screw (x18).
10. Install the knob to M4x6 screw. Hang the chain to the hole on the control box assembly and put the pothook
of front panel to the holes of bottom plate.
Hardware Used:
- Philips Screwdriver (x1).
10Installation
- Knob (x1).
- Screw M4x6 (x1).
- Chain (x1).
11. Screw gas hose and regulator to propane cylinder (not included). Do not cross-thread.
Every part of the heater shall be secure against displacement and shall be constructed to maintain a fixed
relationship between essential parts under normal and reasonable conditions of handling and usage. Parts not
permanently secured shall be designed so they cannot be incorrectly assembled and cannot be improperly
located or misaligned in removing or replacing during cleaning or other servicing.
Use a standard 20 lb. propane cylinder only. (approximately 12.2 in. / 31cm. in diameter and 17.9 in. / 45.5cm
high).
Use this heater only with a propane vapor withdrawal supply system. See chapter 5 of the standard for storage
and handling of liquefied petroleum gas, ANS/NFPA 58. Your local library or fire department should have
this book. Storage of an appliance indoors is permissible only if the cylinder is disconnected and removed
from the appliance. A cylinder must be stored outdoors in a well-ventilated area out of the reach of children.
A disconnected cylinder must have dust caps tightly installed and must not be stored in a building, garage
or any other enclosed area. The maximum inlet gas supply pressure: 250 psi /1750 kPa. The minimum inlet
gas supply pressure: 25 psi /175 kPa. Manifold pressure with regulator provided: 11 inch W.C/ 2.74 kPa.
The pressure regulator and hose assembly supplied with the appliance must be used. The installation must
conform with local codes, or in the absence of local codes,with national fuel gas code, ANS Z223.1/NFPA54,
natural gas and propane Installation Code, CSA B149.1, or propane storage and handling code, B149.2..
A dented, rusted or damaged propane cylinder may be hazardous and should be checked by your cylinder
supplier. Never use a propane cylinder with a damaged valve connection.
The propane cylinder must be constructed and marked in accordance with the specifications for LP gas
cylinders of the U.S. Department of Transportation (DOT) or the standard for cylinders, spheres and tubes for
transportation of dangerous goods and commission, CAN/CSA-B339.
The cylinder must have a listed overfilling prevention device. The cylinder must have a connection device
compatible with the connection for the appliance. The cylinder used must include a collar to protect the cylinder
valve. Never connect an unregulated propane cylinder to the heater.
The knob on the LP tank must be closed. Make sure that the knob is turned clockwise to a full stop. The
cylinder supply system must be arranged for vapor withdrawal. Check that the control knob on the control unit
is turned off. Hold the regulator in one hand and insert the nipple into the valve outlet. Be sure the nipple is
centered in the valve outlet. The coupling nut connects to the large outside threads on the valve outlet. Hand-
tighten the coupling nut clockwise until it comes to a full stop. Firmly tighten by hand only.
To Disconnect: Fully close the tank valve by turning clockwise. Turn the coupling nut counterclockwise until the
regulator assembly detaches.
• Do not store a spare LP-gas cylinder under or near this appliance.
11Installation
• Never fill the cylinder beyond 80 percent full.
• Place the dust cap on the cylinder valve outlet whenever the cylinder is not in use. Only install the type
of dust cap on the cylinder valve that is provided with the cylinder valve. Other type of caps or plugs may
result in leakage of propane.
Operation
LEAK CHECK
WARNING
• Perform all leak tests outdoors.
• Extinguish all open flames.
• NEVER leak test when smoking.
• Do not use the heater until all connections have been leak tested and do not leak.
1. Make 2-3 oz. of leak check solution (one part liquid dishwashing detergent and three parts water).
2. Apply several drops of solution where hose attaches to regulator.
3. Apply several drops of solution where regulator connects to cylinder.
4. Make sure all patio heater and light valves are OFF.
5. Turn cylinder valve ON.
If bubbles appear at any connection, there is a leak.
1. Turn cylinder valve OFF.
2. If leak is at hose/regulator connection: tighten connection and perform another leak test. If bubbles
continue appearing, the hose should be returned to the place of purchase.
3. If leak is at regulator/cylinder valve connection: disconnect, reconnect, and perform another leak check. If
you continue to see bubbles after several attempts, cylinder valve is defective and should be returned to
cylinder’s place of purchase.
If NO bubbles appear at any connection, the connections are secure.
NOTE: Whenever gas connections are loosened or removed, you must perform a complete leak test.
4. Complete installation.
Caution: Do not attempt to operate until you have read and understand all General Safety Information
in this manual and all assembly is complete and leak checks have been performed.
BEFORE TURNING GAS SUPPLY ON
1. Your heater was designed and approved for outdoor use only. Do NOT use it inside a building, garage, or
any other enclosed area.
2. Make sure surrounding areas are free of combustible materials, gasoline, and other flammable vapors or
liquids.
3. Ensure that there is no obstruction to air ventilation. Be sure all gas connections are tight and there are no
12Operation
leaks.
4. Be sure the cylinder cover is clear of debris. Be sure any component removed during assembly or servicing
is replaced and fastened prior to starting.
BEFORE LIGHTING
1. Heater should be thoroughly inspected before each use, and by a qualified service person at least annually.
If relighting a hot heater, always wait at least 5 minutes.
2. Inspect the hose assembly for evidence of excessive abrasion, cuts, or wear. Suspected areas should
be leak tested. If the hose leaks, it must be replaced prior to operation. Only use the replacement hose
assembly specified by manufacturer.
LIGHTING
Note: This heater is equipped with a pilot light that allows for safer startups and shutdowns. Pilot must
be lit before main burner can be started.
1. Turn the control knob to the “OFF” position.
2. Fully open LP cylinder valve.
3. Push control knob in and rotate to pilot position.
Note: For initial start or after any cylinder change, hold control knob in for 2 minutes to purge air
from gas lines before proceeding.
4. Push and release the igniter button until pilot flame is visible through the glass tube.
5. Once the pilot is lit, continue to depress the control knob for 30 seconds.
6. If the pilot does not stay lit, repeat steps 4 to 6.
7. If after repeating steps 4 to 6 unit does not light, then:
- Push in control knob and turn counterclockwise to “PILOT”.
- As you are depressing the control knob, place long stem lighter through the glass tube to light the pilot.
- Repeat step 6.
8. Push in and turn the control knob to the “HIGH”, then release control knob. If you want a lower
temperature, push in the control knob and turn counterclockwise to the “LOW”.
Note: If pilot fails to remain lit, all valves should be closed and a waiting period of at least 5 minutes
should pass before attempting to light.
If you experience any ignition problem please consult “Troubleshooting”.
Caution: Avoid inhaling fumes emitted from the heater’s first use. Smoke and odor from the burning of oils
used in manufacturing will appear. Both smoke and odor will dissipate after approximately 30 minutes. The
heater should NOT produce thick black smoke.
Note: The burner may be noisy when initially turned on. To eliminate excessive noise from the burner, turn the
control knob to the PILOT position. Then, turn the knob to the level of heat desired.
Note: In Normal condition, the height of flame is 2/3 height of glass tube under Hi position. The height
of flame is 1/3 height of glass tube under Low position. The flame is stable and bright. No noise nor
black smoke. Contrarily it is abnormal condition.
13Operation
WARNING - FOR YOUR SAFETY
Be careful when attempting to manually ignite this heater. Holding in the control know for more than 10
seconds before igniting the gas will cause a ball of flame upon ignition.
WHEN HEATER IS ON
The flame should be blue with straight yellow tops. If excessive yellow flame is detected, turn off heater and
consult “Troubleshooting”.
RE-LIGHTING
Note: For your safety, control knob cannot be turned OFF without first depressing control knob in
PILOT position and then rotating it to OFF.
1. Turn control knob to OFF.
2. Wait at least 5 minutes, to let gas dissipate, before attempting to relight Pilot.
3. Repeat the “Lighting” steps on prior page.
WARNING - FOR YOUR SAFETY
Heater will be hot after use. Handle with extreme care.
SHUT DOWN
1. Turn control knob clockwise to PILOT. (Normally, burner will make a slight popping sound when
extinguished.) Burner will extinguish but PILOT will remain ON.
2. To extinguish PILOT depress control knob and continue to turn it clockwise to OFF.
3. Turn cylinder valve clockwise to OFF and disconnect regulator when heater is not in use.
Note: After use, some discoloration of the emitter screen is normal.
OPERATION CHECKLIST
For a safe and pleasurable heating experience, perform this check before each use.
Before Operating:
1. I am familiar with entire owner’s manual and understand all precautions noted.
2. All components are properly assembled, intact and operable.
3. No alterations have been made.
4. All gas connections are secure and do not leak.
5. Wind velocity is below 10 mph.
6. Unit will operate at reduced efficiency below 40°F.
7. Heater is outdoors (outside any enclosure).
8. There is adequate fresh air ventilation.
9. Heater is away from gasoline or other flammable liquids or vapors.
10. Heater is away from windows, air intake openings, sprinklers and other water sources.
11. Heater is at least 24 in. on top and at least 36 in. on sides from combustible materials.
12. Heater is on a hard and level surface.
14Operation
13. There are no signs of spider or insect nests.
14. All burner passages are clear.
15. All air circulation passages are clear.
16. Children and adults should be alerted to the hazards of high surface temperatures and should stay away to
avoid burns or clothing ignition.
17. Young children should be carefully supervised when they are in the area of the heater.
18. Clothing or other protective material should not be hung from the heater, or placed on or near the heater.
19. Any guard or other protective device removed for servicing the heater must be replaced prior to operating
the heater.
20. Installation and repair should be done by a qualified service person. The heater should be inspected before
use and at least annually by a qualified service person.
21. More frequent cleaning may be required as necessary. It is imperative that control compartment, burner
and circulating air passageways of the heater be kept clean.
After Operation:
1. Gas control is in OFF position.
2. Gas Tank valve is OFF.
3. Disconnect Gas line.
Maintenance
WARNING - FOR YOUR SAFETY
• Do NOT touch or move heater for at least 45 minutes after use.
• Reflector is hot to the touch.
• Allow reflector to cool before touching.
To enjoy years of outstanding performance from your heater, make sure you perform the following maintenance
activities on a regular basis:
1. Keep exterior surfaces clean.
2. Use warm soapy water for cleaning. Never use flammable or corrosive cleaning agents.
3. While cleaning your unit, be sure to keep the area around the burner and pilot assembly dry at all times. Do
not submerge the control valve assembly. If the gas control is submerged in water, do NOT use it. It must
be replaced.
a. Keep the appliance area clear and free from combustible materials, gasoline and other flammable
vapors and liquids.
b. Do not obstruct the flow of combustion and ventilation air.
c. Keep the ventilation opening(s) of the cylinder enclosure free and clear from debris.
4. Air flow must be unobstructed. Keep controls, burner, and circulating air passageways clean. Signs of
possible blockage include:
- Gas odor with extreme yellow tipping of flame.
- Heater does NOT reach the desired temperature.
- Heater glow is excessively uneven.
15Maintenance
- Heater makes popping noises.
- Spiders and insects can nest in burner or orifices. This dangerous condition can damage heater and
render it unsafe for use. Clean burner holes by using a heavy-duty pipe cleaner. Compressed air may help
clear away smaller particles.
- Carbon deposits may create a fire hazard. Disassembly the reflector, unscrew the reflector spacer, take
off the screen, take down one side of protective guards. Then take the glass tube from the heater and wash
and clear. After that assembly the glass tube and the rest of parts.
Note: In a salt-air environment (such as near an ocean), corrosion occurs more quickly than
normal. Frequently check for corroded areas and repair them promptly.
TIP: Use high-quality automobile wax to help maintain the appearance of your heater. Apply to exterior
surfaces from the pole down. Do not apply to emitter screen or domes.
STORAGE
Between uses:
• Turn Control Knob OFF.
• Disconnect LP cylinder.
• Store heater upright in an area sheltered from direct contact with inclement weather (such as rain, sleet,
hail, snow, dust and debris).
• If desired, cover heater to protect exterior surfaces and to help prevent build-up in air passages.
Note: Wait until heater is cool before covering.
During periods of extended inactivity or when transporting:
• Turn Control Knob OFF.
• Disconnect LP cylinder and move to a secure, well-ventilated location outdoors.
• Store heater upright in an area sheltered from direct contact with inclement weather (such as rain, sleet,
hail, snow, dust and debris).
• If desired, cover heater to protect exterior surfaces and to help prevent build-up in air passages.
Never leave LP cylinder exposed to direct sunlight or excessive heat.
Note: Wait until heater is cool before covering.
Service
Only a qualified service person should repair gas passages and associated components.
Caution: Always allow heater to cool before attempting service.
16Troubleshooting
PROBLEM POSSIBLE CAUSE CORRECTIVE ACTION
Pilot won’t light. Cylinder valve is closed. Open valve.
Blockage in orifice or pilot tube. Clean or replace orifice or pilot tube.
Note: Heater
Air in gas line. Open gas line and bleed it (pressing
operates at reduced
control knob in) for not more than 1 - 2
efficiency below
minutes or until you smell gas.
40ºF (5ºC).
Low gas pressure with cylinder valve fully Turn cylinder valve OFF and replace
open. cylinder.
Igniter fails. Use match to light pilot; obtain new igniter
and replace.
Pilot won’t stay lit. Dirt built up around pilot. Clean dirt from around pilot.
Connection between gas valve and pilot Tighten connection and perform leak
assembly is loose. check.
Thermocouple is not operating correctly. Replace thermocouple.
Burner won’t light. Propane cylinder is frosted over. Wait until the propane cylinder warms up
and becomes unfrosted.
Blockage in orifice. Clear blockage.
Control knob is not in ON position. Turn control knob to ON.
Burner flame is low. Gas pressure is low. Turn cylinder valve OFF and replace
cylinder.
Outdoor temperature is less than 40ºF and Use a full cylinder.
tank is less than 1/4 full.
Control knob fully ON. Check burner and orifices for blockage.
Carbon build-up Dirt or film on reflector and burner screen. Clean reflector and burner screen.
thick black smoke. Blockage in burner. Remove blockage and clean burner inside
and outside.
17Parts Breakdown
Model PH-CN-0042-S 31879
Model PH-CN-0042-P 37878
18Parts Breakdown
Model PH-CN-0042-S 31879
Item No. Description Position Item No. Description Position Item No. Description Position
41249 Reflector for 31879 1 42777 Lower Support for 31879 11 AH444 Screw M5x12 for 31879 21
42770 Flame Screen for 31879 2 42778 Block Belt for 31879 12 42785 Fixing Bracket for 31879 22
Stainless Steel Wheel Assembly for
40658 Glass Tube for 31879 3 42779 13 42787 Wrench for 31879 23
31879
42771 Upper Support for 31879 4 42780 Stainless Steel Bottom Plate for 31879 14 42788 Philips Screwdriver for 31879 24
42772 Protective Guard for 31879 5 41251 Wing Nut for 31879 15 42789 Knob for 31879 25
72273 Black Silicone Ring for 31879 6 41252 Small Flat Washer Φ6 for 31879 16 AH445 Screw M4x6 for 31879 26
42774 Stainless Steel Side Panel for 31879 7 42781 Stud for 31879 17 AH446 Chain for 31879 27
42775 Stainless Steel Front Panel for 31879 8 42782 3/16” Screw for 31879 18 AH447 Long Stem Lighter for 31879 28
42776 Gas Hose and Regulator for 31879 9 42783 Bolt M6x10 for 31879 19 AH448 AA Battery 1.5V for 31879 29
41250 Control Box Assembly for 31879 10 42784 M6 Flange Nut for 31879 20
Model PH-CN-0042-P 37878
Item No. Description Position Item No. Description Position Item No. Description Position
41249 Reflector for 37878 1 42777 Lower Support for 37878 11 AH444 Screw M5x12 for 37878 21
42770 Flame Screen for 37878 2 42778 Block Belt for 37878 12 42785 Fixing Bracket for 37878 22
Powder Coated Wheel Assembly for
40658 Glass Tube for 37878 3 42950 13 42787 Wrench for 37878 23
37878
42771 Upper Support for 37878 4 42949 Powder Coated Bottom Plate for 37878 14 42788 Philips Screwdriver for 37878 24
42772 Protective Guard for 37878 5 41251 Wing Nut for 37878 15 42789 Knob for 37878 25
72273 Black Silicone Ring for 37878 6 41252 Small Flat Washer Φ6 for 37878 16 AH445 Screw M4x6 for 37878 26
42947 Powder Coated Side Panel for 37878 7 42781 Stud for 37878 17 AH446 Chain for 37878 27
42948 Powder Coated Front Panel for 37878 8 42782 3/16” Screw for 37878 18 AH447 Long Stem Lighter for 37878 28
42776 Gas Hose and Regulator for 37878 9 42783 Bolt M6x10 for 37878 19 AH448 AA Battery 1.5V for 37878 29
41250 Control Box Assembly for 37878 10 42784 M6 Flange Nut for 37878 20
19Notes
________________________________________________________________________________________
________________________________________________________________________________________
________________________________________________________________________________________
________________________________________________________________________________________
________________________________________________________________________________________
________________________________________________________________________________________
________________________________________________________________________________________
________________________________________________________________________________________
________________________________________________________________________________________
________________________________________________________________________________________
________________________________________________________________________________________
________________________________________________________________________________________
________________________________________________________________________________________
________________________________________________________________________________________
________________________________________________________________________________________
________________________________________________________________________________________
________________________________________________________________________________________
________________________________________________________________________________________
________________________________________________________________________________________
________________________________________________________________________________________
________________________________________________________________________________________
________________________________________________________________________________________
________________________________________________________________________________________
________________________________________________________________________________________
20Notes
________________________________________________________________________________________
________________________________________________________________________________________
________________________________________________________________________________________
________________________________________________________________________________________
________________________________________________________________________________________
________________________________________________________________________________________
________________________________________________________________________________________
________________________________________________________________________________________
________________________________________________________________________________________
________________________________________________________________________________________
________________________________________________________________________________________
________________________________________________________________________________________
________________________________________________________________________________________
________________________________________________________________________________________
________________________________________________________________________________________
________________________________________________________________________________________
________________________________________________________________________________________
________________________________________________________________________________________
________________________________________________________________________________________
________________________________________________________________________________________
________________________________________________________________________________________
________________________________________________________________________________________
________________________________________________________________________________________
________________________________________________________________________________________
21Notes
________________________________________________________________________________________
________________________________________________________________________________________
________________________________________________________________________________________
________________________________________________________________________________________
________________________________________________________________________________________
________________________________________________________________________________________
________________________________________________________________________________________
________________________________________________________________________________________
________________________________________________________________________________________
________________________________________________________________________________________
________________________________________________________________________________________
________________________________________________________________________________________
________________________________________________________________________________________
________________________________________________________________________________________
________________________________________________________________________________________
________________________________________________________________________________________
________________________________________________________________________________________
________________________________________________________________________________________
________________________________________________________________________________________
________________________________________________________________________________________
________________________________________________________________________________________
________________________________________________________________________________________
________________________________________________________________________________________
________________________________________________________________________________________
22Warranty Registration
Thank you for purchasing an Omcan product. To register your warranty for this product, complete the information below, tear off the card at
the perforation and then send to the address specified below. You can also register online by visiting:
Merci d’avoir acheté un produit Omcan. Pour enregistrer votre garantie pour ce produit, complétez les informations ci-dessous, détachez la
carte au niveau de la perforation, puis l’envoyer à l’adresse spécifié ci-dessous. Vous pouvez également vous inscrire en ligne en visitant:
Gracias por comprar un producto Omcan usted. Para registrar su garantía para este producto, complete la información a continuación,
cortar la tarjeta en la perforación y luego enviarlo a la dirección indicada a continuación. También puede registrarse en línea en:
https://omcan.com/warranty-registration/
For mailing in Canada For mailing in the US
Pour postale au Canada Pour diffusion aux États-Unis
Por correo en Canadá Por correo en los EE.UU.
OMCAN OMCAN
PRODUCT WARRANTY REGISTRATION PRODUCT WARRANTY REGISTRATION
3115 Pepper Mill Court, 4450 Witmer Industrial Estates, Unit 4,
Mississauga, Ontario Niagara Falls, New York
Canada, L5L 4X5 USA, 14305
or email to: service@omcan.com
Purchaser’s Information
Name: Company Name:
Address:
Telephone:
City: Province or State: Postal or Zip: Email Address:
Country: Type of Company:
Restaurant Bakery Deli
Dealer from which Purchased: Butcher Supermarket Caterer
Dealer City: Dealer Province or State: Institution (specify):
Invoice: Other (specify):
Model Name: Model Number: Serial Number:
Machine Description:
Date of Purchase (MM/DD/YYYY): Date of Installation (MM/DD/YYYY):
Would you like to extend the warranty? Yes No
Thank you for choosing Omcan | Merci d’avoir choisi Omcan | Gracias por elegir Omcan
23Since 1951 Omcan has grown to become a leading distributor of equipment and supplies to the North American food service industry. Our success over these many years can be attributed to our commitment to strengthen and develop new and existing relationships with our valued customers and manufacturers. Today with partners in North America, Europe, Asia and South America, we continually work to improve and grow the company. We strive to offer customers exceptional value through our qualified local sales and service representatives who provide convenient access to over 5,000 globally sourced products. Depuis 1951 Omcan a grandi pour devenir un des “leaders” de la distribution des équipements et matériel pour l’industrie des services alimentaires en Amérique du Nord. Notre succès au cours de ces nombreuses années peut être attribué à notre engagement à renforcer et à développer de nouvelles et existantes relations avec nos clients et les fabricants de valeur. Aujourd’hui avec des partenaires en Amérique du Nord, Europe, Asie et Amérique du Sud, nous travaillons continuellement à améliorer et développer l’entreprise. Nous nous efforçons d’offrir à nos clients une valeur exceptionnelle grâce à nos ventes locales qualifiées et des représentants de service qui offrent un accès facile à plus de 5000 produits provenant du monde entier. Desde 1951 Omcan ha crecido hasta convertirse en un líder en la distribución de equipos y suministros de alimentos en América del Norte industria de servicios. Nuestro éxito en estos años se puede atribuir a nuestro compromiso de fortalecer y desarrollar nuevas relaciones existentes con nuestros valiosos clientes y fabricantes. Hoy con socios de América del Norte, Europa, Asia y América del Sur, que trabajan continuamente para mejorar y crecer la empresa. Nos esforzamos por ofrecer a nuestros clientes valor excepcional a través de nuestro local de ventas y representantes de los servicios que proporcionan un fácil acceso a más de 5,000 productos con origen a nivel mundial.
Vous pouvez aussi lire