Suprasson PMax - Suprasson PMax Lux - User's manual Notice d'utilisation Manual de uso Benutzerhandbuch Manuale d'uso Handleiding voor de ...
←
→
Transcription du contenu de la page
Si votre navigateur ne rend pas la page correctement, lisez s'il vous plaît le contenu de la page ci-dessous
Suprasson PMax - Suprasson PMax Lux
               ®                                      ®

           User's manual • Notice d'utilisation • Manual de uso
    Benutzerhandbuch • Manuale d'uso • Handleiding voor de gebruiker
Illustrations
1 13a 13b 13c 13d 14 15 16 17 18
6
SUPPRA
2
SON
LUX
7
3
4 8 9 10 11 12 19 20
5
37
33
34 38
21 22 23 24 25 BO
OS
31
T
39
35 40
36 41
5 x 20
230V:2x0,5AT
11V:2x1AT
42
32
43
26 27 28 29 30Illustrations
44 45 46 47 48 49 50
SUPRASSON
7
51
6
5
4
52
5 x 20 53
,5AT V fuse
230V:2x0 with a 230
11V:2x1A
T
Use only uniquement avec
Employer le de 230 V
54
un fusib
fuse
a 230Vavec
ly with ement
Use on
yer un
iqu 0V
Emplo ible 23
un fus1. Introduction
The Suprasson® P Max is a multi-clinical piezoelectric • A single or multifunction pedal foot control (depending
ultrasound generator that enables treatment to be carried on the option)
1. Introduction .................................................1 out in optimal aseptic and sterile conditions. • Suprasson® or Suprasson® Lux handpiece depending on
2. Installation ...................................................4 ® ® the version
Suprasson P Max is equipped with a Suprasson handpiece
• Tip kit depending on the sales version
(ultrasound).
3. Starting and stopping the device .......................5
® ®
Suprasson P Max Lux is equipped with a Suprasson Lux
4. Using ultrasound mode....................................6
light handpiece (ultrasound).
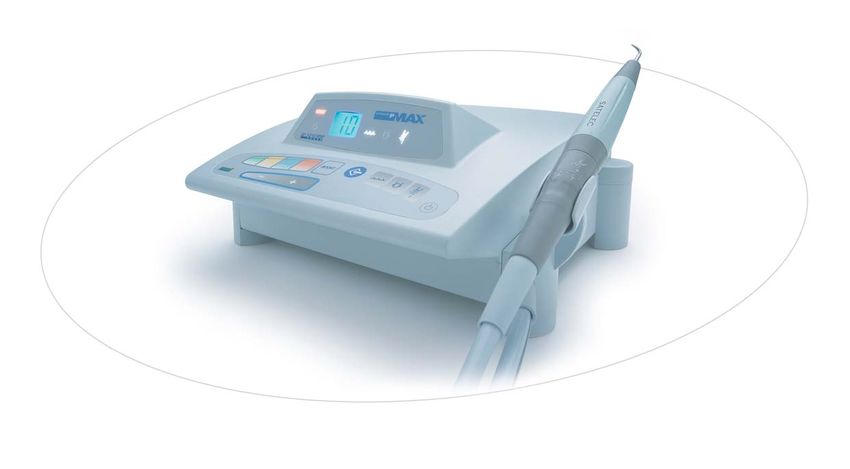
General view
5. Maintenance.................................................7 Refer to figure 1 on the fold-out part of the cover.
6. Troubleshooting ............................................8 General characteristics 1. Rear panel 4. Button to control pump
flow
7. Technical specifications ................................ 10 • Four ultrasound power ranges, each adjustable with 10
levels. 2. Display area 5. Irrigation kit
• Color display for visual and ergonomic representation 3. Control keyboard 6. Suprasson® handpiece
of the power.
• Boost function for instant selection of maximum power
in the selected mode.
• Memory for each of the four power modes for easy
recall of a chosen power level.
• Irrigation via the water supply with flow regulation on
the handpiece connector.
• Main functions on the multifunction foot control.
The Suprasson® P Max is a multifunction device for scaling,
endodontic and periodontic treatment (according to option)
in sterile or aseptic conditions.
Irrigation kit
Available as an option
• Irrigation kit comprising a peristaltic pump, an
irrigation line and two reservoirs for irrigation liquids.
• Independent adjustment of irrigation flow.
• Syringe effect.
• Easy manual selection of the active reservoir or
complete shut-off.
• Support for using bottles or pouches of sterile solution.
Parts included
• A Suprasson® P Max or Suprasson® P Max Lux device
(depending on the option)
• A mains cord
11. Introduction
14. Boost
Front panel – Display Applies the power (value 10) of the selected range; the
lights up. A second press on the key exits the mode.
This mode can also be accessed from the multifunction foot
Includes display and indicators. 10. Water supply indicator control (cannot be memorized and use must be occasional).
Lights when the key is pressed (ref. 16), and
7. Boost indicator indicates irrigation via the drinking water supply. 15. Memory key
Lights when the BOOST function is activated. Memorizes a power level for each of the four power ranges,
11. Irrigation kit indicator with the exception of switching on irrigation and Boost.
8. Standby indicator Lights when the key is pressed (ref. 17), and indicates
Lights when the device is in standby mode (energy saving). irrigation via one of the two reservoirs. 16. Water supply key
Pressing this key selects drinking water (water supply) as
9. Display 12. Spray or dry mode indicator the irrigation solution. The indicator lights up. Irrigation will
The display background color indicates: Lights when the key is pressed (ref. 18). only take place after the spray or dry key (ref. 18) is
pressed; the rate of flow may be set via the handpiece
• power on, the color indicator appears bluish white. connector. The two keys 16 and 17 are mutually exclusive
Any other color signals a malfunction (see chapter Sensitive control panel and may be memorized.
“troubleshooting”);
• in use, the color displayed (green, yellow, blue and Is set out as follows: 17. Irrigation kit key
orange) corresponds to the color code of the
Pressing this key selects the irrigation kit (optional).
ultrasound power range selected. 13. Ultrasound power range keys Irrigation will only take place after the spray or dry key
The figures displayed indicate:
Each yellow, green, blue and orange key corresponds to an (ref. 18) is pressed.
• power on, the number 88 indicates the correct ultrasound power range, from the weakest to the strongest
The rate of flow may be adjusted via the control knob on
operation of the segments of the display. Any other as follows:
the pump. The two keys 16 and 17 are mutually exclusive
value signals a malfunction of the indicator (see • Green background: low power (ref. 13a). and may be memorized.
chapter “troubleshooting”). • Yellow background: intermediate power (ref. 13b).
• In use, the ultrasound power level (1 to 10) for the • Blue background: high power (ref. 13c).
range selected, controlled by the keys (Ref. 18. Spray or dry key
• Orange background: very high power (ref. 13d).
19). The range selected: Switches irrigation on after keys 16 or 17 have been
• when programming: • a reminder is given by the color of the display selected. The indicator (rep 12) lights up. A second press
- the length of time of inactivity before the backlighting. turns irrigation off.
device enters standby mode; • Is programmed in the factory at level 5 except for the
- for Suprasson® P Max Lux only, the length of orange key which is programmed at level 1 and uses 19. The keys
time before the light is switched off on the irrigation from the water supply.
Suprasson® Lux handpiece, when ultrasound Reduce ( key ) or increase ( key) ultrasound power in
The range may also be selected with the multifunction foot
is no longer in use. the selected range. The values go from 1 to 10.
control (see chapter on the multifunction foot control
pedal).
20. Button to enter or leave standby mode
The following figure shows an example of the display, from
left to right, power on, in use (setting the ultrasound power This button is mainly used for leaving standby mode.
The initialization sequence is started. Only this
level) and when programming (light time limit).
button can be used to leave standby mode.
21. Introduction
This button can also be used to put the device into 28. Fan 35. Irrigation
standby mode, but the device goes into standby
Do not obstruct the fan at the risk of causing severe Irrigation selection on/off (ref. 18).
automatically after a set time (see § Setting the
damage to the device.
standby delay of the device).
36. Right pedal
29. Power socket • Ultrasound function selected: activates ultrasound
Rear panel Connection to mains electricity is by a standard connector and associated functions that have been previously
conforming to IEC 60-320. selected.
Is set out as follows:
30. Fuse housing
21. Team Up connector (optional)
Irrigation kit
Contains the device’s fuses.
Connection to an electro-analgesia device used during It is fixed underneath the unit (ref. 39).
prophylactic treatment. ® ®
Suprasson and Suprasson Lux The pump (ref. 42) sends (ref. 43) the contents of the
22. Compressed air supply (Suprasson® P Max handpieces selected reservoir (ref. 38 and 41) to the Suprasson®
handpiece (ref. 6) fitted with the Sterijoint.
Lux) Refer to the relevant instructions.
A rapid disconnection system with an automatic valve It is possible to regulate the flow by turning the limiter
enables it to be connected to the compressed air supply. located above the pump motor (ref. 40).
Multifunction foot control
The selector (ref. 41) is used as follows:
23. Foot control connector
Connection for the single or multifunction foot control 31. Left pedal • selector to the left : left reservoir.
pedal. Activates rinsing without ultrasound. When the irrigation kit • selector to the right: right reservoir.
is available, pressing the pedal initiates rinsing (syringe • selector in the center: both reservoirs closed.
24. Irrigation kit connector effect – with a flow rate of about 120 ml/min).
The two reservoirs (ref. 38) are independent and are fixed
Refer to kit instructions for details. 32. Connector on either side of the pump. They can be sterilized in an
autoclave.
25. On/off button (O/I) Connection of the device. The connector (ref. 37) links the irrigation kit to the device.
®
26. Air pressure adjustment (Suprasson P Max 33. Range of functions
Lux)
Each press selects one of the four power modes. The
Adjustment is automatic via a pressure regulator integrated ultrasound power setting used will be the one memorized,
into the device. or by default the factory setting, (the mid position value of
5, except for the top range which is set to 1). Check the
27. Drinking water supply connector display to view the function selected.
Its rapid disconnection system with an automatic valve
enables it to be connected to the supply. A removable filter 34. Boost
is located on the water inlet pipe. See notes relating to the key (ref. 14).
32. Installation
Recommendations
For your safety, connections (water, air and electricity)
should be carried out by an approved installer of dental
equipment. The device requires the following connections
(see technical specifications chapter).
Carry out the connection to the drinking water supply
using an automatic cutoff valve of the Aquastop type,
or to the dental chair water supply.
Caution: always turn off the water supply when you
leave the dental practice.
Setting up the equipment
• Position the device in the place where it is going to
be used.
• Connect the foot control (rep 32) to the connector on
the device (rep 23).
• Connect the optional equipment (Team Up ref. 21,
irrigation kit ref. 24).
• Connect the water supply pipe with its filter to the
connector located at the rear of the device (ref. 27).
• Connect the air supply pipe to the rear of the device
(ref. 22) for Suprasson® P Max Lux.
• Plug in the power socket (ref. 29)
• Open the supply taps (water-air).
43. Starting and stopping the device
This device should only be used by professionals (dental Entering standby mode Delay before the device enters standby mode
practictioners and hygienists). Before being used for the
This setting specifies the length of time before the device
first time it is: 1. Press the (rep 20) key.
enters standby mode. To change this setting:
• Imperative to clean, disinfect using alcohol or - The front panel goes out.
disinfectant dental wipes and/or sterilize the - The device is in energy saving mode. 1. Put the device into standby ( key).
accessories (casing of the device, handpiece, tips, - The (rep. 8) indicator lights up. 2. Press the yellow and blue keys together, then
keys, etc.). Reminder: the device enters standby mode on its own after the key, while keeping the other keys
• Recommended that the accessories should be a predetermined time. See § Setting the device’s standby depressed.
plugged in and the spray operated for a few minutes delay. The display will indicate “A” (Stop) followed by a
to rinse the device’s internal water circuits. figure giving the current time delay in minutes.
Important: It is imperative that the water supply is turned 3. Release the keys.
off when leaving the dental practice. Leaving standby mode 4. Set the time with the or keys.
The length of time can be set from no standby to
1. Press the key (rep. 20).
15 minutes. The new value comes into effect
Switching on the power The (rep. 8) indicator goes out and the device when the device is restarted.
returns to the configuration being used before
1. Set the power switch to the on position (I) (rep. entering standby. “AC” indicates that standby mode will be activated after 12
25). minutes. The table below shows the value displayed
The device automatically goes into standby according to the desired time delay in minutes.
mode: the green indicator (ref. 8) on the Changing the delays
front lights up. The device is in energy saving Display min Display min)
Delays refer to the time the light in the Suprasson® Lux
mode.
handpiece stays on after ultrasound has been used, and the A- 0 (*) A8 8
time taken before the device goes into standby mode after
A1 1 A9 9
To operate a period of inactivity.
A2 2 AA 10
1. Press the (rep 20) key on the front of the Delay before the light goes out A3 3 AB 11
device
The initialization phase lasting a few seconds is This function only applies to the Suprasson® P Max Lux. It A4 4 AC 12
launched. The information displayed is as follows specifies the length of time before the light goes out after
A5 5 AD 13
(any other values indicate malfunction): ultrasound has been used (three seconds by default). To
- Display: the figure 88 is displayed. change this setting: A6 6 AE 14
- Background color of the display: bluish- 1. Put the device into standby ( key). A7 7 AF 15
white. 2. Press the boost and yellow keys together, then
- Indicators: they all light up. the key while keeping the other keys (*) 0 = no standby
At the end of the initialization phase, the display depressed.
will show one of the following: The display will indicate “L” (Light) followed by a
- By default, low power mode is at level 5 on a figure giving the current time delay in seconds. Switching off the device
green background, no irrigation, water 3. Release the keys. 1. Set the on/off switch to the 0 position.
supply selected, light out in three seconds, 4. Set the time with the or keys.
(Suprasson® P Max Lux), enters standby mode The length of time can be set from 0 (L-) to nine
automatically after nine minutes. seconds (L9). The new value comes into effect
- Or the last configuration used. when the device is restarted.
The device is ready to use. Therefore a light out time delay of 7 seconds will
be displayed at “L7”.
54. Using ultrasound mode
Memorizing the ultrasound power
Choosing the ultrasound power range level
1. Select a power range by pressing one of the
1. Select the desired power range (ref. 13).
four keys (green, yellow, blue, orange) (ref.
13) on the control panel: 2. Change the power level with the keys
By default the display indicates the color of the (ref. 19).
range selected at power setting 5 (1 for high 3. Press the memory key . (ref. 15)
power) and irrigation from the water supply. The power display shows “--” for one second to
Reminder: the ultrasound power range may be selected confirm memorization.
with the multifunction foot control.
Recalling a level from memory
Setting ultrasound power 1. Press the key for the desired power range (ref.
13).
Incremental setting The memorized value is displayed.
Refer to the Tipbook for power settings of
1. Press the key to increase ultrasound power Satelec tips.
or the key to decrease it from 1 to 10, by
steps of 1.
Setting the power to maximum ( )
1. Press the key on the front of the unit (ref.
14) or the multifunction foot control (ref. 34)
to set the power to maximum.
The indicator lights up (ref. 7) and the display
indicates the value of 10 in the selected range.
To exit Boost mode, press the key on the front of
the unit or press the multifunction foot control
once more, or change the power range.
Spray or dry
1. Press the key on the face of the unit. (ref.
18) or the multifunction foot control (ref. 35) to
activate irrigation.
- In water supply mode, controlling the water
flow is via the connector ring on the
Suprasson® handpiece (ref. 47).
- In irrigation kit mode, controlling the water
flow is via the flow limiter located on the
pump (ref. 40).
65. Maintenance
4. Disconnect the irrigation line from the Fan
Sterijoint, and discard.
Cleaning and disinfecting the device 5. Disconnect the Sterijoint unit (ref. 46), 1. Check regularly that the fan is free from dust.
The casing of the Suprasson® P Max as well as the cords Suprasson® handpiece (ref. 47) and tip (ref. 44) 2. Clean if necessary by gentle blowing after
should be cleaned and disinfected every day, using alcohol from the cord. having disconnected the mains supply.
or disinfectant dental wipes. 6. Take out and empty the reservoirs.
7. Disinfect them.
Cleaning, disinfecting and sterilization 8. Sterilize the reservoirs and the Sterijoint in an
autoclave.
of ultrasound systems 9. Clean the motor and peristaltic pump with
alcohol every day.
In the rear of the handpiece an irrigation circuit
waterproof o’ring (1.15x1) is accessible and visible
thanks to a groove of the rear socket. This allows
for easy replacement of the o’ring in the case of Cleaning the filters
damage or wearing. You can replace it yourself or
The water filter
have it done. After a number of
disconnections/connections and/or sterilizations, it Cleaning the water filter must be done in relation to the
is recommended to lubricate this o’ring with dental hardness index of the water.
1. Shut off the water at the tap on the water
instrument quality lubricant to maintain its supply side and purge the circuit.
efficiency and avoid internal leakage. 2. Set the on/off button to the "O" position and
unplug the mains lead.
Without an irrigation kit 3. Unscrew the two parts of the filter (ref. 48 and
Proceed as follows: 50) using two 10mm open-ended spanners.
1. Separate the Suprasson® handpiece (ref .45) 4. Extract and replace the cartridge (ref. 49).
from the cord (ref. 47) by pulling, without 5. Reassemble by reversing the operation,
turning. retightening the two parts of the filter (ref. 48
2. Unscrew the tip (ref. 44) from the Suprasson® and 50).
handpiece.
3. Clean and sterilize the Suprasson® handpiece Air filter
and tip after each use.
Refer to water filter section above.
With an irrigation kit Replacing the fuses
It is imperative that all parts in contact with the solution
Proceed as follows:
should be carefully rinsed after treating each patient as
1. Set the on/off button to the "O" position (ref.
follows:
51) and unplug the mains lead (ref. 52).
1. Disconnect the irrigation line from the kit.
2. Insert the end of a screwdriver (ref. 53) in the
2. Immerse it in clean water.
slot to open the protective cover.
3. Press the pedal for one minute to rinse the
3. Replace the fuses (ref. 54) with fuses of the
Sterijoint, the Suprasson® handpiece and the
same type and value.
tip.
4. Push the fuse holder back into its housing.
76. Troubleshooting
Fault Possible cause Solution
Does not operate. Unplugged or defective mains cord. Check and/or replace the mains cord.
(general) Fuses blown. Replace the fuses.
Defective wall power outlet. Contact your electrician.
Device switched off (0). Set the switch to the on position (I).
Foot control disconnected and/or defective. Check and/or replace the foot control.
No water but ultrasound No water in the water supply. Contact your approved installer.
working.
Water inlet pipe not connected. Connect the water inlet.
Incorrect spray setting. Adjust the setting.
Handpiece and/or tip blocked. Disconnect the handpiece and check if water is coming out of the cord:
- if not, return the device to Satelec After Sales Service;
- if it is, unscrew the tip from the handpiece, using the syringe blow air through
the tip and the handpiece. If the problem persists, return to Satelec After
Sales Service.
Water not atomized by the Unsuitable treatment or tip, or selected ultrasound power Change the treatment or tip or adjust the ultrasound.
ultrasound. too low.
Tip not tightened correctly. Re-tighten the tip.
Bent or worn tip. Replace the tip.
Incorrect use of the handpiece and/or the tip. Refer to the instructions.
Faulty contact between the handpiece and its connector. Push the handpiece into the connector more firmly, without turning it.
Water present in the handpiece connector. Dry the connector. Where there are black marks between the pins of the
connector and/or the contacts of the handpiece, return to Satelec After Sales
Service.
Ultrasound too strong or too Power not set correctly in relation to treatment. Adjust the power (see instructions).
weak.
Tip not tightened correctly. Re-tighten the tip.
Bent or worn tip. Replace the tip.
Incorrect use of the handpiece and/or tip. Refer to the instructions.
86. Troubleshooting
Fault Possible Cause Solution
No ultrasound Tip not tightened correctly. Re-tighten the tip.
Defective handpiece. Replace the handpiece.
Oxidization and/or black marks on the pins of the Clean the contacts or replace the cord or return to Satelec After Sales Service.
connector.
Cord cut. Replace the cord or return to Satelec After Sales Service.
Water leaking from the Worn handpiece o’ring. Replace the o’ring.
handpiece connector.
Leaking from the end of the Dirt in the water circuit (electric valve blocked open) Clean the circuit and electric valve (check the electric valve is working properly)
tip, pedal released. or return to Satelec After Sales Service.
No light with the Lux Blown bulb. Replace the bulb.
handpiece.
Incorrect use or setting of the mode. Refer to the instructions.
Electrical problem. Return to Satelec After Sales Service.
Overheating of the Lux No air in the supply. Contact your approved installer.
handpiece.
Air inlet pipe not connected. Connect the air inlet.
Energy saving mode not Incorrect use or setting of the mode. Refer to the instructions.
working properly.
Exiting from energy saving mode not possible. Return to Satelec After Sales Service.
Adjustment impossible. Return to Satelec After Sales Service.
97. Technical specification
Electrical Mechanical Symbols and markings
Class 1 type BF device Water pressure at inlet: 1 to 5 bar (14 to 72 PSI) Alternating current
Intermittent duty 10 min / 5 min Air pressure at inlet (Suprasson® P Max Lux): 4.5 to 6 bar (65
to 87 PSI) Type BF device
Information display: LCD digital display with colored
backlighting.
Operational Warning, please refer to the accompanying
Option selection: press buttons.
Water flow rate at exit: 0 to 120 ml/min documentation.
®
Halogen bulb: 3.5 V / 750 mA / 15 000 lux (Suprasson P
Max Lux only) Frequency of vibrations: 27 to 33 kHz Marking:
Light out delay: can be set between 0 and 9 seconds (Lux Peristaltic pump: adjustable from 5 to 40 ml/min (optional)
version only)
Syringe function: rate of flow from about 100 ml/min (with 0459
Mains power supply the peristaltic pump)
• 110 to 150 V AC, 50/60 Hz
• 230 to 260 V AC, 50/60 Hz
Fuse protection: dimensions 5x20 mm, 0.5 A (230 V) or 1 A Dimensions and use
(115 V). Overall dimensions:
Power consumption: 55 VA • Width: 250mm
• Height : 110mm
Insulation: 4kV (1 ms) • Depth: 300mm
Factory configuration: Weight: 2.7kg
• Power 5 in all ranges
• Light out delay: after 3 mins (Suprasson® P Max Lux
only) Fixing: mount on a table
• Standby: after 9 mins
Operating temperature: +10 to +40 °C / 30 to 75% RH.
Manufactured in accordance with current legislation
Storage/transport temperature: -40 to +70 °C / 10 to 100%
CEM: conforms to the general IEC 601-1 (= EN 60601-1) RH
standard
Retention of the memorized configuration: 10 years at
+25°C
101. Présentation
Le Suprasson® P Max est un générateur d’ultrasons Eléments livrés
piézoélectrique multiclinique qui permet de travailler dans
1. Présentation.................................................1 des conditions optimales d’asepsie et de stérilité. • Un appareil Suprasson® P Max ou Suprasson® P Max Lux
(selon option).
2. Installation ...................................................4 Suprasson® P Max est équipé d’une pièce à main Suprasson® • Un cordon secteur.
(ultrasons). • Une pédale simple ou multifonctions (selon option).
3. Mise en marche et arrêt de l’appareil.................5
Suprasson® P Max Lux est équipé d’une pièce à main • Pièce à main Suprasson® ou Suprasson® Lux selon
4. Utilisation en mode ultrasonore ........................6 version.
lumière Suprasson® Lux (ultrasons).
5. Entretien .....................................................7 • Kit d’inserts selon version commerciale.
6. Anomalies de fonctionnement ..........................8 Caractéristiques générales
Vue générale
7. Caractéristiques techniques ........................... 10 • Quatre gammes de puissance ultrasonore, chacune
réglable sur 10 niveaux. Se référer aux figures localisées sur la partie dépliable de
• Afficheur multicouleurs pour un repérage visuel et couverture.
ergonomique de la puissance.
1. Face arrière. 4. Bouton de réglage de
• Fonction Boost pour un passage instantané à la débit pompe d’irrigation.
puissance maximale du mode sélectionné.
2. Zone d’affichage. 5. Kit d’irrigation.
• Mémoire sur chacun des quatre modes de puissance
3. Clavier de commande. 6. Pièce à main Suprasson®.
pour un rappel simplifié d’un niveau de puissance
librement défini.
• Irrigation à partir du réseau d’eau avec réglage du
débit sur le connecteur de la pièce à main.
• Fonctions principales sur la pédale multifonctions.
Le Suprasson® P Max est un appareil multifonctions
permettant le détartrage, les traitements endodontiques et
parodontiques sous condition aseptique ou stérile (selon
option).
Kit d’irrigation
Il est disponible en option.
• Composé d’une pompe péristaltique, d’une ligne
d’irrigation et de deux réservoirs pour l’utilisation de
liquides d’irrigation.
• Réglage indépendant du débit d’irrigation.
• Effet seringue.
• Sélection manuelle aisée du réservoir actif ou arrêt
complet.
• Potence pour utilisation de flacons ou de poches de
solution stérile.
11. Présentation
Zone d’affichage permet de quitter le mode. Ce mode est également
accessible par la pédale multifonctions (ne peut être
Elle regroupe l’afficheur et les voyants. mémorisé et doit rester exceptionnel).
7. Voyant Boost 10. Voyant ‘Eau réseau’ 15. Touche de mémorisation
S’allume lorsque la fonction Boost est activée. S'allume après appui sur la touche (rep.16), indique Mémorise un niveau de puissance pour chacune des quatre
une irrigation à partir du réseau d’eau potable. gammes de puissance, le choix de l’irrigation, à l’exception
8. Voyant Veille du Boost.
S’allume lorsque l’appareil est en mode veille (économie
11. Voyant ‘Kit irrigation’
d’énergie). S'allume après appui sur la touche (rep. 17), indique 16. Touche eau réseau
l’irrigation à partir de l’un des deux réservoirs. L’appui sur cette touche sélectionne l’arrivée d’eau
9. Afficheur potable (réseau d’eau) comme irriguant. Le voyant
12. Voyant ‘mode spray ou dry’ s’allume. L’irrigation ne se fera qu’après appui sur la
La couleur du fond de l’afficheur :
touche spray ou dry (rep. 18) ; le débit d’irrigation est
• A la mise sous tension, l’indicateur de couleur S'allume après appui sur la touche (rep. 18). réglable sur le connecteur de la pièce à main. Les deux
apparaît blanc bleuté. Toute autre couleur signale un touches 16 et 17 s’excluent mutuellement et sont
dysfonctionnement (voir chapitre 6 « Anomalies de mémorisables.
fonctionnement). Clavier de commande
• En utilisation, l’affichage de la couleur (vert, jaune, Il se présente comme suit :
bleu et orange) correspond à la couleur de la touche 17. Touche kit d’irrigation
de gamme de puissance ultrasonore sélectionnée. L’appui sur cette touche permet la sélection du kit
13. Touches gamme de puissances ultrasons d’irrigation (option). L’irrigation ne se fera qu’après appui
Les chiffres affichés : Chaque touche jaune, verte, bleu ou orange correspond à sur la touche spray ou dry (rep. 18).
• A la mise sous tension, le nombre 88 indique le bon une gamme de puissance ultrasonore, de la plus faible à la
fonctionnement des segments de l’afficheur. Toute plus forte comme suit : Le débit d’irrigation est réglé par le bouton rotatif situé sur
autre valeur signale un dysfonctionnement de • Fond vert : basse puissance (rep. 13a). la pompe. Les deux touches 16 et 17 s’excluent
l’indicateur (voir chapitre « Anomalies de • Fond jaune : puissance intermédiaire (rep. 13b). mutuellement et sont mémorisables.
fonctionnement ». • Fond bleu : haute puissance (rep. 13c).
• En utilisation, le niveau de puissance ultrasonore (1 à • Fond orange : très haute puissance (rep. 13d). 18. Touche spray ou dry
10) pour la gamme sélectionnée, réglé par les touches La gamme sélectionnée : Autorise l’irrigation suivant la sélection des touches 16 ou
(rep. 19).
• Est rappelée par la couleur du rétro-éclairage de 17 ; le voyant (rep 12) s’allume. Un nouvel appui inhibe
• En programmation : l’afficheur.
- La durée d’inutilisation avant mise en veille de l’irrigation.
• Est programmée en usine au niveau 5 sauf touche
l’appareil ; orange au niveau 1 et utilise l’irrigation avec l’eau du
- Sur Suprasson® P Max Lux uniquement, la durée réseau.
19. Les touches
avant extinction de la lumière sur la pièce à La gamme peut également être sélectionnée avec la Diminue (touche ) ou augmente (touche ) la puissance
main Suprasson® Lux, à l’arrêt des ultrasons pédale multifonctions (voir Paragraphe Pédale ultrasonore, de la gamme sélectionnée. Les valeurs vont de
multifonctions en page suivante). 1 à 10.
La figure ci-après est un exemple d'affichage, de gauche à
droite, à la mise sous tension, en utilisation (réglage niveau 14. Touche Boost
de puissance ultrasonore) et en programmation (délai Applique la puissance (valeur 10) de la gamme
d'extinction). sélectionnée ; le voyant s’allume. Un nouvel appui
21. Présentation
20. Bouton d’activation ou de désactivation du 27. Connecteur réseau d’eau potable sauf pour la gamme maximale paramétrée à 1). Consulter
mode veille l’afficheur pour visualiser la fonction sélectionnée.
Son système de déconnexion rapide auto obturant permet
L’appui sur ce bouton permet principalement la sortie de le relier au réseau. Un filtre démontable est situé sur le
du mode veille. La phase d’initialisation est lancée. tuyau d’arrivée d’eau. 34. Boost
Seul ce bouton permet la sortie du mode veille. Voir descriptif de la touche (rep. 14).
L’appui sur ce bouton permet également la mise en 28. Ventilateur
veille de l’appareil mais l’appareil passe 35. Irrigation
Ne pas l’obstruer, risque de détériorations graves de
automatiquement en mode veille après un temps
l’appareil. Marche/arrêt de l’irrigation sélectionnée (rep. 18).
défini (voir paragraphe Temporisation de mise en
veille de l’appareil).
29. Embase secteur 36. Pédale de droite
La connexion au secteur s’effectue par une prise Fonction ultrasons sélectionnée : active les ultrasons et les
Face arrière normalisée conforme à la norme IEC 60-320. fonctions associées préalablement sélectionnées.
Elle se présente comme suit.
30. Logement fusibles
Kit d’irrigation
21. Connecteur Team Up (option)
®
Il renferme les fusibles de l’appareil.
Il est fixé sous l'appareil (rep. 39).
Connexion à un appareil d’électro-analgésie utilisé lors des
traitements prophylactiques. Pièces à main Suprasson et ®
La pompe (rep. 42) envoie (rep. 43) le contenu du réservoir
sélectionné (rep. 38 et 41) vers la pièce à main Suprasson®
22. Réseau air comprimé (Suprasson P Max Lux) ® Suprasson® Lux (rep.6) équipée du Sterijoint®.
Un système de déconnexion rapide auto obturant permet Se référer à la notice correspondante.
Il est possible de régler le débit en tournant le
de relier l’appareil au réseau d’air comprimé. potentiomètre situé au-dessus du moteur pompe (rep. 40).
23. Connecteur de pédale Pédale multifonctions Le sélecteur (rep. 41) est utilisé comme suit :
Elle se présente comme suit. • Sélecteur à gauche : réservoir de gauche.
Connexion à la pédale simple ou multifonctions.
• Sélecteur à droite : réservoir de droite.
31. Pédale de gauche • Sélecteur au centre : fermeture des 2 réservoirs.
24. Connecteur du kit d’irrigation
Se référer à la notice du kit pour le détail. Active le rinçage sans ultrason. En présence du kit Les deux réservoirs (rep. 38) sont indépendants et sont
d’irrigation, l’appui génère un flux de rinçage (effet disposés de part et d’autre de la pompe. Ils sont
seringue – débit d’environ 120 ml/mn). stérilisables en autoclave.
25. Bouton de Marche-Arrêt (O/I)
Le connecteur (rep. 37) relie le kit d’irrigation à l’appareil.
32. Connecteur
26. Réglage de la pression d’air (Suprasson® P
Max Lux) Connexion à l'appareil.
Le réglage se fait de manière automatique par un
régulateur de pression intégré à l’appareil. 33. Gamme de fonctions
Sélection à chaque appui des quatre modes de puissance.
La puissance ultrasonore appliquée sera celle mémorisée,
ou à défaut la valeur de réglage usine (valeur centrale de 5,
32. Installation
Recommandations
Pour votre sécurité, les raccordements (eau, air et
électricité) devront être réalisés par un installateur
dentaire agréé. L’appareil nécessite les raccordements
suivants (voir Chapitre 7 - Caractéristiques techniques) :
Effectuer le branchement au réseau d’eau potable par
l’intermédiaire d’un robinet de coupure automatique
de type AquaStop, ou au circuit d’eau du fauteuil.
Important : fermer impérativement l’arrivée d’eau en
quittant le cabinet dentaire.
Mise en place de l’équipement
• Positionner l’appareil à l’endroit d’utilisation.
• Relier le connecteur (rep 32) de la pédale au
connecteur (rep 23) de l’appareil.
• Raccorder les équipements optionnels (Team Up®
rep.21, kit d’irrigation rep. 24).
• Raccorder le tuyau d’arrivée d’eau avec son filtre au
branchement situé à l’arrière de l’appareil (rep. 27).
• Raccorder le tuyau d’air à l’arrière de l’appareil
(rep.22) si Suprasson® P Max Lux.
• Brancher l’embase secteur (rep. 29).
• Ouvrir les robinets d’alimentation (eau-air).
43. Mise en marche et arrêt de l’appareil
L’utilisation de l’appareil est limitée aux professionnels Mise en veille Une temporisation d’extinction de la lumière de 7 secondes
(chirurgiens-dentistes, hygiénistes). Avant la première mise est visualisée par « L7 ».
en service, il est impératif: 1. Appuyer sur la touche (rep 20).
• de nettoyer, désinfecter à l’alcool ou à l’aide de - La face avant s’éteint. Temporisation de mise en veille de l’appareil
lingettes désinfectantes de cabinet dentaire le boîtier, - L’appareil est en mode économie d’énergie.
Ce réglage définit le délai avant mise en veille de l'appareil.
les cordons de l'appareil et les accessoires et/ou de - Le voyant (rep 8) s’allume.
Pour modifier cette temporisation :
stériliser ces derniers. Rappel : l’appareil passe seul en mode veille après un
• de brancher les accessoires et de faire fonctionner le temps prédéfini. Voir paragraphe Temporisation de mise en 1. Mettre l'appareil en veille (touche ).
spray pendant quelques minutes pour rincer les veille de l’appareil sur cette même page. 2. Appuyer simultanément sur les touches
circuits d’eau internes à l’appareil. « jaune» et « bleue », puis sur la touche
Important : fermer impérativement l’arrivée d’eau en tout en maintenant les autres touches
quittant le cabinet dentaire. Quitter la mise en veille appuyées
L’afficheur indique «A» (Arrêt) suivi d’un chiffre
1. Appuyer sur la touche (rep. 20). représentant la temporisation d’extinction
Mise sous tension Le voyant (rep 8) s’éteint et l’appareil se actuelle, en minutes.
positionne dans sa configuration avant mise en 3. Relâcher les touches.
1. Basculer l’interrupteur secteur (rep. 25) en veille. 4. Ajuster la temporisation (touches ou ).
position marche (I). Le délai est réglable de "pas d'extinction" à
L’appareil passe automatiquement en mode 15 minutes. La nouvelle valeur est prise en
veille : le voyant vert (rep. 8) en face avant Modification des temporisations compte dès le redémarrage de l’appareil.
s’allume. L’appareil est en mode économie
Les temporisations concernent les délais de maintien de la
d’énergie. Une temporisation de mise en veille de 12 minutes est
lumière issue de la pièce à main Suprasson® Lux après arrêt
visualisée par « AC ». Le tableau suivant précise l’affichage
des ultrasons et de mise en veille de l’appareil après une
en fonction de la temporisation en minutes souhaitée.
Mise en fonction période d’inactivité.
Affichage Minutes Affichage Minutes
1. Appuyer sur la touche (rep 20) de la face Temporisation d’extinction de la lumière
avant A- 0 (*) A8 8
La phase d’initialisation est lancée durant Cette fonction n’existe que sur le Suprasson® P Max Lux.
Elle définit le délai d'extinction de la lumière après l’arrêt A1 1 A9 9
quelques secondes. Les informations présentées
sont (toute valeur différente indique un des ultrasons (3 secondes par défaut). Pour modifier cette A2 2 AA 10
dysfonctionnement) : temporisation :
A3 3 AB 11
- Afficheur : le chiffre 88 s’affiche. 1. Mettre l'appareil en veille (touche ).
- Couleur de fond de l’afficheur : blanc bleuté 2. Appuyer simultanément sur les touches A4 4 AC 12
- Voyants : tous allumés. « boost» et « jaune », puis sur la touche A5 5 AD 13
Au terme de la phase d’initialisation, l’affichage tout en maintenant les autres touches
appuyées A6 6 AE 14
correspond à l’un des deux cas suivants :
- Par défaut, le mode puissance basse est au L’afficheur indique «L» (Lumière) suivi d’un A7 7 AF 15
niveau 5 sur fond vert, sans irrigation, eau du chiffre représentant la temporisation d’extinction
actuelle, en secondes. (*) 0 = Pas d’extinction.
réseau sélectionnée, délai d’extinction de
lumière à 3 secondes (sur Suprasson® P Max 3. Relâcher les touches.
4. Ajuster avec les touches ou .
Lux), mise en veille automatique après 9
Le délai est réglable de 0 seconde (L-) à 9
Arrêt complet de l’appareil
minutes.
- Ou dernière configuration utilisée. secondes (L9). La nouvelle valeur est prise en 1. Basculer le commutateur Marche-Arrêt en
L’appareil est prêt à fonctionner. compte dès le redémarrage de l’appareil. position 0.
54. Utilisation en mode ultrasonore
Choix de la gamme de puissance - En mode «kit d’irrigation», le réglage se fait à
l’aide du limiteur de débit situé sur la pompe
ultrasonore (rep. 40).
1. Sélectionner l’une des quatre touches (vert,
jaune, bleu, orange) du clavier (rep. 13). Mémorisation du niveau de puissance
Par défaut, l’afficheur indique la couleur de la
gamme sélectionnée à la puissance 5 (1 pour la ultrasonore
haute puissance) et l’irrigation est effectuée
1. Sélectionner la gamme de puissance désirée
avec l’eau du réseau.
(rep. 13).
Rappel : la gamme de puissance ultrasonore peut être
2. Modifier le niveau de puissance avec les
sélectionnée avec la pédale multifonctions.
touches (rep. 19).
3. Appuyer sur la touche de mémorisation
Réglage de la puissance ultrasonore (rep. 15).
L’afficheur de puissance indique ‘--’ pendant une
Réglage continu seconde pour confirmer la mémorisation.
1. Appuyer sur la touche pour augmenter ou
sur la touche pour diminuer la puissance Rappel d’un niveau mémorisé
ultrasonore de 1 à 10, par pas de 1. 1. Appuyer sur la touche de la gamme de
puissance souhaitée (rep. 13).
Réglage à puissance maximale ( ) La valeur mémorisée s’affiche.
1. Appuyer sur la touche de la face avant Se référer au TipBook pour connaître la puissance
(rep. 14) ou de la pédale multifonctions d’utilisation des inserts de SATELEC.
(rep. 34) pour mettre la puissance à son
maximum.
Le voyant s’allume (rep. 7) et l’afficheur indique
la valeur 10 de la gamme sélectionnée
Pour quitter le mode Boost, appuyer une nouvelle
fois sur la touche en face avant ou sur la pédale
multifonctions, ou changer de gamme de
puissance.
Spray ou dry
1. Appuyer sur la touche en face avant
(rep. 18) ou sur la pédale multifonctions
(rep. 35) pour actionner l’irrigation.
- En mode «eau réseau», le réglage se fait à
l’aide de la bague du connecteur de la pièce à
main Suprasso® (rep. 47).
65. Entretien
Nettoyage et désinfection de l’appareil 5. Déconnecter l'ensemble Sterijoint® (rep. 46), Ventilateur
pièce à main Suprasson® (rep. 47) et insert
Le boîtier du Suprasson® P Max ainsi que les cordons doivent (rep.44) du cordon. 1. Vérifier régulièrement le niveau
être nettoyés et désinfectés, tous les jours, à l’alcool ou au 6. Sortir et vider les réservoirs. d’empoussiérage.
moyen de lingettes désinfectantes de cabinet dentaire. 7. Les désinfecter. 2. Nettoyer si nécessaire par soufflage à basse
8. Stériliser les réservoirs et le Sterijoint® en pression après avoir débranché le cordon
Nettoyage, désinfection et stérilisation autoclave. secteur.
du système des ultrasons 9. Nettoyer tous les jours l’axe du moteur de la
pompe péristaltique à l’alcool.
La pièce à main détient dans sa partie arrière un joint
d'étanchéité du circuit d'irrigation (1,15x1) accessible et
visible grâce à une échancrure de la douille arrière. Celle-ci Nettoyage des filtres
permet également le remplacement plus aisé du joint en
cas de blessure ou d'usure excessive. Faites procéder ou
Filtre à eau
procédez vous-mêmes à son échange. Au fil des
déconnexions/reconnexions et/ou des stérilisations, il est Ce nettoyage sera effectué en fonction de l’indice de
recommandé de lubrifier ce joint avec une graisse pour dureté de l’eau.
instrumentations dentaires afin de prolonger son efficacité 1. Fermer l’arrivée au robinet côté réseau d’eau
et éviter des fuites internes. puis purger le circuit.
2. Positionner le bouton Marche/Arrêt sur "O" et
Sans kit d'irrigation débrancher le cordon secteur.
Procéder comme suit : 3. Dévisser les 2 parties du filtre (rep. 48 et 50) à
1. Désolidariser la pièce à main Suprasson® l’aide de 2 clefs plates de 10.
(rep. 45) du cordon (rep. 47) en tirant, sans 4. Extraire et remplacer la cartouche (rep. 49).
tourner. 5. Remonter en sens inverse en resserrant les 2
2. Dévisser l'insert (rep. 44) de la pièce à main parties du filtre (rep. 48 et 50).
Suprasson®.
3. Nettoyer et stériliser la pièce à main Filtre à air
Suprasson® et l'insert après chaque utilisation. La procédure est similaire à celle décrite pour le filtre à
eau ci-dessus.
Avec kit d'irrigation
Il est impératif d’effectuer un rinçage systématique de Remplacement des fusibles
toutes les parties en contact avec la solution après chaque
patient comme suit : Procéder comme suit :
1. Déconnecter la ligne d'irrigation du kit. 1. Positionner le bouton marche/Arrêt sur "O"
2. L'immerger dans de l’eau claire. (rep. 51) et débrancher le cordon secteur de
3. Appuyer sur la pédale pendant une minute pour son embase(rep. 52).
rincer le Sterijoint®, la pièce à main Suprasson® 2. Insérer la pointe d’un tournevis dans l’encoche
et l’insert. (rep. 53) pour ouvrir le capot de protection.
4. Déconnecter la ligne d’irrigation du Sterijoint®, 3. Remplacer les fusibles (rep. 54) par des fusibles
la jeter. de même valeur et type.
4. Replacer le compartiment fusible dans son
logement en le poussant.
76. Anomalies de fonctionnement
Anomalie constatée Cause possible Solution
Aucun fonctionnement Cordon secteur débranché ou défectueux. Vérifier et/ou remplacer le cordon secteur.
(général) Fusibles grillés. Remplacer les fusibles.
Prise secteur murale défectueuse. Contacter votre électricien.
Interrupteur de l’appareil sur arrêt (0). Mettre l’interrupteur sur marche (I).
Pédale déconnectée et/ou défectueuse. Vérifier et/ou remplacer la pédale.
Pas d’eau mais présence des Pas d’eau au niveau du réseau. Contacter votre installateur agréé.
ultrasons
Tuyau d’arrivée d’eau non connecté. Connecter l’arrivée d’eau.
Mauvais réglage du spray. Ajuster le réglage.
Pièce à main et/ou insert bouché. Débrancher la pièce à main et vérifier si l’eau sort du cordon :
- Si non, retour de l’appareil au Service Après Vente SATELEC.
- Si oui, dévisser l’insert de la pièce à main, souffler de l’air avec la seringue
dans l’insert et la pièce à main, si le problème persiste, retour au Service
Après Vente SATELEC.
Pas de brumisation de l’eau Clinique ou insert non adapté ou puissance des ultrasons Changer de clinique ou d’insert ou régler les ultrasons.
par les ultrasons sélectionnée trop faible.
Mauvais serrage de l’insert. Resserrer l’insert.
Insert déformé ou usé. Remplacer l’insert.
Mauvaise utilisation de la pièce à main et/ou de l’insert. Se reporter à la notice d’utilisation.
Mauvais contact de la pièce à main avec son connecteur. Enfoncer, sans tourner, la pièce à main.
Présence d’eau au niveau du connecteur de la pièce à Sécher le connecteur, en cas de traces noires entre les broches du connecteur
main. et/ou les plots de la pièce à main, retour au Service Après Vente SATELEC.
Ultrasons trop forts ou trop Mauvais réglage de la puissance par rapport à la clinique. Ajuster la puissance (voir notice d’utilisation).
faibles
Mauvais serrage de l’insert. Resserrer l’insert.
Insert déformé ou usé. Remplacer l’insert.
Mauvaise utilisation de la pièce à main et/ou de l’insert. Se reporter à la notice d’utilisation.
86. Anomalies de fonctionnement
Anomalie constatée Cause possible Solution
Pas d’ultrasons Mauvais serrage de l’insert. Resserrer l’insert.
Pièce à main défectueuse. Remplacer la pièce à main.
Présence d’oxydation et / ou de traces noires au niveau Nettoyer les contacts ou remplacer le cordon ou retour au Service Après Vente
des broches du connecteur. SATELEC.
Cordon coupé. Remplacer le cordon ou retour au Service Après Vente SATELEC
Fuite d’eau au niveau du Usure du petit joint d'étanchéité en eau de la pièce à Remplacer le joint.
connecteur de la pièce à main main.
Fuite en bout d’insert, pédale Présence d’impureté dans le circuit d’eau (électrovanne Nettoyer le circuit et l’électrovanne (vérification du bon fonctionnement de
relâchée bloquée ouverte) l’électrovanne) ou retour au Service Après Vente SATELEC.
Pas de lumière avec la pièce à Ampoule grillée. Remplacer l’ampoule.
main Lux
Mauvaise utilisation ou réglage du mode. Se reporter à la notice d’utilisation
Problème électrique. Retour au Service Après Vente SATELEC.
Echauffement de la pièce à Pas d’air au niveau du réseau. Contacter votre installateur agréé.
main Lux
Tuyau d’arrivée d’air non connecté. Connecter l’arrivée d’air.
Problème de fonctionnement Mauvaise utilisation ou réglage du mode. Se reporter à la notice d’utilisation.
avec le mode économie
Sortie du mode économie d’énergie impossible. Retour au Service Après Vente SATELEC.
d’énergie
Réglage impossible. Retour au Service Après Vente SATELEC.
97. Caractéristiques techniques
Electriques Mécaniques Symboles et marquage
Equipement de classe I, type BF. Pression d’eau en entrée : 1 à 5 bars (14 à 72 PSI). Courant alternatif.
®
Service intermittent 10 mn / 5 mn Pression d’air en entrée (Suprasson P Max Lux) : 4,5 à 6
bars (65 à 87 PSI). Appareil de type BF.
Affichage des informations : par afficheur LCD numérique,
avec rétro-éclairage multicolore.
Fonctionnelles Attention, se référer aux documents accompagnant.
Sélection des choix : par boutons tactiles.
Débit d’eau en sortie : 0 à 120 ml/mn.
Ampoule halogène : 3,5 V / 750 mA / 15 000 lux Marquage : se référer à l’étiquette apposée à l’arrière de
(Suprasson® P Max Lux uniquement). Fréquence de vibration : 27 à 33 kHz. l’appareil.
Temporisation d’extinction lumière : réglable entre 0 et 9 Pompe péristaltique : débit réglable de 5 à 40 ml/mn
secondes (Version Lux uniquement). (option).
0459
Alimentation (sélection en usine) : Fonction seringue : débit de 100 ml/mn environ (avec
• 110 à 150 V AC, 50/60 Hz. pompe péristaltique).
• 230 à 260 V AC, 50/60 Hz.
Protection par fusible : dimensions 5x20 mm, 0,5 A (230 V)
ou 1 A (115 V). Dimensionnelles et d’utilisation
Puissance consommée : 55 VA. Dimensions hors tout :
• Largeur : 250 mm.
Isolement : 4 kV (1 ms). • Hauteur : 110 mm.
• Profondeur : 300 mm.
Configuration usine : • Poids : 2,7 kg.
• Puissance 5 sur toutes les gammes.
• Extinction éclairage : après 3 mn (Suprasson® P Max Fixation : montage sur table.
uniquement).
• Mise en veille : après 9 mn. Température de fonctionnement : + 10 à + 40 °C / 30 % à
75 % HR.
Fabriqué en conformité avec la réglementation en vigueur.
Température de stockage/transport : - 40 à + 70 °C / 10 %
Construit selon la norme générale IEC 601-1 (= EN 60601-1). à 100 % HR.
Rétention de la configuration mémorisée : 10 ans à +25°C.
101. Presentación
El SUPRASSON® P-MAX es un generador de ultrasonidos Elementos suministrados
piezoeléctrico multiclínico que permite un trabajo en
1. Presentación ..................................................................1 condiciones de asepsia y de esterilidad óptimas. • Un aparato SUPRASSON® P-MAX o SUPRASSON® P-
2. Instalación.......................................................................4 MAX Lux (según opción)
SUPRASSON® P-MAX está equipado con una pieza de • Un cable de red
mano Suprasson® (ultrasonidos). • Un pedal simple o doble (según opción)
3. Puesta en marcha y parada del aparato....................5
SUPRASSON® P-MAX Lux está equipado con una pieza de • Pieza de mano Suprasson® o Suprasson® Lux según
4. Uso en modo ultrasónico ............................................6 versión
mano luz Suprasson® Lux (ultrasonidos).
5. Mantenimiento ...............................................................7 • Kit de inserts según versión comercial
6. Anomalías de funcionamiento....................................8 Características generales
Vista general
7. Características técnicas............................................ 10 • Cuatro gamas de potencia ultrasónica, cada una
ajustable en 10 niveles. Consultar la figura 1 ubicada sobre la parte desplegable de
• Pantalla multicolor para una visualización ergonómica la portada.
de la potencia.
1. Parte trasera 4. Botón de ajuste de caudal
• Función Boost para obtener instantáneamente la bomba irrigación
potencia máxima del modo seleccionado.
2. Zona de visualización 5.. Kit de irrigación
• Memoria de cada uno de los cuatro modos de potencia
para una activación fácil de un nivel de potencia 3. Teclado de mando 6. Pieza de mano
libremente definido. Suprasson
• Irrigación a partir de la red de agua con ajuste del
caudal en el conector de la pieza de mano.
• Funciones principales ubicadas en el pedal
multifunción.
El SUPRASSON® P-MAX es un aparato multifunción que
permite la limpieza de boca, los tratamientos endodóncicos y
periodónticos en condiciones asépticas o estériles (según
opción)
Kit de irrigación
Está disponible como opción.
• Kit de irrigación compuesto por una bomba peristáltica,
un canal de irrigación y dos depósitos para el uso de
líquidos de irrigación.
• Ajuste independiente del caudal de irrigación.
• Efecto jeringa.
• Fácil selección manual del depósito activo o parada
completa.
• Soporte para uso de frascos o de bolsas de solución
estéril.
1Vous pouvez aussi lire