Bathroom faucet Instruction Manual
←
→
Transcription du contenu de la page
Si votre navigateur ne rend pas la page correctement, lisez s'il vous plaît le contenu de la page ci-dessous
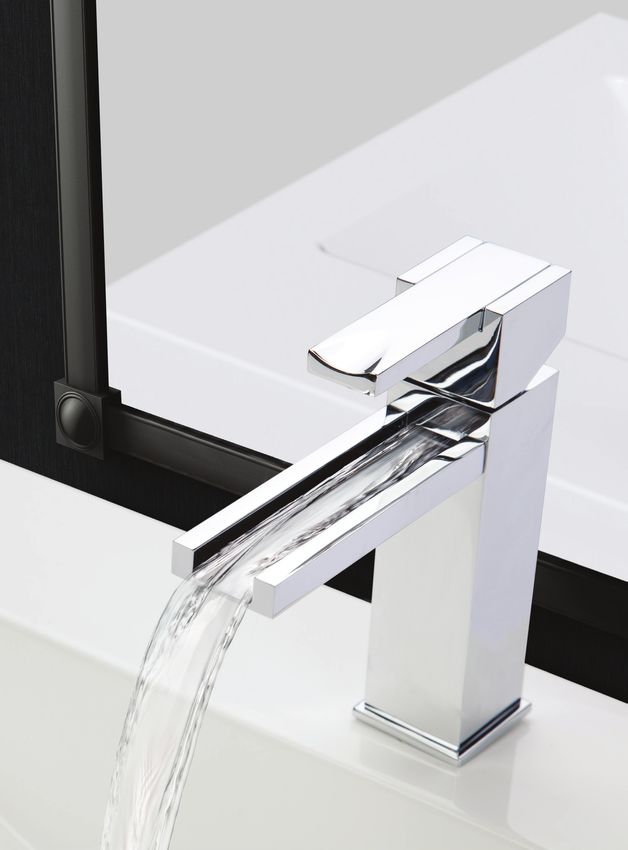
Bathroom faucet
                          Instruction Manual

Customer service
Monday to Friday: 9 AM - 5PM E.S.T.
Service à la clientèle
Lundi au vendredi : 9 h à 17 h HNE

Tel: 1-866-661-9606
customerservice@artikaworld.com

Made in China
Fabriqué en Chine                              rev. 12-1-2015
Installation Manual
You will need
Adjustable Wrench Adjustable Pliers
Plumber’s Tape
Hardware list (included)
Allen Key Tool
Important
• Follow local plumbing and building codes.
• Shut off water supply.
Questions? 1-866-661-9606
customerservice@artikaworld.comInstallation Manual
Faucet installation
Installation on 3-hole sink.
1. Insert the faucet base through
the sink hole or centre sink hole.
2. Slide the rubber washer bracket
and brass retaining bracket onto the
threaded stud.
3. Using the included 11mm tool,
screw the retaining nut onto the
threaded stud.
Installation on 1-hole sink.
Questions? 1-866-661-9606
customerservice@artikaworld.comInstallation Manual
Water supply connection
1. Wrap plumber’s
tape 2 times around
the threads on the
water taps.
2. Connect and tight-
en the supply hoses.
3. Check for leaks by
running water for 1
minute. Tighten again
as necessary.
Questions? 1-866-661-9606
customerservice@artikaworld.comInstallation Manual
Drain installation
1. Remove the drain pop-up and
drain pipe by unscrewing them as
shown.
2. Remove the retaining nut and
washers from the drain housing.
Questions? 1-866-661-9606
customerservice@artikaworld.comInstallation Manual
3. Insert the drain housing
into your sink’s drain hole.
4. Install the rubber
washer and thin washer
under the sink.
5. Screw the drain retain-
ing nut onto the drain
housing. Tighten with
adjustable pliers.
6. Wrap the included
plumber’s tape around
the drain pipe 2 times.
7. Screw the pipe onto
the drain housing under
your sink.
8. Connect the drain trap
(not included).
9. Replace the drain pop-
up.
Questions? 1-866-661-9606
customerservice@artikaworld.comInstallation Manual
The faucet is delicately adjusted
at the factory for optimum water
flow. However, because your
local water pressure may vary, you
can adjust the water flow with the
adjustment bar.
We suggest that at maximum flow,
the water should almost hit the
inside edge of your sink.
If flow is too little: Turn the
adjustment bar counter-clockwise
no more than ¼ turn.
If flow is too much: Turn the
adjustment bar clockwise no more
than ¼ turn.
Questions? 1-866-661-9606
customerservice@artikaworld.comInstallation Manual
Faucet Replacement Parts
Remove this set screw
with allen key provided
to remove handle for
cartridge replacment
1
Item # Description Artika Part #
4 Ceramic cartridge 92-616/P4
Questions? 1-866-661-9606
customerservice@artikaworld.comInstallation Manual Warranty Artika for Living inc. is proud to offer you a 25-year warranty. We warrant it to be free of manufacturing defects in material and workmanship for a period of 25 years from the date of purchase. Should a defect arise within a warrant period, Artika will provide a replacement free of charge. Please call 1-866-661-9606 for more details. Our warranty does not cover a faucet that has been installed incorrectly, or subjected to abnormal use. Our faucet is intended for residential use only, and not commercial. The warranty does not cover shipping costs, labor costs or any other cost associated with the installation or replacement of the faucet, and is extended to the original consumer. The maximal value of the warranty cannot exceed the retail price of the product. Artika for Living inc. is not liable for indirect or consequential damages arising from improper use or installation of this faucet. Questions? 1-866-661-9606 customerservice@artikaworld.com
Installation Manual

Questions? 1-866-661-9606
customerservice@artikaworld.com
Robinet de salle de bain
                         Guide d’installation

Customer service
Monday to Friday: 9 AM - 5PM E.S.T.
Service à la clientèle
Lundi au vendredi : 9 h à 17 h HNE

Tel: 1-866-661-9606
customerservice@artikaworld.com

Made in China
Fabriqué en Chine                               rev. 12-1-2015
Guide d’Installation
Vous aurez besoin
Clé à molette Pinces ajustable
Ruban de plomberie
Quincaillerie (inclus)
Clé Outil
Important
• Suivre le code de plomberie et le code du bâti-
ment régional
• Fermer l’alimentation d’eau
Questions? 1-866-661-9606
customerservice@artikaworld.comGuide d’Installation
Installation du robinet
Installation sur un évier à 3 trous
1. Insérer la base du robinet dans le
trou de l’évier ou celui du centre
2. Mettre le support en caoutchouc
et le support en laiton sur le goujon
fileté
3. En utilisant l’outil de 11 mm,
visser la noix sur le goujon fileté.
Installation sur un évier à 1 trou
Questions? 1-866-661-9606
customerservice@artikaworld.comGuide d’Installation
Alimentation en eau
1. Emballer le filet des
entrées d’eau avec le
ruban de plomberie
2. Visser les tuyaux
d’alimentations sur les
entrées d’eau
3. Faire couler l’eau
pendant 1 minute et
vérifier pour les fuites.
Resserrer si nécessaire.
Questions? 1-866-661-9606
customerservice@artikaworld.comGuide d’Installation
Installation du drain
1. Retirer la partie supérieure du
drain et le tuyau d’évacuation en
les dévissant comme illustré.
2. Retirer l’écrou et la rondelle du
drain
Questions? 1-866-661-9606
customerservice@artikaworld.comGuide d’Installation
3. Insérer le drain dans le
trou de drain de l’évier
4. Mettre la rondelle de
caoutchouc et celle de
plastique
5. Visser l’écrou sur le
drain. Ajuster avec la
pince ajustable
6. Emballer le filet du
tuyau d’évacuation avec
le ruban de plomberie
7. Visser le tuyau
d’évacuation dans le
drain
8. Connecter la plombe-
rie (non inclus).
9. Remplacer la partie
supérieure du drain.
Questions? 1-866-661-9606
customerservice@artikaworld.comGuide d’Installation
Ajustement du débit d’eau
La robinet est délicatement ajusté à
l’usine pour optimiser le débit d’eau.
Cependant, due au débit d’eau de
votre région, la pression peut varier.
Vous pouvez ajuster la pression
avec la barre d’ajustement.
Nous suggérons qu’à débit
maximal, l’eau devrait presque
toucher la parois intérieure de votre
évier.
Si le débit est trop faible : Tourner
la barre d’ajustement dans le sens
antihoraire PAS plus de ¼ de tour.
Si le débit est trop fort : Tourner la
barre d’ajustement dans le sens
horaire PAS plus de ¼ de tour.
Questions? 1-866-661-9606
customerservice@artikaworld.comGuide d’Installation
Pièces de remplacement - robinet
Dévisser l’ensemble
de vis avec la clé
fournie à fin de rétirer la
poignée et changer la
cartouche.
1
Item # Description Artika Part #
4 Cartouche céramique 92-616/P4
Questions? 1-866-661-9606
customerservice@artikaworld.comGuide d’Installation Garantie Artika for Living inc. est fier de vous offrir une garantie de 25 ans. Nous garantissons que notre produit n’a aucun défaut de fabrication dans les matériaux et la production, et ce pour une période de 25 ans suivant la date d’achat. Si vous découvrez un défaut de fabrication au cours de la période de garantie, Artika remplacera votre produit sans frais. Veuillez appeler au 1-866-661-9606 pour plus de détails. Notre garantie ne couvre pas les robinets qui ont été incorrectement installés, ou qui ont fait l’objet d’une utilisation anormale. Notre robinet est destiné a un usage résidentiel seulement, et non commercial. La garantie ne couvre ni les couts de main d’œuvre, ni tout autre cout associé à l’installation ou au remplacement du robinet et ne s’applique que pour le consommateur initial. La valeur maximale de la garantie ne peut dépasser le prix de détail du produit. Artika for Living inc. N’es pas responsable des dommages indirects ou conséquents découlant d’une utilisation ou installation inadéquate. Questions? 1-866-661-9606 customerservice@artikaworld.com
Guide d’Installation

Questions? 1-866-661-9606
customerservice@artikaworld.com
Vous pouvez aussi lire