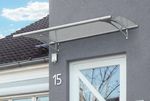
Echtglasvordach HD LED - Artikel 7410003 - Montageanleitung Assembly instructions Instructions de montage - Gutta
←
→
Transcription du contenu de la page
Si votre navigateur ne rend pas la page correctement, lisez s'il vous plaît le contenu de la page ci-dessous
Echtglasvordach HD LED - Artikel 7410003

 D   Montageanleitung                      Nr.: 9219134

GB   Assembly instructions
 F   Instructions de montage
Important                                               Recommandations
    Wichtige Hinweise!
                                                      D           Reccommendations!                            GB         importantes !
                                                                                                                                                                          F

    • Vor der Montage bitte Montageanleitung genau-               • Prior to assembly please study the assembly in-       • Avant le montage, veuillez lire attentivement les
    estens durchlesen und Produkt auf evtl. Transport-            structions in detail and check the consignment for      instructions de montage et vérifier que le produit
    schäden bzw. Fehler überprüfen, da für Schäden an             possible faulty parts or damage during transpor-        ne présente pas de défauts ni de dommages dus au
    bereits montierten Produkten keine Haftung über-              tation. No liability will be assumed for damage to      transport, car aucune responsabilité ne sera assu-
    nommen werden kann.                                           products already assembled.                             mée pour les pièces déjà montées.
    • Prüfen Sie vor dem Einbau, ob Typ, Maß und Farbe            • Please check that type, dimensions and colour         • Vérifiez avant le montage, si le type, la dimension
    übereinstimmen.                                               are correct before assembly.                            et la couleur sont corrects.
    • Maßanfertigungen sind vom Umtausch ausge-                   • Custom-made products cannot be exchanged.             • Les fabrications sur mesure ne seront pas échangées.
    schlossen.                                                    • The canopy may only be used for the intended          • L`auvent doit être seulement utilisé pour la fonc-
    • Das Vordach darf nur für den vorgeschriebenen               purpose, failing which no claims for product liabili-   tion prescrite, sans quoi, toutes prestations de ga-
    Zweck verwendet werden, anderenfalls erlischt der             ty can be accepted!                                     ranties seront annulées !
    Produkthaftungsanspruch!                                      • Clean the canopy every 3 months and only use a re-    • Nettoyez l`auvent environ tous les trois mois. Uti-
    • Reinigen Sie das Vordach bitte in Abständen von             commended cleaning product (no scrubbing agents         lisez seulement des produits d`entretien recomman-
    ca. 3 Monaten. Verwenden Sie nur vom Handel emp-              or solvents). If necessary, the lacquered parts can     dés dans le commerce (pas de produit à récurer ni
    fohlene Pflegemittel (keine Scheuer- oder Lösungs-            also be treated with with car polish.                   de solvant). Si nécessaire, les pièces peintes peuvent
    mittel). Die lackierten Teile können auch bei Bedarf          • The water drains should be cleaned regularly (in      être également entretenues avec un lustrant auto.
    mit Autopolitur behandelt werden.                             order to avoid damage caused by accumulated water).     • Nettoyez les gouttières régulièrement (l`accu-
    • Die Wasserabläufe sind regelmäßig zu reinigen               • In each case, the canopy fastenings must be sui-      mulation d`eau pourrait endommager l`auvent).
    (ansonsten Beschädigungsgefahr durch Stauwasser).             table for the construction of the wall in question.     • Adaptez le matériel à adapter selon la nature du
    • Die Befestigungsmittel sind der jeweiligen Be-              Secure attachment must be ensured.                      mur afin de garantir une fixation sûre.
    schaffenheit der Wand anzupassen. Eine ausrei-                • Accumulated snow and ice should be removed from       • Nettoyez l‘auvent si une épaisse couche de neige
    chende Befestigung ist zu gewährleisten.                      the canopy.                                             et de glace le recouvre.
    • Bei erhöhter Schnee- und Eislast ist das Vordach            • Caution - Danger of accident! The canopy is not       • ATTENTION DANGER ! Ne montez pas sur l`auvent.
    abzuräumen.                                                   load bearing; do not climb or place your weight on      • Recommandation : le montage doit être effectué
    • Achtung Unfallgefahr! Vordach ist nicht begehbar.           the canopy.                                             par 2 personnes. En outre, vous devez réaliser les
    • Empfehlung: Die Montage sollte von zwei Personen            • Recommendation: Assembly should be carried            joints avec un mastic silicone en vente dans le
    durchgeführt werden. Zusätzlich müssen Sie mit ei-            out by two persons. You must also seal the canopy       commerce.
    nem handelsüblichen Silikon abdichten.                        using standard commercial silicone.                     • L`installation électrique doit être effectuée ou en-
    • Die Elektroinstallation muss vom Elektro-Fach-              • The electrical installation must be carried out or    levée par un électricien qualifié.
    mann ausgeführt oder abgenommen werden.                       removed by a qualified electrician.                     • Une fois la période de garantie légale arrivée à
    • Auf Verschleißteile besteht nach Ablauf der ge-             • No guarantee claims can be accepted for parts         son terme, cette garantie ne s’applique plus sur les
    setzlichen Garantiezeit kein Garantieanspruch.                subject to wear and tear after the statutory guaran-    pièces d’usure.
    • Zu diesem Vordach liefern wir auch separates                tee period has expired.                                 • Pour cet auvent, nous fournissons d‘autres acces-
    Zubehör. Bitte informieren Sie sich bei Ihrem Fach-           • We can also supply separate accessories for this      soires séparément. Veuillez vous informer auprès de
    händler.                                                      canopy. Please ask your local dealer for details.       votre dépositaire.
    • Änderung der Konstruktion vorbehalten.                      • The design is subject change.                         • Sous réserve de modifications de la construction.

                                      Text aktualisiert 31/2021

                                                                                                                                                              3/8“

                                                                                                                                   Ø 12,0 mm

2
Stückliste | Parts list | liste de pièces
Nr. Bezeichnung Stück
No. Description Pieces
No. Désignation Piéces
Wandhalter
1. 1x
Wall holder | Support mural
Dübel Ø 12 mm
2. Plugs Ø 12 mm | Goujons Ø 12 mm
7x
U-Scheibe
3. Washers | Laveuse
7x
Schraube 10 x 80 mm
4. Screw 10 x 80 mm| Visser 10 x 80 mm
7x
LED Lichtband
5. LED light band | Bande lumineuse LED
2x
Trafo
6. Trafo | Transformateur
1x
Kunststoffplatten
7. Plastic sheets | Feuilles de plastique
14x
Glashalteprofil
8. Glass holding profile | Profilé de retenue du verre
1x
Abdeckkappen
9. Cover caps | Capuchons de protection
2x
Abdeckprofil
10. Cover profile | Profil de couverture
1x
LED-Lichttechnik
Energieeffizienzklasse G
Umweltfreundlich & kostensenkend
3Anbaumaße | Mounting dimensions | Dimensions de montage | Montageafmetingen
Montage Wandhalter + Kunststoffplatten | Mounting wall bracket + plastic plates |
Support mural de montage + plaques en plastique
1x 7x
Setzen Sie oberen Kunststoffplatten in den Wandhalter ein.
Insert upper plastic plates into the wall holder.
Insérez les pastilles de plastique supérieures dans le support mural.
Befestigen Sie den Träger mit allen Befestigungslö-
chern an der Wand. Das Befestigungsmaterial muss 7x
entsprechend der Wandbeschaffenheit ausgewählt
werden.
Attach the carrier to the wall with all mounting
holes. The fastening material must be selected
according to the wall condition.
Fixez le support au mur avec tous les trous de mon-
tage. Le matériel de fixation doit être sélectionné en
fonction de l'état du mur.
4Montage Glashalter + Kunststoffplatten | Mounting glas holder+ plastic plates |
Montage porte-verre + panneaux en plastique
7x
Setzen Sie die unteren Dichtungen auf das Glashalteprofil.
Place the lower gaskets on the glass retaining profile.
Placer les joints inférieurs sur le profilé de retenue en verre
Montage LED Lichtband | Mounting LED strip light | Montage de la bande LED
1x
Setzten Sie die einen der beiden LED-Streifen in das Glasprofil ein.
Achten Sie dabei, dass das Kabel an einer Seite raus schaut. Einsetzten des LED Streifens / Inserting the LED
strip / Insérer la bande de LED
Insert one of the two LED strips into the glass profile. Make sure
that the cable looks out on one side.
Insérez l'une des deux bandes de LED dans le profil de verre.
Assurez-vous que le câble sort d'un côté.
Montage Glashalter | Mounting glas holder | Montage porte-verre
Installieren Sie das Glashalteprofil auf den Träger.
Install the glass retaining profile on the support.
Installez le profil de retenue du verre sur le support.
5Montage Glas | Mounting glas | Montage Verre
Installieren Sie das Glas:
Legen Sie die Glasplatte geneigt auf das Glashalteprofil und schieben Sie es bis zum vollständigen Einführen gegen
den hinteren Anschlag. Bringen Sie die Glasplatte langsam wieder in horizontale Position. Das Glashalteprofil bewegt
sich ebenfalls in die horizontale Position. Durch das Eigengewicht der Glasplatte entsteht eine Klemmfunktion.
Install the glass:
Lay the glass plate tilted on the glass holding profile and push it against the rear stop until it is fully inserted. Slowly
return the glass plate to a horizontal position. The glass retaining profile also moves to the horizontal position. The
weight of the glass plate creates a clamping function.
Installez le verre:
Poser la plaque de verre inclinée sur le profil de maintien du verre et la pousser contre la butée arrière jusqu'à ce
qu'elle soit complètement insérée. Remettre lentement la plaque de verre en position horizontale. Le profil de retenue
du verre se déplace également en position horizontale. Le poids de la plaque de verre crée une fonction de serrage
Installieren Sie das obere Abdeckprofil
Install the top cover profile
Installez le profil de couverture supérieur
6Montage LED Lichtband | Mounting LED strip light | Montage de la bande LED
Schließen Sie die beiden LED Streifen an den mitgelieferten Trafo an.
Der Trafo selbst wird an 220 V Stromanschluss angeschlossen. Nach
dem Anschließen können Sie z.B. den Trafo im Träger einfügen – siehe
Bild.
Connect the two LED strips to the supplied transformer. The transfor-
mer itself is connected to 220 V power supply. After connecting you
can use the transformer, for example Insert in the carrier - see picture.
Connectez les deux bandes de LED au transformateur fourni. Le
transformateur lui-même est connecté à une alimentation 220 V. Après
la connexion, vous pouvez insérer le transformateur dans le support -
voir la photo.
Setzten Sie den 2. LED-Streifen in die untere
Nut des Trägers ein. Achten Sie dabei, dass
das Kabel an einer Seite raus schaut.
Insert the 2nd LED strip into the lower
groove of the carrier. Make sure that the
cable looks out on one side.
Insérez la deuxième bande de LED dans la
rainure inférieure du support. Assurez-vous
que le câble sort d'un côté.
Montage Endkappen | Mounting End caps | Montage Embouts
Bringen Sie nun die seitlichen Ab-
deckkappen und das Diffuserprofil
an den Träger an.
Now attach the side covers and
the diffuser profile to the carrier.
Fixez maintenant les couvercles
latéraux et le profil du diffuseur
sur le support.
Silikonstreifen zum Abdichten setzten
Silicone strips for sealing set
Bandes en silicone pour kit d'étanchéité
7Produktübersicht / Overview of product range / Gamme de produits
Hohlkammerplatten Profilplatten Vordächer Terrassendächer
Twinwall sheets Profile plates Canopies Terrace roofs
Paneele Ebene Platten Bitumenwellplatten Noppenbahn
Twinwall panels Polystyrene sheets Corrugated bitumen sheets Dimpled Membrane
Hobbyplatten Rasengitter Gartenprodukte ... und vieles mehr !
Plates for crafts Lawn grids Garden products ... and much more !
Gutta Werke GmbH
Bau- und Heimwerkerprodukte
Bahnhofstraße 51-57
www.gutta.com
D-77746 Schutterwald
Telefon 0781 6090
Telefax 0781 6093200
info@gutta.com
U(0a34bc-BFGEIE(
www.scobalit.de
D - Montageanleitung-Nr.: 9219134 - 500 - 05/2022
Scobalitwerk Wagner GmbH Scobalitwerk Wagner GmbH Scobalitwerk Wagner GmbH Scobalitwerk Wagner GmbH Scobalitwerk Wagner GmbH
Zürnkamp 27 Fichtenstraße 18 Hermann-Ilgen-Straße 7 Industriepark 3 Bahnhofstraße 51-57
D-21217 Seevetal-Meckelfeld D-56584 Anhausen D-04808 Wurzen D-97273 Kürnach D-77746 Schutterwald
Telefon 040 2190210 Telefon 02639 962570 Telefon 03425 814708 Telefon 09367 98440 Telefon 0781-9907900
Telefax 040 70011446 Telefax 02639 962571 Telefax 03425 814709 Telefax 09367 984429 Telefax 0781-6093207
seevetal@scobalit.de anhausen@scobalit.de wurzen@scobalit.de kuernach@scobalit.de offenburg@scobalit.deVous pouvez aussi lire


