NL EN INSTELLEN + INSTALLEREN SETUP + INSTALLATION - WIFI-SPEAKERSET - AQUASOUND
←
→
Transcription du contenu de la page
Si votre navigateur ne rend pas la page correctement, lisez s'il vous plaît le contenu de la page ci-dessous
NL   Instellen + Installeren    2
EN   Setup + Installation      12

          • SPKConga-W

      WiFi-Speakerset

            1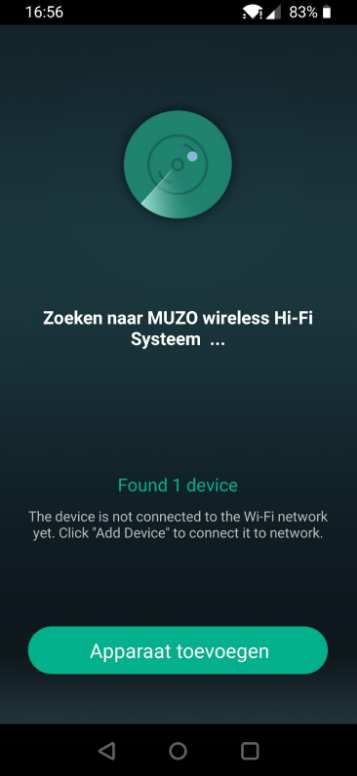
Inhoud

         Checklist alle onderdelen                   3

         Instellen:
         • WiFi-Speakerset toevoegen aan
             uw huisnetwerk (2.4 GHz)                4

         •   WiFi-Speakerset via LAN toevoegen
             aan uw huisnetwerk                      8

         Aansluiten externe bron (AUX)               9

         Resetten WiFi-Speaker                       10

         Welke App’s kunt u gebruiken                10

         Installeren van de WiFi-Speaker             11

              www.aquasound.eu - info@aquasound.eu

                                 2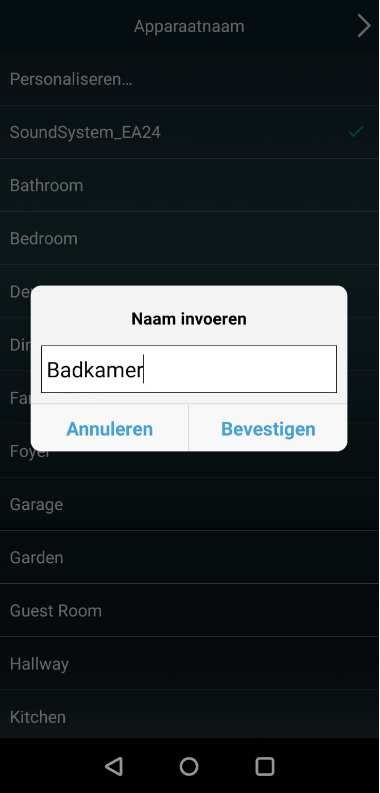
Checklist onderdelen

Dank u wel voor de aankoop van dit AquaSound product. De WiFi-Speaker is een geavanceerd
(draadloos) WiFi-audio systeem voor keuken, badkamer of elke andere ruimte in huis. De
onderstaande onderdelen vindt u in de verpakking:

Digitale WiFi-Speakerset (1x)       230V/24V adapter (1x)         Speakersnoer 3,5 meter (1x)

                                                  3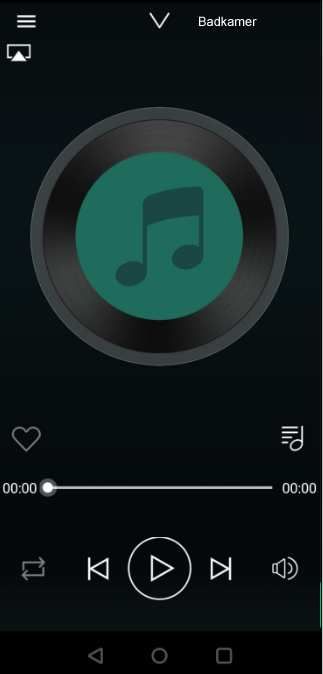
WiFi-Speaker toevoegen aan uw huisnetwerk

WiFi-Speaker toevoegen aan uw draadloze huisnetwerk (2.4 GHz)
Onderstaande stappen dient u eenmaal uit te voeren. De WiFi-Speaker is dan permanent met uw
huisnetwerk verbonden.

    •   Zorg ervoor dat de WiFi-Speaker op een locatie staat waar een goede Wi-Fi verbinding
        gewaarborgd is.
    •   Voeg de WiFi-Speaker eerst toe aan uw draadloze huisnetwerk, alvorens u tot inbouw
        overgaat.

1       Download nu de Muzo Player* App via Google Play of Apple’s App-store,
        maar open de App nog niet.

2       Sluit de WiFi-Speaker aan op de stroom. Wacht nu 45 seconde.
3       Neem uw mobiele telefoon of tablet ter hand en zet de 3G/4G UIT.
4       Ga nu eerst naar de Wi-Fi instellingen in uw mobiele telefoon of tablet.
5       Zoek Wi-Fi netwerk “SoundSystem” of WiFi Speaker” en verbind ermee.

        Als dat is gelukt ziet u staan ‘Verbonden, geen internet’ (dit is juist). U hoort een stem die zegt
        ‘you are now connected to the speaker’.
        (Als een Password wordt gevraagd toets dan: 88888888)

6       Start nu de Muzo Player App op.
7       De App zal de WiFi-Speaker nu vinden, de melding
        ‘Found 1 device’ verschijnt.
8       Druk ‘Apparaat Toevoegen’ (Indien gevraagd, kies voor
        ‘Muzo Cobblestone’)

                                                    4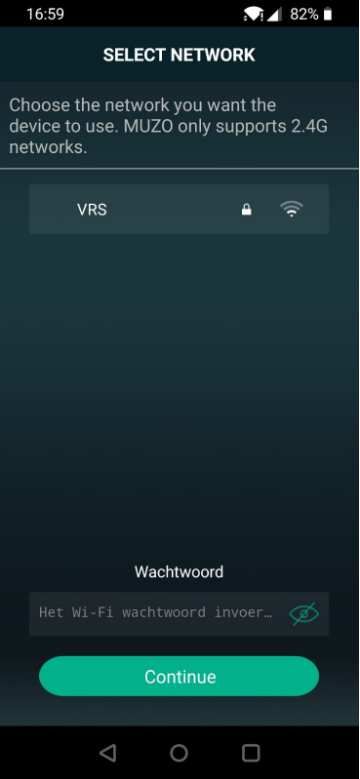
9 Nu verschijnt er een lijst met Wi-Fi netwerken (Routers).
Kies dat netwerk waarmee u de WiFi-Speaker wenst te
koppelen.
10 Toets het Password in van uw huisnetwerk, kies volgende.
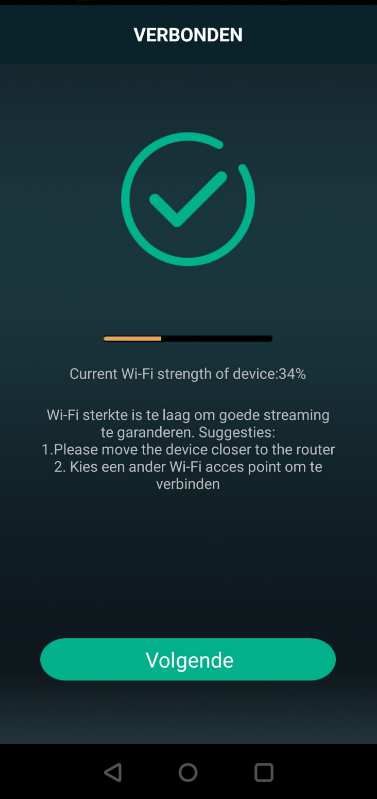
11 Als de koppeling is gelukt ziet u het scherm ‘Verbonden’ en
u hoort u de stem zeggen ‘Connected to your Wi-Fi network’
12 Kies volgende.
5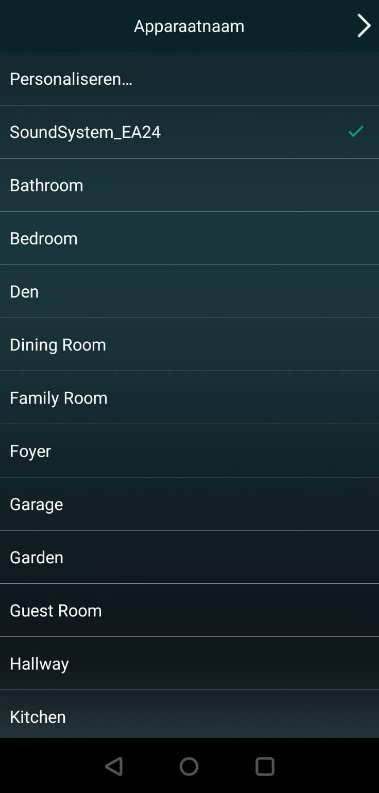
13       Nu kunt u een naam kiezen uit de lijst van bechikbare
          namen, of kies ‘Personaliseren’ en bedenk zelf een
         naam.
14       Druk nu rechtsboven ‘>’ (pijltje naar rechts) om de
         instellingen te bevestigen.

U komt nu in de apparaatlijst, het instellen is klaar.

     •   Selecteer een apparaat of swipe naar links en rechts om in de
         Verschillende schermen te komen.

                                  >

                                                         6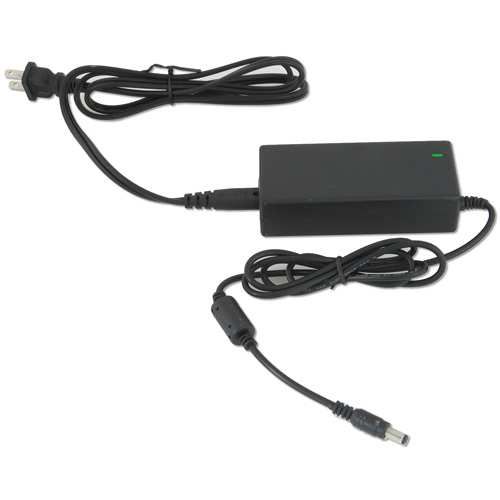
De WiFi-Speaker is nu permanent in uw huisnetwerk opgenomen.
   • Zet de 3G/4G weer aan op uw mobiele telefoon/tablet.
   • Nu mag uw mobiele telefoon/tablet weer met uw Wi-Fi huisnetwerk (2.4 Ghz) verbonden
       worden.

Apple gebruikers:
   • Stream via de AirPlay functie van uw mobiele telefoon.
   • Stream via de Muzo App op uw mobiele telefoon of tablet.
   • Stream rechtstreeks vanuit Spotify (Spotify Premium account vereist).

Android gebruikers:
   • Stream via de Muzo APP op uw mobiele telefoon.
   • Stream rechtstreeks vanuit Spotify (Spotify Premium account vereist).

AquaSound N-Joy gebruikers:
   • Stream vanuit de N-Joy controller rechtstreeks naar de WiFi-Speaker.

      Zorg ervoor dat de WiFi-Speaker op een locatie staat waar een goede Wi-Fi verbinding
      gewaarborgd is.

                                                7
WiFi-Speaker via LAN toevoegen aan uw huisnetwerk

Het is ook mogelijk om de WiFi-Speaker met een LAN-kabel (niet meegeleverd) in uw huisnetwerk op
te nemen. In dit geval zijn er verder geen instellingen nodig en kunt u de WiFi-Speaker direct
gebruiken met de Muzo Player App of middels de Airplay functie van Apple.

                                                    LAN aansluiting

                                               8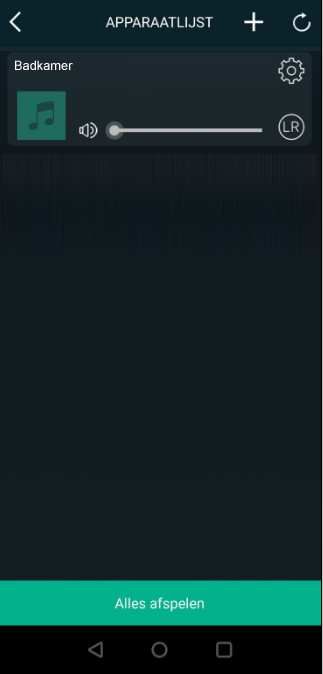
Aansluiten externe bron:

Op de WiFi-Speaker is een Aux-In (Line In) voorzien. Hier kunt u bijvoorbeeld een TV op aansluiten.
Het geluid van de TV zal dan te horen zijn via de speaker. De AUX-In kan op 2 manieren geactiveerd
worden.

       Line-In (Aux-In)                                      Aansluiting voor de pasieve speaker

Handmatige Aux:
De WiFi-Speaker kan via de Muzo Player App op Aux-In (Line-In) gezet worden. Het geluid van een
apparaat (bv TV) welke is aangesloten op de Line-In zal nu via de speakers te horen zijn.

AUTO-AUX
De Auto-Aux wordt geactiveerd nadat u een muziekstream pauzeert. Na 7-8 seconde schakelt de
WiFi-Speaker automatisch om naar Aux-In. Start u weer een stream, dan zal de WiFi-Speaker
automatisch omschakelen en de stream ten gehore brengen.

                                                9
Welke App’s kunt u gebruiken:
Er zijn meerdere App’s beschikbaar via Google Play of Apple’s App-store. Kies de App waar u het
prettigst mee kunt werken.
• Muzo Player
• Smart Sonix
• 4Stream
Resetten van de WiFi-Speaker:
Om de WiFi-Speaker te resetten, houdt u de Reset-knop minimaal 10 seconde in. Na zo’n 10 seconde
hoort u de stem bevestigen dat de reset is geslaagd, u hoort ‘restore to factory settings’.
Reset-knop
10Installeren van de WiFi-Speakerset:
Als het apparaat correct is toegevoegd aan uw huisnetwerk dan kunt u ‘m inbouwen. Houd rekening
met de volgende punten om de WiFi-Speaker juist te plaatsen:
• Er moet voldoende Wi-Fi bereik aanwezig zijn op de plaats waar u de WiFi-Speaker gaat
installeren.
• Achter het plafond dient een stopcontact aanwezig te zijn.
• Indien u een LAN-kabel achter uw plafond heeft gelegd, steek deze dan in de RJ45
aansluiting.
1 Gebruik de mal om het gat in het plafond te bepalen en zaag/snijd deze uit.
2 Plaats de speaker in het gat. Met een schroevendraaier kunt u de 4 schroeven aandraaien.
Hierdoor zullen de haken (achterzijde) omklappen en de speaker vastzetten. Gebruik een
schroevendraaien en geen schroefmachine.
11Contents
Checklist all parts 13
Set up:
• Add the WiFi-Speakerset to
your home network (2.4 GHz) 14
• Add the WiFi-Speakerset via LAN to
your home network 18
Connecting external source (AUX) 19
Reset WiFi-Speakerset 20
Which apps can you use? 20
Installing the WiFi-Speakerset 21
www.aquasound.eu - info@aquasound.eu
12Checklist all parts
Thank you for purchasing this AquaSound product. The WiFi-Speakerset is an
advanced (wireless) Wi-Fi audio system for kitchen, bathroom or any other room in the house. You will
find the following parts in the package:
Digital WiFi-Audio amplifier/receiver (1x) 230V/24V adapter (1x) Speaker cord 3,5 meters (1x)
13Add the WiFi-Speakerset to your home network
Add WiFi-Speakerset to your home network (2.4 GHz)
You need to complete the steps below only once. The WiFi-Speakerset is then permanently connected
to your home network.
• Make sure that the WiFi-Speakerset is in a location where a good Wi-Fi connection is
guaranteed.
• Add the WiFi-Speakerset to your wireless home network before you proceed with installation
of the device (for instance in the ceiling).
1 Download the Muzo Player* App via Google Play or Apple’s App store,
but do not yet open the app.
2 Connect the WiFi-Speakerset to the plugged in power adapter. Now wait 45 seconds.
3 Take your mobile phone or tablet and turn the 3G / 4G OFF.
4 First go to the Wi-Fi settings in your mobile phone or tablet.
5 Search for and connect to the Wi-Fi network named “SoundSystem” or “WiFi Speaker”.
If successful, you will see "Connected, no internet" (this is correct). You will hear a voice
saying ‘you are now connected to the speaker’.
(If a Password is requested then enter: 88888888)
6 Next start the Muzo Player app.
7 The app will now find the WiFi-Speakerset, the notification
"Found 1 device" appears.
8 Press "Add device" (If requested, choose
"Muzo Cobblestone")
149 A list of Wi-Fi networks (Routers) now appears.
Choose the network with which you want to connect
the WiFi-Speakerset.
10 Enter the password of your home network, then choose next.
11 If the connection is successful, you will see the
"Connected" screen and you will hear a voice say
‘Connected to your Wi-Fi network’
12 Choose ‘Next’.
1513 Now you can choose a name from the list of available
names in the list or choose “Personalize” and create
a new name yourself.
14 Now press ">" in the top right of the screen
(the arrow to the right) to confirm the settings.
You are now in the device list, the set-up is complete.
• Select a device or swipe left and right to enter
the different screens
>
16The WiFi-Speakerset is now permanently included in your home network.
• Switch on the 3G / 4G on your mobile phone / tablet.
• Now your mobile phone / tablet can be connected to your Wi-Fi home network (2.4 GHz)
again.
Apple users:
• Stream via the AirPlay function of your mobile phone.
• Stream via the Muzo App on your mobile phone or tablet.
• Stream directly from Spotify (Spotify Premium account required).
Android users:
• Stream via the Muzo App on your mobile phone or tablet.
• Stream directly from Spotify (Spotify Premium account required).
AquaSound N-Joy users:
• Stream directly from the N-Joy controller to the WiFi-Speakerset.
Make sure the WiFi-Speakerset is in a location where a good Wi-Fi connection is guaranteed.
17Add the WiFi- Speakerset to your home network via LAN
It is also possible to add the speaker set to your home network with a LAN cable (not included). In this
case, no further settings are required and you can use the WiFi-Speakerset directly with the Muzo
Player app or through Apple's Airplay function.
LAN connection
18Connecting an external source:
An Aux-In (Line In) is provided on the speaker set. You can connect a to TV, for example. The sound
from the TV will then be heard through the speakers. The AUX-In can be activated in 2 ways.
Line-In (Aux-In) Connection for the passive speaker
Manual Aux:
The speaker set can be switched to Aux-In (Line-In) via the Muzo Player app. The sound from a
device (e.g. TV) connected to the Line-In will now be heard through the speakers of the amplifier.
AUTO-AUX
The Auto-Aux is activated after you pause the active music stream. After 7-8 seconds the speakers
automatically switch to Aux-In. If you start a stream again, the speakers will automatically switch over
and play the stream.
19Which apps can you use:
There are several apps available through Google Play or Apple’s App Store. Choose the app that
works best for you.
• Muzo Player
• Smart Sonix
• 4Stream
Resetting the WiFi-Speakerset:
To reset the WiFi-Speakerset, hold the Reset-button for at least 10 seconds. After about 10 seconds
you will hear a voice confirming that the reset was successful, you will hear ‘restore to factory settings’.
Reset-button
20Installing the WiFi-Speakerset:
If the device has been correctly added to your home network, you can install it. Keep the following
points in mind to position the speaker set correctly:
• There must be sufficient Wi-Fi range available at the place where you are going to install the
Wi-Fi Speaker.
• A socket must be present behind the ceiling.
• If you have laid a LAN cable behind your ceiling, plug it into the RJ45 connection.
To install speakers:
1 Use the template to determine the hole in the ceiling and saw or cut it out.
2 Place the speaker in the hole. You can tighten the 4 screws with a screwdriver. This will cause
the hooks (rear) to flip over and secure the speaker. Use a screwdriver and not a screw gun.
21www.aquasound.eu - info@aquasound.eu
22Vous pouvez aussi lire