MANUEL D'UTILISATION GAMME ORDINATEUR - Bamboo ...
←
→
Transcription du contenu de la page
Si votre navigateur ne rend pas la page correctement, lisez s'il vous plaît le contenu de la page ci-dessous

MANUEL D’UTILISATION
GAMME ORDINATEUR
FR - Avertissement

Les exemples, dessins, photographies inclues dans ce manuel d’utilisation peuvent être légèrement
différentes du produit réel et sont susceptibles d’être légèrement modifiés.
Ne tentez pas de changer, configurer, ou modifier le matériel, ou de le démonter, cela peut lui
causer des dommages irréversibles et n’est pas couvert par la garantie utilisateur.

EN - Disclaimer

The examples, drawings, photographs included in this user manual may be slightly different from
the actual product and may be slightly modified.
Do not attempt to change, configure, modify or disassemble the equipment, this may cause
irreversible damage and is not covered by the user warranty.

ES - Advertencia

Los ejemplos, dibujos y fotografías incluidos en este manual del usuario pueden ser ligeramente
diferentes del producto real y pueden modificarse ligeramente.
No intente cambiar, configurar, modificar o desarmar el equipo, esto puede causar daños
irreversibles y no está cubierto por la garantía del usuario.

IT - Avvertimento

Gli esempi, i disegni, le fotografie inclusi in questo manuale dell'utente possono essere leggermente
diversi dal prodotto reale e possono essere leggermente modificati.
Non tentare di cambiare, configurare, modificare o disassemblare l'apparecchiatura, ciò potrebbe
causare danni irreversibili e non è coperto dalla garanzia dell'utente.

DE - Warnung

Die in dieser Bedienungsanleitung enthaltenen Beispiele, Zeichnungen und Fotos können
geringfügig vom tatsächlichen Produkt abweichen und geringfügig geändert werden.
Versuchen Sie nicht, das Gerät zu ändern, zu konfigurieren, zu modifizieren oder zu

                                                                                             1
zerlegen. Dies kann zu irreversiblen Schäden führen und ist nicht durch die Garantie
des Benutzers abgedeckt.
FR - Av er ti s s e m e nt                                                                                     1
         EN - D iscla i m e r                                                                                           1
         ES - A dv er te nc i a                                                                                         1
         IT - Av ver ti m e nto                                                                                         1

S
         DE - Wa rnu ng                                                                                                 1
         - - - - - - - - - - - - - - - - - - - - - - - - - - - - - - - - - - - - - - - - - - - - - - - - - - - - --------
         Clav ier                                                                                                       2

O
         S o ur is                                                                                                      3
         Ensemble c l avi e r s o uri s                                                                                 4
    FR

         En cas de d ys f o nc ti o nne m e nt                                                                          5
         Réinitia lisa ti o n d u ré c e p te ur US B                                                                   6

M        - - - - - - - - - - - - - - - - - - - - - - - - - - - - - - - - - - - - - - - - - - - - - - - - - - - - --------
         Keybo a rd                                                                                                     9
         Mo use                                                                                                         10

M
         Keybo a rd mo us e s e t                                                                                       11
    EN

         In case o f m al f unc ti o n                                                                                  12
         Resetting t he US B re c e i ve r                                                                              13

A
         - - - - - - - - - - - - - - - - - - - - - - - - - - - - - - - - - - - - - - - - - - - - - - - - - - - - --------
         Tecla do                                                                                                       16
         Rató n                                                                                                         17

I
         Co njunto de te c l ad o y rató n                                                                              18
    ES

         En caso de m al f unc i o nam i e nto                                                                          19
         Restablece r e l re c e p to r US B                                                                            20

R
         - - - - - - - - - - - - - - - - - - - - - - - - - - - - - - - - - - - - - - - - - - - - - - - - - - - - --------
         Ta stier a                                                                                                     23
         Mous e                                                                                                         24
         S et ta stier a m o us e                                                                                       25

E
    IT

         In caso di m al f unz i o nam e nto                                                                            26
         Ripristino d e l ri c e vi to re US B                                                                          27
         - - - - - - - - - - - - - - - - - - - - - - - - - - - - - - - - - - - - - - - - - - - - - - - - - - - - --------
         Ta sta tur                                                                                                     30
         Maus                                                                                                           31
         Maus-ta sta tur s e t                                                                                          32
    DE

         Im Falle eine r Fe hl f unk ti o n                                                                             33
         Zur ücksetze n d e s US B - Em p f änge rs                                                                     34
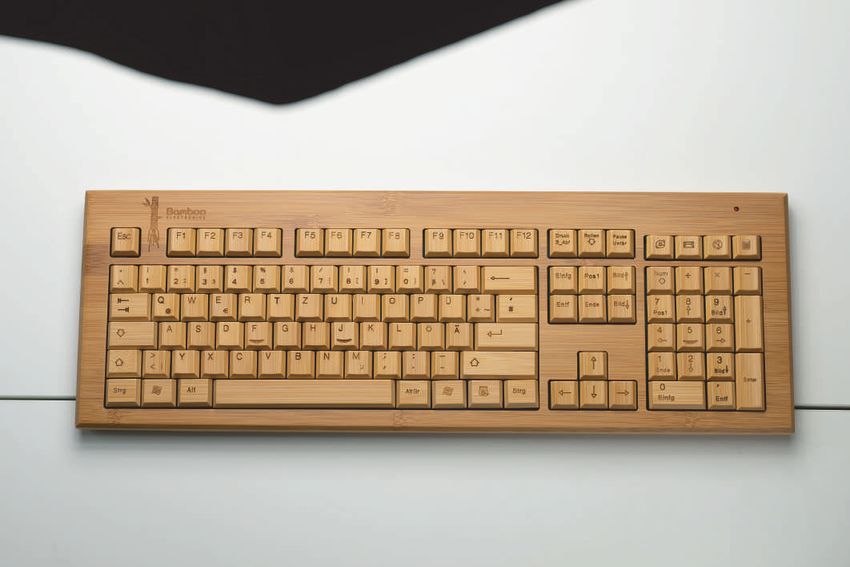
CLAVIER

1 . F O NCT ION S
  •   M o d e é co n o m ie d ’ én er g ie intelligent multi- niveaux
  •   T e c h n o l og ie a n t i-in t er fér ences.
  •   M i s e e n veille et r éveil au t omatique, économie d’énergie optimale.
  •   S u p p o r t ala r m e d e b a s s e t ension, avec lumière indicateur de basse t e nsi on.
  •   E n t i è r e men t c o mp at ib le avec Windows, Mac OS, Linux
  •   D i s ta n c e d e t r a n s m is s io n : 7 - 1 5 m

2. CO M M EN T L’ U TIL IS ER ?

           F a i t es g lis s er le c ac h e-piles.               Fermez le cache- pi l e s, b r anc he z

 1                                                            2
           R é c u p ér ez le r éc ep t eu r USB et               le récepteur au por t U S B d e
           i n s ér ez les p iles p o u r le clavier              votre ordinateur, p ui s
           d a n s le s en s in d iq u é.                         vous pouvez utiliser l e c l av i e r .

3. CA RA CTÉR IS TIQUES G É N É R AL E S
  • T e m p é r at u r e d e fo n c t io n n ement : 0 - 5 5 °C
  • P i l e s : 2 p iles AAA
  • C e r t i fi c at : FCC, CE

4 . GEST IO N DE L A BATTER I E

  • P r e n d e n c h a r g e la veille a utomatique
  • S or t i e d u m o d e veille : Ap puyer sur une touche

                                                                                               2
SOURIS

1. F O NCTION S
  •   S ou r i s o p t iq u e s an s fi l en bambou, trois boutons.
  •   P r é c i s i on o p t im a le ju s q u ' à 1 2 5 reports par seconde.
  •   P r i s e e n c h a r g e d e la m is e en veille et du réveil automatique.
  •   Ap p l i c a tio n : o r d in a t eu r p ortable et PC de bureau.
  •   T ot a l e m en t c o mp at ib le ave c Windows, Mac OS, Linux
  •   D i s ta n c e d e t r a n s m is s io n : 7 - 1 5 m

2. CO M M EN T L’ U TIL IS ER ?

           R e t ir ez le c o u ver c le in férieur, sortez le
 1         r é c ep t eu r Blu et o o t h et connectez- le à
           v ot r e a p p a r eil

 2         I n s tallez d eu x p iles AAA dans le sens indiqué.
           F e r mer le c o u ver c le, p uis vous pouvez l’utiliser.

 3         S w i t c h D P I : Ap p u yez p our changer la sensibilité
           d e l a s o u r is , 1200 D P I par défaut.
                                                           Switch DPI

3. CA RA CTÉR IS TIQUES G É N É R AL E S
  • T e m p é r at u r e d e fo n c t io n n ement : 0 - 5 5 °C
  • T e n s i o n d e fo n c t io n n em en t : 3 .0 V (2 piles AAA)
  • C e r t i fi c at s : FCC, CE, Ro H S

4. GESTIO N DE L A BATTER I E

  •   M o d e d e fo n c t io n n em en t : lorsque vous déplacez le curseur
  •   M o d e v eille : a r r êt ez d e b o uger le curseur
  •   M o d e a tt en t e : 10 s ec o n d es après la veille

                                                                                    3
  •   H or s t e ns io n : a p r ès 30 minutes d’attente en mode veille
ENSEMBLE CLAVIER-SOURIS

1 . F O NCT ION S
  cf . « cl av i er » p a g e 2 et « s o ur i s» pa ge 3

2 . CO M M E N T L’ UTIL IS ER ?

         I n s ér ez les p iles d an s le clavier et la souris et
 1       r é c up ér ez le r éc ep t eu r USB placé dans la souris.

 2       B r a nc h ez le r éc ep t eu r USB au port USB de votre
         o r d i n at eu r p u is , vo u s pouvez utiliser les appareils ensemble.

                                                      Récepteur USB

3 . CA RA CT ÉR IS TIQU ES G ÉN É R AL E S
  cf . « cl av i er » p a g e 2 et « s o ur i s» pa ge 3

4 . GEST IO N DE L A BATTER I E
  cf . « cl av i er » p a g e 2 et « s o ur i s» pa ge 3

                                                                                     4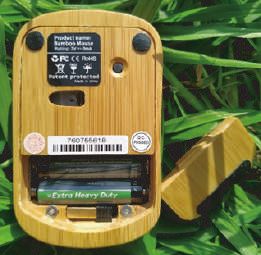
EN CAS DE DYSFONCTIONNEMENTS

      ÉTA PE 1 : ES S AYEZ U N P O R T U SB D I FFÉ R E N T

   Essayez de connecter le récepteur à un port USB différent, puis vérifiez l’état du récepteur.
   En essayant un port USB différent vous pourriez éliminer des problèmes inhérents au port USB.

   Utilisez toujours un port USB direct, pas de HUB USB ou de réplicateur.
   La connexion à un HUB USB peut fonctionner mais sera moins stable qu’une connexion directe.

   Veuillez noter que l’utilisation d’accessoires types ventilateur de bureau peut créer des
   interférences avec le récepteur USB, notamment en cas d’utilisation sur laptop.
   En cas de problème déconnectez tous les autres appareils avant d’essayer le récepteur sur les
   différents ports USB.

      ÉTA PE 2 : R EM P L A CEZ L E S P I L E S

   Cela peut arriver si les piles sont déchargées ou non conformes. Nous vous recommandons
   d’utiliser des piles prévues pour l’utilisation de produits électroniques.
   Vérifiez que les piles soient placées correctement dans leur emplacement et dans le bon sens.

      ÉTA PE 3 : TES TEZ L E PR O D U I T SU R U N AU T R E AP PAR EI L

   Il est possible que le problème soit logiciel. Dans ce cas essayez de connecter le récepteur USB
   sur un autre ordinateur, ou bien même une SMART TV, ou tout autre appareil doté d’un port USB.
   Si cela ne fonctionne toujours pas, passez à l’étape 4.

      ÉTA PE 4 : R ÉIN ITIA L IS E Z L E P R O D U I T

   Dans certains cas, la connexion entre le récepteur USB et votre produit peut nécessiter d’être
   réinitialisée. Pour réinitialiser la connexion suivez le guide dans la section « réinitialisation du
   récepteur USB » en page suivante.

                                                                                                  5
Si vous avez la moindre question, ou souhaitez recevoir plus d’informations,
contactez-nous directement à l’adresse suivante :
contact@bambooelectronics.fr
https://bambooelectronics.fr/
RÉINITIALISATION DU RÉCEPTEUR USB
Un récepteur USB est un petit récepteur inséré dans un port USB qui envoie et reçoit le signal sans-fil
avec la souris ou le clavier.
Chaque récepteur est configuré pour communiquer automatiquement avec les appareils qui y ont été
associés. Le récepteur USB n’interfère pas avec d’autres appareils sans fil et ne peut pas fonctionner
avec eux. Le récepteur USB se trouve à l’intérieur de nos produits, dans le compartiment des piles.
RECONFIGURATION DU CLAVIER
ÉTA PE 1
Pressez la touche « esc » et la touche « += » simultanément sur votre clavier.
L’indicateur lumineux rouge s’allume alors.
ÉTA PE 2
Insérez le récepteur USB sur l’un des ports de votre appareil.
(note : votre ordinateur peut prendre quelques instants pour configurer le nouvel appareil)
ÉTA PE 3
Une fois la connexion établie, l’indicateur lumineux s’éteint et vous pouvez désormais
utiliser votre produit.
Si vous n’insérez pas le récepteur USB 10-15 secondes après avoir réalisé l’étape 1, le mode
« connexion » expire, revenez alors à l’étape 1 pour recommencer la configuration.
6
Si le récepteur USB et votre produit fonctionnent correctement, mais que l’indicateur
lumineux a tendance à clignoter, cela signifie que les piles de votre appareil doivent
être remplacées.RÉINITIALISATION DU RÉCEPTEUR USB
RECONFIGURATION DE LA SOURIS
1È RE MÉTH ODE
ÉTA PE 1
Repérez le bouton de réinitialisation en
dessous de la souris.
ÉTA PE 2
Appuyez puis relâchez le bouton. Insérez le récepteur USB dans un port USB de votre
ordinateur si vous ne l’avez pas déjà fait.
2È ME MÉTH ODE
ÉTA PE 1
Appuyez sur les 3 boutons de la souris
(clic gauche, clic droit, et mollette)
simultanément pendant 3 secondes.
ÉTA PE 2
Relâchez les 3 boutons. Insérez le récepteur USB dans un port USB de votre
7
ordinateur si vous ne l’avez pas déjà fait.RÉINITIALISATION DU RÉCEPTEUR USB
RECONFIGURATION DE L’ENSEMBLE CLAVIER-SO URIS
Suivez la même procédure de réinitialisation que dans la page 6 et la page 7 pour
reconnecter 2 appareils indépendants au même récepteur USB.
En suivant cette procédure, vous pouvez également lier le clavier avec une autre souris, et
inversement. Cette réinitialisation permet de connecter ou séparer 2 appareils.
8USER’S MANUAL
PC PRODUCTS
9KEYBOARD
1 . F EAT UR ES
• M u l t i - l e vel in t ellig en t en er gy saving mode
• An ti - i n t er fer en c e t ec h n o lo gy.
• S ta n d b y an d a u t o ma t ic wa ke up, optimal energy saving.
• L o w v ol tag e ala r m s u p p o r t , with low voltage indicator light.
• F u l l y c o m p at ib le w it h W in d ows, Mac OS, Linux
• T r a n s m is s io n d is t an c e: 7-15 m
2. HO W TO US E
S l i d e o ff t h e b a t t er y c o v er. Close the battery c ov e r , p l ug
1 R e c o ver t h e U S B r ec eiver and
i n s e rt t h e b at t er ies fo r the 2 the receiver into y our
computer's USB por t , t he n y ou
k e y b oa r d in t h e d ir ec t ion indicated. can use the keybo ar d .
3. GENERA L S PEC IF ICATIO N S
• O p e r a ti ng t emp er a t u r e: 0-55 ° C
• B a tt e r i es : 2 AAA b at t er ies
• C e r t i fi c at e: FCC, CE
4 . BAT TER Y M A N A G EM EN T
• S u p p o r t s a u t o s t an d b y
• E x i t S ta nd b y: P r es s a key
10MOUSE
1 . F EATUR ES
• B a m b o o w ir eles s o p t ic al m ouse, three buttons.
• O p t i m u m ac c u r ac y u p t o 12 5 reports per second.
• S u p p or t fo r s leep a n d a u t o wake up.
• A p p l i c a tio n : lap t o p a n d d esktop PC.
• F u l l y c o m p at ib le w it h W in d ows, Mac OS, Linux
• T r a n s m i s s io n d is t an c e: 7-15 m
2 . HO W TO U S E
1 R e mo ve t h e b o t t o m c o ver, take out the
B l u et o o t h r ec eiver a n d connect it to your device
2 I n s t all t w o AAA b at t er ies in the direction shown.
C l os e t h e lid , t h en yo u can use it.
3 DP I s wit c h : P r es s t o c hange the sensitivity of
th e m o u s e, 1200 D P I b y def ault.
DPI Switch
3 . GENERA L S P ECIF ICATIO N S
• O p e r a t i ng t emp er a t u r e: 0-55 ° C
• O p e r a t i ng V o lt a g e: 3.0V ( 2 A AA batteries)
• C e r ti fi c at es : FCC, CE, Ro H S
4 . BATTER Y M A N A G EM ENT
• M od e o f o p er at io n : w h en you move the cursor
• S t a n d b y m o d e: s t o p mo vin g the cursor
• S t a n d b y m o d e: 10 s ec o n d s af ter standby
11
• O ff : Af t er 30 m in u t es o f s t andby sleepKEYBOARD MOUSE SET
1 . F EATUR ES
c f . « k e y b o a r d » p a g e 9 a n d «mouse» page 1 0
2 . HO W TO US E
1 I n s er t t h e b a t t er ies in the keyboard and the mouse and
r e c o ver t h e U S B r ec eiver placed in the mouse.
2 C o n nec t t h e U S B r ec eiv er to the USB port of your
c om p u t er t h en , yo u c an use the devices together.
3 . GENERA L S PEC IF ICATIO N S
c f . « k e y b o a r d » p a g e 9 a n d «mouse» page 1 0
4 . BATTERY M A N A G EM EN T
c f . « k e y b o a r d » p a g e 9 a n d «mouse» page 1 0
12IN CASE OF MALFUNCTION
If you encounter a problem with one of our products, we invite you to follow the detailed
procedure below:
STEP 1 : TR Y A DIF F ERE N T U SB P O R T
Try connecting the receiver to a different USB port and check the receiver status. By trying a
different USB port you could eliminate problems inherent to the USB port.
Always use a direct USB port, no USB HUB or replicator. The connection to a USB HUB may work
but will be less stable than a direct connection.
Please note that the use of desktop fan accessories may interfere with the USB receiver,
especially when used on a laptop. In case of problem disconnect all other devices before trying
the receiver on different USB ports.
STEP 2 : R EPL A C E TH E B AT T E R I E S
This can happen if the batteries are discharged or non-compliant. We recommend using batteries
intended for the use of electronic products. Check that the batteries are correctly placed in their
position and in the correct direction.
STEP 3 : TES T TH E PR O D U C T O N AN OT H E R D E V I C E
It is possible that the problem is software. In this case, try connecting the USB receiver to another
computer, or even a SMART TV, or other device with a USB port.
If it still does not work, go to step 4.
STEP 4 : R ES ET TH E PR O D U C T
In some cases, the connection between the USB receiver and your product may need to be reset.
To reset the connection, follow the guide in "Resetting the USB Receiver" on the next page.
13
If you have any questions, or would like to receive more information,
contact us directly at the following address:
contact@bambooelectronics.fr
https://bambooelectronics.fr/RESETTING THE USB RECEIVER
A USB receiver is a small receiver inserted into a USB port that sends and receives the wireless signal
with the mouse or keyboard. Each receiver is configured to communicate automatically with the
devices that have been associated with it. The USB receiver does not interfere with other wireless
devices and can not work with them.
The USB receiver is inside our products, in the battery compartment.
RECONFIGURATION OF THE KEYBOARD
STEP 1
Press the "esc" key and the "+ =" key simultaneously on your keyboard.
The red indicator lights up.
STEP 2
Insert the USB receiver into one of the ports on your device.
(note: your computer may take a few moments to configure the new device)
ST EP 3
Once the connection is established, the indicator light turns off and you can now use your
product.
If you do not insert the USB receiver 10-15 seconds after performing step 1, the "connection"
mode expires, then return to step 1 to restart the configuration.
14
If the USB receiver and your product work properly, but the indicator light tends to
blink, the batteries in your device need to be replaced.RESETTING THE USB RECEIVER
RECONFIGURATION OF THE MOUSE
F IR S T WAY
STEP 1
Locate the Code reset button on the
underside of the mouse.
STEP 2
Press and then reset the button. Insert the USB receiver in a USB port on your computer if it
is not already inserted.
SE C OND WAY
STEP 1
Press on the 3 buttons of the mouse
(left click, right click, middle scroll)
simultaneously during 3 seconds.
STEP 2
Release all 3 buttons. Insert the USB receiver in a USB port on your computer
15
if it is not already inserted.RESETTING THE USB RECEIVER
RECONFIGURATION OF THE KEYBOARD AND MOUSE SET
Follow the same reset procedure as on page 14 and page 15 to reconnect two independent
devices to the same USB receiver.
By following this procedure, you can also link the keyboard to another mouse, and vice versa.
This reset allows you to connect or separate two devices.
16MANUAL DE USUARIO
COMPUTADORA
17TECLADO
1 . F UNCIO N ES
• M o d o i n t elig en t e d e ah o r r o de energía multinivel
• T e c n ol og ía a n t iin t er fer en t e.
• E n e s p e ra y d es p er t a d o r a utomático, óptimo ahorro de energía.
• S op or t e d e a la r m a d e b ajo voltaje, con luz indicadora de bajo vol t aj e .
• T ot a l m e n t e c o mp at ib le c o n Windows, Mac OS, Linux
• D i s ta n c ia d e t r an s m is ió n : 7- 1 5 m
2. CÓ M O U S A R
D e s l ic e la t ap a d e la b atería. Cierre la tapa de la b at e r í a,
1 R e c o ja el r ec ep t o r U S B e inserte
l a s b at er ía s p a r a el t ec lado en la 2 conecte el receptor al p ue r t o
USB de su computad or a, l ue go
puede usar el teclad o.
d i r ec c ió n q u e s e m u es tra.
3. CA RA CTER ÍS TICA S G ENE R AL E S
• T e m p e r at u r a d e fu n c io n a m iento: 0 - 5 5 ° C
• B a te r í a s: 2 b a t er ía s AAA
• C e r t i fi c ad o : FCC, CE
4 . GEST IÓ N DE L A BATER Í A
• S op or t a es p er a a u t o má t ic a
• S a l i r d e l m o d o d e es p er a: presione una tecla
18RATÓ N
1. F UNCION ES
• R a t ó n ó p t ic o in alá m b r ic o d e bambú, tres botones.
• P r e c i s i ón ó p t im a d e h as t a 1 2 5 inf ormes por segundo.
• S op or t e p ar a d o r m ir y d es pertarse automáticamente.
• Ap l i c a c i ón : c o mp u t ad o r a p ortátil y PC de escritorio.
• T ot a l m e n t e c o mp at ib le c o n Windows, Mac OS, Linux
• D i s ta n c ia d e t r an s m is ió n : 7- 1 5 m
2. CÓ M O U S A R
1 R e t ir e la c u b ier t a in fer i or, saque el receptor
B l u et o o t h y c o n éc t elo a su dispositivo
2 I n s tale d o s b at er ía s AA A en la dirección que se
m u es t r a . Cier r e la t ap a, luego puede usarla.
3 I n ter r u p t o r D P I: p r es io ne para cambiar la
s e n s ib ilid a d d el mo u s e, 1 2 0 0 DPI por defecto.
Interruptor DPI
3. CA RA CTER ÍS TICA S G ENE R AL E S
• T e m p e r at u r a d e fu n c io n a m iento: 0 - 5 5 ° C
• B a te r í a s: 2 b a t er ía s AAA
• C e r t i fi c ad o : FCC, CE
4. GESTIÓ N DE L A BATER Í A
• M o d o d e o p er ac ió n : c u an d o mueve el cursor
• M o d o d e es p er a : d eja d e m over el cursor
• M o d o d e es p er a : 10 s eg u n dos después del modo de espera
19
• Ap a g a d o: d es p u és d e 30 minutos de sueño en esperaCONJUNTO DE TECLADO
Y RATÓN
1 . F UNCIO N ES
v e r « te c l a do » p á g in a 16 y «r atón» página 1 7
2 . CÓ M O U S A R
I n s er t e la s b a t er ía s en el teclado y el mouse y
1 r e c up er e el r ec ep t o r U SB ubicado en el mouse.
2 C on ec t e el r ec ep t o r U S B al puerto USB de su
c o mp u t ad o r a , lu eg o , p ueden usar los dispositivos juntos.
3 . CA RA CT ER ÍS TIC A S G ENE R AL E S
v e r « te c l a do » p á g in a 16 y «r atón» página 1 7
4 . GEST IÓ N DE L A BATER Í A
v e r « te c l a do » p ág in a 16 y «r atón» página 1 7
20EN CASO DE MAL FUNCIONAMIENTO
Si encuentra un problema con uno de nuestros productos, lo invitamos a seguir el procedimiento
detallado a continuación:
PA SO 1 : PR UEBE CON U N P U E R TO U SB D I FE R E N T E
Intente conectar el receptor a un puerto USB diferente y verifique el estado del receptor.
Al probar un puerto USB diferente, podría eliminar los problemas inherentes al puerto USB.
Utilice siempre un puerto USB directo, no HUB USB o replicador. La conexión a un HUB USB
puede funcionar, pero será menos estable que una conexión directa.
Tenga en cuenta que el uso de accesorios para ventiladores de escritorio puede interferir con el
receptor USB, especialmente cuando se usa en una computadora portátil. En caso de problemas,
desconecte todos los demás dispositivos antes de probar el receptor en diferentes puertos USB.
PA SO 2 : R EEM P L A CE L AS B AT E R Í AS
Esto puede suceder si las baterías están descargadas o no cumplen. Recomendamos el uso de
baterías destinadas al uso de productos electrónicos. Compruebe que las baterías estén
colocadas correctamente en su posición y en la dirección correcta.
PA SO 3 : PR UEBE EL PR O D U C TO E N OT R O D I SP O SI T I VO
Es posible que el problema sea software. En este caso, intente conectar el receptor USB a otra
computadora, o incluso a un televisor SMART u otro dispositivo con un puerto USB.
Si aún no funciona, vaya al paso 4.
PA SO 4 : R ES TA BL EC ER E L P R O D U C TO
En algunos casos, es posible que sea necesario restablecer la conexión entre el receptor USB y
su producto. Para restablecer la conexión, siga la guía en "Restablecimiento del receptor USB"
en la página siguiente.
19
Si tiene alguna pregunta o desea recibir más información, contáctenos
directamente a la siguiente dirección:
contact@bambooelectronics.fr
https://bambooelectronics.fr/RESTABLECER EL RECEPTOR USB
Un receptor USB es un pequeño receptor insertado en un puerto USB que envía y recibe la señal
inalámbrica con el mouse o el teclado. Cada receptor está configurado para comunicarse
automáticamente con los dispositivos que se le han asociado. El receptor USB no interfiere con otros
dispositivos inalámbricos y no puede funcionar con ellos.
El receptor USB está dentro de nuestros productos, en el compartimento de la batería.
RECONFIGURACIÓN DEL TECLADO
PA SO 1
Presione la tecla "esc" y la tecla "+ =" simultáneamente en su teclado.
El indicador rojo se ilumina.
PA SO 2
Inserte el receptor USB en uno de los puertos de su dispositivo.
(nota: su computadora puede tardar unos minutos en configurar el nuevo dispositivo)
PA SO 3
Una vez que se establece la conexión, la luz indicadora se apaga y ahora puede usar su
producto.
Si no inserta el receptor USB 10-15 segundos después de realizar el paso 1, el modo de
"conexión" caduca, luego regrese al paso 1 para reiniciar la configuración.
20
Si el receptor USB y su producto funcionan correctamente, pero la luz indicadora
tiende a parpadear, es necesario reemplazar las baterías de su dispositivo.RESTABLECER EL RECEPTOR USB
RECONFIGURACIÓN DEL RATÓN
PRIMER MÉTODO
PA SO 1
Ubique el botón de reinicio debajo del mouse.
PA SO 2
Presiona y suelta el botón. Inserte el receptor USB en un puerto USB de su computadora si
aún no lo ha hecho.
SE GUNDO MÉTODO
PA SO 1
Presione los 3 botones del mouse
(clic izquierdo, clic derecho y rueda)
simultáneamente durante 3 segundos.
PA SO 2
Suelta los 3 botones. Inserte el receptor USB en un puerto USB de su
21
computadora si aún no lo ha hecho.RESTABLECER EL RECEPTOR USB
RECONFIGURACIÓN DEL ENSAMBLAJE DEL TECLADO Y
EL MOUSE
Siga el mismo procedimiento de reinicio que en la página 20 y la página 21 para volver a
conectar 2 dispositivos independientes al mismo receptor USB
Siguiendo este procedimiento, también puede vincular el teclado con otro mouse, y viceversa.
Este reinicio le permite conectar o separar 2 dispositivos.
22MANUALE UTENTE
COMPUTER
23TASTIERA
1 . F UNZION I
• M o d a l i t à d i r is p ar m io en er getico intelligente multilivello
• T e c n ol og ia a n t i-in t er fer en za.
• S ta n d b y e s veg lia a u t o ma t ica, risparmio energetico ottimale.
• S u p p o r t o a lla r m i d i b a s s a tensione, con spia di bassa tensione.
• P i e n a m en t e c o mp at ib ile c on Windows, Mac OS, Linux
• D i s ta n z a d i t r a s mis s io n e: 7- 1 5 m
2 . CO M O U S A R E
S fi l a r e il c o p er c h io d ella batteria. Chiudi il coperch i o d e l l a
1 R a c c o g lier e il r ic evit o r e USB e
i n s er ir e le b at t er ie p er la tastiera 2 batteria, collega i l r i c e v i t or e
alla porta USB de l t uo
computer, quindi p uoi usar e
n e l l a d ir ezio n e m o s t r ata.
la tastiera.
3 . CA RAT TER IS TIC H E G ENE R AL I
• T e m p e r at u r a d i fu n zio n am ento: 0 - 5 5 ° C
• B a tt e r i e: 2 b a t t er ie AAA
• C e r t i fi c at o : FCC, CE
4 . GESTIO N E DEL L A BATTE R I A
• S u p p o r t a lo s t an d b y au t o matico
• E s c i d a S t an d b y: p r emer e un tasto
24MOUSE
1. F UNZION I
• M ou s e o t t ic o s en za fi li in b ambù, tre pulsanti.
• Pr e c i s i on e o t t ima le fi n o a 1 2 5 rapporti al secondo.
• S u p p or t o p er il s o n n o e la sveglia automatica.
• A p p l i c a zio n e: lap t o p e P C desktop.
• Pi e n a m en t e c o mp at ib ile c on Windows, Mac OS, Linux
• Di s ta n z a d i t r a s mis s io n e: 7- 1 5 m
2. CO M O US A R E
1 R i m u o ver e il c o p er c h io inferiore, estrarre il
r i c e v it o r e Blu et o o t h e collegarlo al dispositivo
2 I n s t a lla r e d u e b at t er ie AAA nella direzione
m o s t r a t a. Ch iu d i il c o p erchio, quindi puoi usarlo.
3 I n t er r u t t o r e D P I: p r emere per modificare la
s e n sib ilit à d el m o u s e, 1 2 0 0 DPI per impostazione
p r e defi n it a .
Interruttore DPI
3. CA RAT TER IS TICH E G ENE R AL I
• T e m p e r at u r a d i fu n zio n am ento: 0 - 5 5 ° C
• T e n s i on e d i fu n zio n am en t o: 3 ,0 V (2 batterie AAA)
• C e r ti fi c at i: FCC, CE , Ro H S
4. GESTIO N E DEL L A BATTE R I A
• M od a l i t à o p er at iva: q u a n d o si sposta il cursore
• M od a l i t à s t a n d b y: s m et t e di spostare il cursore
• M od a l i t à s t a n d b y: 10 s ec o ndi dopo lo standby
25
• O ff : d op o 30 min u t i d i s t a n dbySET TASTIERA MOUSE
1. FUNZIO N I
v e d e r e « ta st ier a» p ag in a 23 e «mouse» pagina 2 4
2 . CO M O U S A R E
I n s e r ir e le b a t t er ie n ella tastiera e nel mouse e
1 r i p r i st in a r e il r ic evit o r e USB posizionato nel mouse.
2 C ol l eg a il r ic evit o r e U S B alla porta USB del tuo
c o m pu t er , q u in d i p u o i utilizzare i dispositivi insieme.
3 . C A RAT TER IS TIC H E G EN E R AL I
v e d e r e « ta st ier a» p ag in a 23 e «mouse» pagina 2 4
4. G ESTIO N E DEL L A BATTE R I A
v e d e r e « ta st ier a» p ag in a 23 e «mouse» pagina 2 4
26IN CASO DI MALFUNZIONAMENTO
Se riscontri un problema con uno dei nostri prodotti, ti invitiamo a seguire la procedura
dettagliata di seguito:
PA SSA GG IO 1: PR OVA R E U N 'ALT R A P O R TA U SB
Prova a collegare il ricevitore a un'altra porta USB e controlla lo stato del ricevitore.
Provando una porta USB diversa, è possibile eliminare i problemi inerenti alla porta USB.
Utilizzare sempre una porta USB diretta, nessun hub o replicatore USB. La connessione a un HUB
USB può funzionare ma sarà meno stabile di una connessione diretta.
Si noti che l'uso di accessori per ventole desktop può interferire con il ricevitore USB,
specialmente se utilizzato su un laptop. In caso di problemi, scollegare tutti gli altri dispositivi
prima di provare il ricevitore su diverse porte USB.
PA SSA GG IO 2: S OS TITU I R E L E B AT T E R I A
Ciò può accadere se le batterie sono scariche o non conformi. Si consiglia di utilizzare batterie
destinate all'uso di prodotti elettronici. Verificare che le batterie siano posizionate correttamente
nella loro posizione e nella direzione corretta.
PA SSA GG IO 3: TES TA R E I L P R O D OT TO SU U N ALT R O D IS P OS I T I VO
È possibile che il problema sia il software. In questo caso, provare a collegare il ricevitore USB a
un altro computer, o anche a una SMART TV, o ad un altro dispositivo con una porta USB.
Se il problema persiste, andare al passaggio 4.
PA SSA GG IO 4: R IPR IS TI N AR E I L P R O D OT TO
In alcuni casi, potrebbe essere necessario ripristinare la connessione tra il ricevitore USB e il
prodotto. Per ripristinare la connessione, seguire la guida in "Ripristino del ricevitore USB"
nella pagina successiva.
27
Se hai domande o desideri ricevere maggiori informazioni, contattaci
direttamente al seguente indirizzo:
contact@bambooelectronics.fr
https://bambooelectronics.fr/RIPRISTINO DEL RICEVITORE USB
Un ricevitore USB è un piccolo ricevitore inserito in una porta USB che invia e riceve il segnale wireless
con il mouse o la tastiera. Ogni ricevitore è configurato per comunicare automaticamente con i
dispositivi ad esso associati. Il ricevitore USB non interferisce con altri dispositivi wireless e non può
funzionare con essi.
Il ricevitore USB è all'interno dei nostri prodotti, nel vano batterie.
RICONFIGURAZIONE DELLA TASTIERA
PA SSA G G IO 1
Premere contemporaneamente il tasto "esc" e il tasto "+ =" sulla tastiera.
L'indicatore rosso si accende.
PA SSA G G IO 2
Inserire il ricevitore USB in una delle porte del dispositivo.
(nota: il computer potrebbe richiedere alcuni minuti per configurare il nuovo dispositivo)
PA SSA G G IO 3
Una volta stabilita la connessione, la spia si spegne e ora è possibile utilizzare il prodotto.
Se non si inserisce il ricevitore USB 10-15 secondi dopo aver eseguito il passaggio 1, la modalità
"connessione" scade, quindi tornare al passaggio 1 per riavviare la configurazione.
28
Se il ricevitore USB e il prodotto funzionano correttamente, ma l'indicatore luminoso
tende a lampeggiare, è necessario sostituire le batterie del dispositivo.RIPRISTINO DEL RICEVITORE USB
RICONFIGURAZIONE DEL MOUSE
PRIMO METODO
PA SSA G G IO 1
Individuare il pulsante di ripristino sotto il
mouse
PA SSA G G IO 2
Premere e rilasciare il pulsante. Inserire il ricevitore USB in una porta USB del computer se
non lo si è già fatto.
SE CONDO METODO
PA SSA G G IO 1
Premere i 3 pulsanti del mouse (clic sinistro,
clic destro e ruota) contemporaneamente
per 3 secondi.
PA SSA G G IO 2
Rilasciare i 3 pulsanti. Inserire il ricevitore USB in una porta USB del computer
29
se non lo si è già fatto.RIPRISTINO DEL RICEVITORE USB
RICONFIGURAZIONE DELL'ASSIEME TASTIERA E MOUSE
Seguire la stessa procedura di ripristino di pagina 28 e pagina 29 per ricollegare 2 dispositivi
indipendenti allo stesso ricevitore USB.
Seguendo questa procedura, è anche possibile collegare la tastiera con un altro mouse e
viceversa. Questo ripristino consente di connettere o separare 2 dispositivi.
30BENUTZERHANDBUCH
COMPUTER
29TASTATUR
1 . F UNKT ION EN
• M e h r s t u fi g er in t ellig en t er Energiesparmodus
• An ti - I n ter fer en z-T ec h n o lo g i e.
• S ta n d b y u n d a u t o ma t is c h es Aufwachen, optimale Energieeinsparung.
• U n te r s tü t zu n g fü r Nied er s pannungsalarm mit Anzeige für Nieders p annung.
• V o l l k o m p at ib el mit W in d o ws, Mac OS, Linux
• Ü b e r t r a gu n g s r eic h w eit e: 7-1 5 m
2 . WIE BEN U TZT M A N
S c h i e ben S ie d ie Bat t er ieabdeckung Schließen Sie die
1 a b . N eh m en S ie d en U S B-Empf änger
u n d l e g en S ie d ie T as t a t u rbatterien 2 Batterieabdeckung , sc hl i e ße n
Sie den Empfänger an d e n U S B -
Anschluss Ihres Co m p ut e r s an
i n d e r a n g eg eb en en Ric h tung ein.
und verwenden Sie d i e T ast at ur .
3 . A LLGEMEIN E M ER KM A L E
• B e tr i e b st emp er a t u r : 0-55 ° C
• B a tt e r i en : 2 AAA-Bat t er ien
• Ze r ti fi k at : FCC, CE
4 . BATTER IEM A N A G EM EN T
• U n te r s tü t zt Au t o -S t a n d b y
• S ta n d b y b een d en : D r ü c ken Sie eine Taste
30MAUS
1 . F UNKT ION EN
• D r a h t l os e o p t is c h e Ba m b u smaus, drei Tasten.
• O p ti m a l e G en au ig keit vo n bis zu 1 2 5 Berichten pro Sekunde.
• U n te r s tü t zu n g fü r S c h la f u nd automatisches Aufwachen.
• An w e n du n g : Lap t o p u n d D esktop- PC.
• V o l l k o m p at ib el mit W in d o ws, Mac OS, Linux
• Ü b e r t r a g u n g s r eic h weit e: 7- 1 5 m
2. WIE BE N UTZT M A N
E n t fer n en S ie d ie u n t ere Abdeckung, nehmen Sie
1 d e n Blu et o o t h -E m p fä n ger heraus und schließen
S i e ih n an Ih r G er ä t an
L e g en S ie zwei AAA-Ba tterien in der angegebenen
2 R i c h t u n g ein . S c h ließen Sie den Deckel, dann
k ö n n en S ie es ver wen den.
D P I -S c h a lt er : D r ü c ken Sie diesen Schalter, um die
3 E m p fi n d lic h keit d er Maus zu ändern
(s ta n d a r d mä ßig 1200 DPI).
DPI- Schalter
3. A LLGEM EIN E M ER KM AL E
• B e tr i e b st emp er a t u r : 0-55 ° C
• B e tr i e b ss p an n u n g : 3,0 V ( 2 AAA- Batterien)
• Ze r ti fi k at e: FCC, CE , Ro H S
4 . BATTER IEM A N A G EM EN T
• F u n k t i on s w eis e: W en n S ie den Cursor bewegen
• S ta n d b y-Mo d u s : Bew eg en Sie den Cursor nicht weiter
• S ta n d b y-Mo d u s : 10 S eku n den nach dem Standby
31
• Au s : N a c h 30 Min u t en S t a ndby- SchlafMAUS-TASTATUR SET
1. F UNK TION EN
v g l . " t a s tat u r " S eit e 30 u n d "Maus" Seite 3 1
2 . WIE BEN U TZT M A N
L e g en S ie d ie Bat t er ien in Tastatur und Maus ein und
1 s a m meln S ie d en U S B-Empf änger in der Maus.
S c h ließen S ie d en U S B-Empf änger an den USB- Anschluss
2 I h r e s Co mp u t er s an . Anschließend können Sie die Geräte
z u s amm en ver w en d en .
3 . A LLGEM EIN E M ER KM A L E
v g l . " t a s tat u r " S eit e 30 u n d "Maus" Seite 3 1
4. BAT TER IEM A N A G EM EN T
v g l . " t a s tat u r " S eit e 30 u n d "Maus" Seite 3 1
32IM FALLE EINER FEHLFUNKTION
Wenn Sie auf ein Problem mit einem unserer Produkte stoßen, bitten wir Sie, die folgenden
Schritte auszuführen:
S C HRITT 1 : PR OBIER EN S I E E I N E N AN D E R E N U SB - AN SC HLU S S A U S
Versuchen Sie, den Receiver an einen anderen USB-Port anzuschließen, und überprüfen Sie den
Receiver-Status. Wenn Sie einen anderen USB-Anschluss ausprobieren, können Sie Probleme
beseitigen, die mit dem USB-Anschluss verbunden sind.
Verwenden Sie immer einen direkten USB-Anschluss, keinen USB-Hub oder Replikator. Die
Verbindung zu einem USB-Hub funktioniert möglicherweise, ist jedoch weniger stabil als eine
direkte Verbindung.
Bitte beachten Sie, dass die Verwendung von Desktop-Lüfterzubehör den USB-Empfänger stören
kann, insbesondere bei Verwendung auf einem Laptop. Trennen Sie im Problemfall alle anderen
Geräte, bevor Sie den Receiver an verschiedenen USB-Anschlüssen testen.
S CHRITT 2 : ER S ETZEN S IE D I E B AT T E R I E N
Dies kann passieren, wenn die Batterien entladen oder nicht konform sind. Wir empfehlen die
Verwendung von Batterien, die für die Verwendung von elektronischen Produkten vorgesehen
sind. Vergewissern Sie sich, dass die Batterien richtig eingelegt sind und in die richtige Richtung
weisen.
S C HRITT 3 : TES TEN S IE DAS P R O D U K T AU F E I N E M AN D E REN GERÄT
Möglicherweise liegt das Problem in der Software. Versuchen Sie in diesem Fall, den
USB-Empfänger an einen anderen Computer oder sogar an ein SMART-Fernsehgerät oder ein
anderes Gerät mit einem USB-Anschluss anzuschließen.
Wenn es immer noch nicht funktioniert, fahren Sie mit Schritt 4 fort.
S CHRITT 4 : S ETZEN S IE D AS P R O D U K T Z U R Ü C K
In einigen Fällen muss die Verbindung zwischen dem USB-Empfänger und Ihrem Produkt
möglicherweise zurückgesetzt werden. Befolgen Sie zum Zurücksetzen der Verbindung die
Anweisungen unter "Zurücksetzen des USB-Empfängers" auf der nächsten Seite.
33
Wenn Sie Fragen haben oder weitere Informationen wünschen, wenden
Sie sich direkt an folgende Adresse:
contact@bambooelectronics.fr
https://bambooelectronics.fr/ZURÜCKSETZEN DES USB-EMPFÄNGERS
Ein USB-Empfänger ist ein kleiner Empfänger, der an einen USB-Anschluss angeschlossen ist und das
Funksignal mit der Maus oder der Tastatur sendet und empfängt. Jeder Empfänger ist so konfiguriert,
dass er automatisch mit den ihm zugeordneten Geräten kommuniziert. Der USB-Empfänger stört
andere drahtlose Geräte nicht und kann nicht mit ihnen arbeiten.
Der USB-Empfänger befindet sich in unseren Produkten im Batteriefach.
NEUKONFIGURATION DER TASTATUR
SCHRIT T 1
Drücken Sie gleichzeitig die Taste "esc" und die Taste "+ =" auf Ihrer Tastatur.
Die rote Anzeige leuchtet auf.
SCHRIT T 2
Stecken Sie den USB-Empfänger in einen der Anschlüsse Ihres Geräts.
(Hinweis: Es kann einen Moment dauern, bis Ihr Computer das neue Gerät konfiguriert hat.)
SCHRITT 3
Sobald die Verbindung hergestellt ist, erlischt die Anzeigeleuchte und Sie können Ihr Produkt
jetzt verwenden.
Wenn Sie den USB-Empfänger 10-15 Sekunden nach dem Ausführen von Schritt 1 nicht
anschließen, wird der Verbindungsmodus beendet. Kehren Sie dann zu Schritt 1 zurück, um die
Konfiguration neu zu starten.
Wenn der USB-Empfänger und Ihr Produkt ordnungsgemäß funktionieren, die
Anzeigelampe jedoch blinkt, müssen die Batterien in Ihrem Gerät ersetzt werden.
34ZURÜCKSETZEN DES USB-EMPFÄNGERS
NEUKONFIGURATION DER MAUS
E RSTE METH ODE
SCHRIT T 1
Suchen Sie die Reset-Taste unter der Maus.
SCHRIT T 2
Drücken Sie die Taste und lassen Sie sie los. Stecken Sie den USB-Empfänger in einen
USB-Anschluss Ihres Computers, falls Sie dies noch nicht getan haben.
Z WE I TE METH ODE
SCHRIT T 1
Drücken Sie die 3 Maustasten (Linksklick,
Rechtsklick und Rad) gleichzeitig für
3 Sekunden.
SCHRIT T 2
Lassen Sie die 3 Tasten los. Stecken Sie den USB-Empfänger in einen
35
USB-Anschluss Ihres Computers, falls Sie dies noch nicht getan haben.ZURÜCKSETZEN DES USB-EMPFÄNGERS
NEUKONFIGURATION DER TASTATUR- UND
MAUSBAUGRUPPE
Gehen Sie wie auf Seite 34 und Seite 35 zurück, um zwei unabhängige Geräte wieder an
denselben USB-Empfänger anzuschließen.
Mit diesem Verfahren können Sie die Tastatur auch mit einer anderen Maus verbinden und
umgekehrt. Mit diesem Reset können Sie 2 Geräte verbinden oder trennen.
36Vous pouvez aussi lire