Montageanleitung Assembly instructions Instructions de montage Nr.: 9219117 - Scheurich24

La page est créée Kévin Lemoine
 
CONTINUER À LIRE
Montageanleitung Assembly instructions Instructions de montage Nr.: 9219117 - Scheurich24
D    Montageanleitung               Nr.: 9219117
GB   Assembly instructions
F    Instructions de montage

Seitenteil BS - Art.-Nr.: 7500015
Montageanleitung Assembly instructions Instructions de montage Nr.: 9219117 - Scheurich24
D
                                                              Important
                                                                                                               GB
                                                                                                                           Recommandations
                                                                                                                                                                             F         Stückliste | Parts list | liste de pièces
    Wichtige Hinweise!                                        Reccommendations!                                            importantes !
    • Vor der Montage bitte Montageanleitung genauestens      • Prior to assembly please study the assembly instruc-       • Avant le montage, veuillez lire exactement les inst-
    durchlesen und Produkt auf evtl. Transportschäden         tions in detail and check the consignment for possible       ructions de montage et vérifier s‘il n‘y a pas de défaut
    bzw. Fehler überprüfen, da für Schäden an bereits mon-    faulty parts or damage during transportation. No liability
    tierten Produkten keine Haftung übernommen werden         will be assumed for damage to products already as-
                                                                                                                           ou si le produit n’a pas été endommagé pendant le
                                                                                                                           transport, car aucune responsabilité ne sera assumée
                                                                                                                                                                                        Nr.        Bezeichnung                                     Stück
    kann.                                                     sembled.                                                     pour les pièces déjà montées.                                No.        Description                                     Pieces
    • Prüfen Sie vor dem Einbau, ob Typ, Maß und Farbe        • Please check that type, dimensions and colour corre-       • Vérifiez avant le montage, si le type, la dimension et
    übereinstimmen.                                           spond before assembly                                        la couleur correspondent.
                                                                                                                                                                                        No.        Désignation                                     Piéces
    • Maßanfertigungen sind vom Umtausch ausgeschlos-         • Custom-made parts cannot be exchanged.                     • Les fabrications sur mesure ne seront pas échangées.
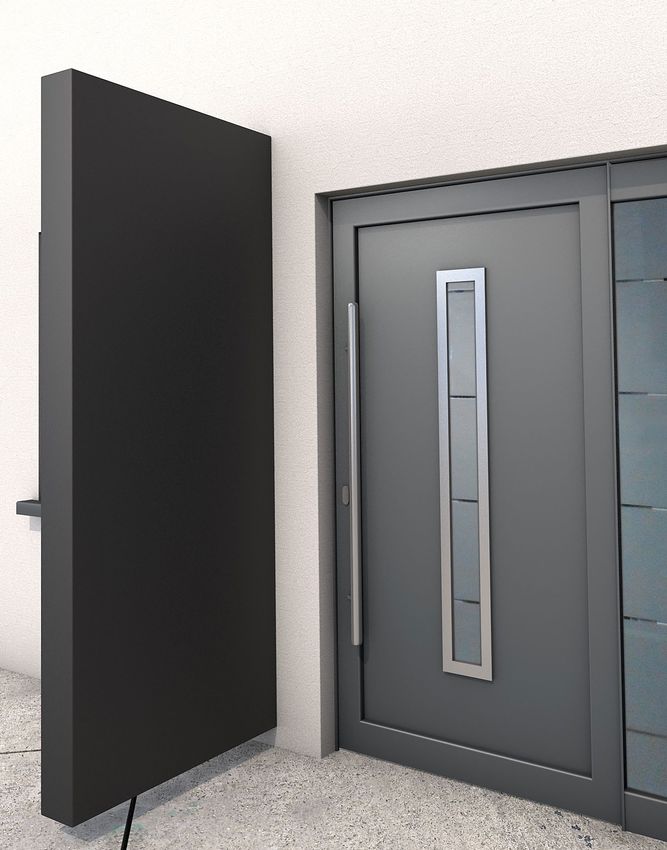
    sen.                                                      • The canopy may only be used for the intended pur-          • L‘auvent doit être seulement utilisé pour la fonction                                                               BS Seitenteil
    • Das Vordach darf nur für den vorgeschriebenen           pose, otherwise no claims for product liability can be       prescrite, dans le cas contraire, toutes
    Zweck verwendet werden, anderenfalls erlischt der         accepted!                                                    prestations de garanties seront annulées !
                                                                                                                                                                                                                                                 BS side panel
    Produkthaftungsanspruch!                                  • Clean the canopy every 3 months and only use a re-         • Nettoyez l‘auvent environ tous les trois mois. Utilisez                                                           BS élément latéral
    • Reinigen Sie das Vordach bitte in Abständen von ca.     commended cleaning product (no scrubbing 0agents or          seulement des produits d‘entretien recommandés dans le
    3 Monaten. Verwenden Sie nur vom Handel empfohlene        solvents). If necessary, the lacquered parts can also be     commerce (pas de récurant ou de solvant). Si nécessaire,                Dübel Ø 12 mm
    Pflegemittel (keine Scheuer- oder Lösungsmittel). Die     treated with with car polish.                                                                                                   1.                                                       6
    lackierten Teile können auch bei Bedarf mit Autopolitur   • The water drains should be cleaned regularly (in order
                                                                                                                           les pièces laquées peuvent être également entretenues                   Plugs / Goujons
                                                                                                                           avec un polish pour automobile.
    behandelt werden.                                         to avoid damages caused by accumulated water).               • Nettoyez les gouttières régulièrement (l‘accumulation                 U-Scheibe
    • Die Wasserabläufe sind regelmäßig zu reinigen (an-      • In each case, the canopy fastenings must be suitable       d‘eau pourrait endommager l‘auvent).                               2.                                                       6
    sonsten Beschädigungsgefahr durch Stauwasser).            for the construction of the wall in question. Secure at-     • Les moyens de fixation sont à adapter selon la nature
                                                                                                                                                                                                   Washers / Laveuse
    • Die Befestigungsmittel sind der jeweiligen Beschaf-     tachment must be warranted.                                  du mur. Une fixation sûre et suffisante est à garantir.
    fenheit der Wand anzupassen. Eine ausreichende Be-        • Accumulated snow and ice should be removed from the                                                                                Schraube 10 x 80 mm
                                                                                                                           • Nettoyez l‘auvent si une épaisse couche de neige et              3.                                                       6
    festigung ist zu gewährleisten.                           canopy.                                                      de glace le recouvre.                                                   Screw / Visser
    • Bei erhöhter Schnee- und Eislast ist das Vordach ab-    • Caution - Danger of Accident! The canopy is not load       • ATTENTION DANGER ! Ne montez pas sur l‘auvent.
    zuräumen.                                                 bearing; do not climb or place your weight on the ca-                                                                                Metallschraube 4,8 x 20 mm
    • Achtung Unfallgefahr! Vordach ist nicht begehbar.       nopy.
                                                                                                                           • Recommandation : Le montage devrait être effectué                4.                                                      12
                                                                                                                           par 2 personnes. En supplément, vous devez étancher                     Metal srew / Métallique visser
    • Empfehlung: Die Montage sollte von zwei Personen        • Recommendation: Assembly should be carried out by          avec de la pâte de silicone usuelle.
    durchgeführt werden. Zusätzlich müssen Sie mit einem      two persons. You must also seal the canopy using stan-
                                                                                                                           • Une fois la période de garantie légale arrivée à son
    handelsüblichen Silikon abdichten.                        dard commercial silicone.
                                                                                                                           terme, cette garantie ne s’applique plus sur les pièces
    • Auf Verschleißteile besteht nach Ablauf der gesetzli-   • No guarantee claims can be accepted for parts sub-         d’usure.
    chen Garantiezeit kein Garantieanspruch.                  ject to wear and tear after the statutory guarantee pe-
                                                                                                                           • Pour cet auvent, nous livrons également des accessoires               Wandhalter 110 x 137 mm
    • Zu diesem Vordach liefern wir auch separates Zube-      riod has expired.                                                                                                               5.                                                       3
    hör. Bitte informieren Sie sich bei Ihrem Fachhändler.    • We can also supply separate accessories for this ca-
                                                                                                                           des accessoires séparés. Veuillez vous informer auprès de               Wall bracket / Support mural
                                                                                                                           votre dépositaire.
    • Änderung der Konstruktion vorbehalten.                  nopy. Please ask your local trader for further.
                                                                                                                           • Sous réserve de modifications de la construction.
                                                              • The design is subject to alterations.

                                                                                                                                                                                                   Senkkopfschaube | Countersunk head cover
                                                                                                                                                                                              9.   Couvercle de tête fraisée | Verzonken kop
                                                                                                                                                                                                                                                       2

                                                                                                                                       3/8“

                                                                                             Ø 3,5 mm (Metall / Metal / Métal)
                                                                                             Ø 12,0 mm (Stein / Stone / Pierre)

2                                                                                                                                                                                                                                                                   3
Montageanleitung Assembly instructions Instructions de montage Nr.: 9219117 - Scheurich24
Anbaumaße Seitenblende | Mounting dimensions, side panel
                                                                                                                                                       Montage Seitenblende | Assembly of side panel
    Dimensions panneau latéral | Montageafmetingen zijpaneel
                                                                                                                                                       Instructions panneau latéral | Montage zijpaneel

                                                                                                                                                        2.   Zusammenfügen | Assembly | Affilier | Aaneenvoegen

                                                                                                                                              115 mm
                                                                                                                                                             1. Setzen Sie die Seitenblende auf die Winkel.   2. Schieben Sie die Seitenblende an das Vordach.
                                                                                                                            87 mm                            1. Place the side panel on the brackets.         2. Slide the side panel upto the canopy.
                                                                                                                                                             1. Placer le panneau latéral sur les supports.   2. Glisser le panneau latéral sur la verrière.
                                                                                                                                                             1. Plaats het zijpaneel op de beugels.           2. Schuif het zijpaneel tegen de overkapping.

                                                                                                                                              985 mm
          Auf der Seite, wo das Seitenteil
          montiert wird, bitte die Senkkopf-
          schauben (2x) verwenden.

          On the side where the side panel will
          be mounted, please use the counter-
          sunk screws (2x).

          Du côté où le panneau latéral est
          monté, veuillez utiliser les vis à tête

                                                                                                                                              985 mm
          fraisée (2x).

          Aan de kant waar het zijpaneel wordt
          gemonteerd, gebruikt u de verzonken
          schroeven (2x).                                                                                                                                                                                                             2.

    Montage | Mounting instructions | Assemblage | Montage

     1.    Wandhalter montieren | Mount wall bracket | Montage du support mural | Bevestiging van de muurbeugel
           1.   Abstände messen, im Wasser ausrichten, Bohrlöcher anzeichnen (Wandhalter als Schablone verwenden).                       6x
           2.   Bohren Sie die Löcher mit einem Ø 12 mm Bohrer.
           3.   Dübel in die Wand einsetzen, nun die Wandhalter mit je 2 Schrauben und Unterlegscheiben lose anziehen.                   6x
           4.   Wandhalter mit Wasserwaage ausrichten und nun die Schrauben fest anziehen.                                               6x
           1.   Measure distances, align with a water level, mark drill holes (use wall holder as template)                              3x
           2.   Drill the holes with a Ø 12 mm drill bit
                                                                                                                                                                                                                                                                 1.
           3.   Insert dowels into the wall, and then loosely fit the wall brackets with 2 screws and washers each.
           4.   Align the wall brackets with a spirit level and then tighten the screws.
           1.   Mesurez les écartements, ajustez avec un niveau à bulle, marquez les trous à percer (à l‘aide du support mural)
           2.   Percer les trous avec une mèche de Ø 12 mm.                                                                                                                1.                                                          2.
           3.   Insérez des chevilles dans le mur, puis fixez les supports muraux sans serrer avec deux vis et trois rondelles chacun.
           4.   Alignez les supports muraux avec un niveau à bulle et serrez les vis.
           1.   Afstanden meten, uitlijnen in water, boorgaten markeren (gebruik de muurbeugel als sjabloon)
           2.   Boor de gaten met een Ø 12 mm boor.
           3.   Steek de deuvels in de muur, draai nu de muurbeugels losjes aan, elk met 2 schroeven en onderlegringen.
           4.   Richt de muurbeugels uit met een waterpas en draai nu de schroeven vast.

4                                                                                                                                                                                                                                                                     5
Montageanleitung Assembly instructions Instructions de montage Nr.: 9219117 - Scheurich24
Montage Seitenblende | Assembly side panel                                                                          Maße für den Zubehöreinbau | Dimensions for installation of accessories |
    Montage élément | Montage zijpaneel                                                                                 Dimensions pour l‘installation des accessoires

     3.   Befestigung | Fasting | Fixation | Bevestiging
          1. Bohren Sie die Löcher mit einen Bohrer 3,5 mm vor. | Pre-drill the holes with a 3.5 mm drill bit.
                                                                                                                 12 x
             Prépercez les trous avec une mèche de 3,5 mm. | Boor de gaten met een 3,5 mm boor.

          2. Setzen Sie die Schrauben wie angezeigt. | Insert the screws as indicated.
             Insérez les vis comme indiqué. | Plaats de schroeven zoals aangegeven.

                                                                                                                                                                                    700 mm
                                                                                                                                                                        Breite max. 76
                                                                                                                                                                                       0     mm

                                                                                                                                                                                                  Höhe max. 800 mm
                                                                                                                           Briefkasten /
                                                                                                                           Letterbox /
                                                                                                                           Boîte aux lettres

                                                                                                                                                                    70 mm                                            70 mm

                                                                                                                                                                                    700 mm
6                                                                                                                                                                                                                            7
Montageanleitung Assembly instructions Instructions de montage Nr.: 9219117 - Scheurich24
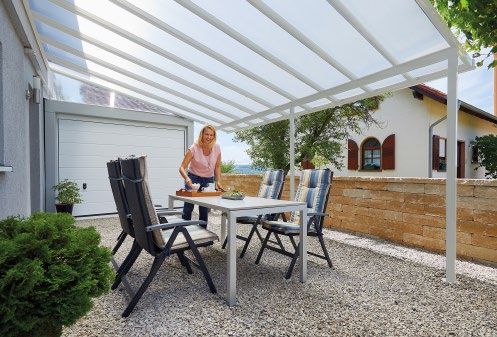
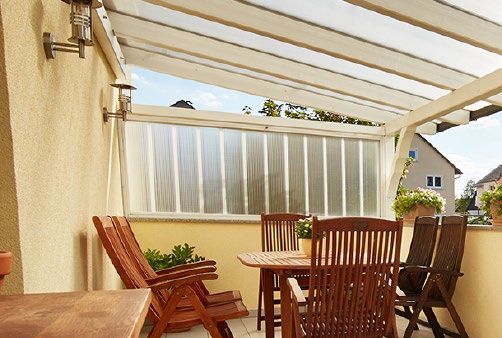
Produktübersicht / Product range / Gamme de produits

Hohlkammerplatten             Profilplatten          Vordächer            Terrassendächer

Paneele                       Ebene Platten          Bitumenwellplatten   Noppenbahn

Hobbyplatten                  Effektplatten          Rasengitter          Gartenprodukte

                                                                                            D - 25/20 - 1000 - WMD - Montageanleitung-Nr.: 9219117
Montageanleitung Assembly instructions Instructions de montage Nr.: 9219117 - Scheurich24 Montageanleitung Assembly instructions Instructions de montage Nr.: 9219117 - Scheurich24 Montageanleitung Assembly instructions Instructions de montage Nr.: 9219117 - Scheurich24 Montageanleitung Assembly instructions Instructions de montage Nr.: 9219117 - Scheurich24 Montageanleitung Assembly instructions Instructions de montage Nr.: 9219117 - Scheurich24
Vous pouvez aussi lire