Switch trident pro-s controller - wireless - Game Devil
←
→
Transcription du contenu de la page
Si votre navigateur ne rend pas la page correctement, lisez s'il vous plaît le contenu de la page ci-dessous
1
         2       3
         Changable   wireless   extended      easy      durable casting   turbo
           d-pad                triggers   connection     & buttons       button

   switch
trident pro-s
 controller
   wireless

  manual

Instructions for connecting Trident PRO-S to the Switch Console
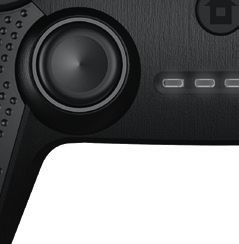
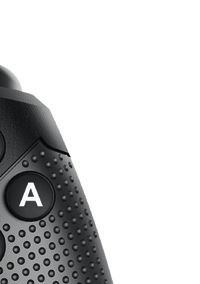
Buttons on the front of the controller
1. Directional Pad (changeable D-pad) 7. Turbo Button: Activate & Deactivate: press and hold any
2. Action Buttons (Y, X, B, A) = X, = B button and then press Turbo
3. Left Analog Stick and L3 button 8. Screenshot /SHARE
4. Right Analog Stick and R3 button 9. Menu selection
5. HOME Button 10. Menu selection
6. LED Indicator 1, 2, 3, 4 11. L Button
12. R Button
9 7 5 8 10
11 12
1 2
3 4
6
Buttons on the shoulder and the back of the controller
13 14
13. RZ Trigger
14. LZ Trigger
15. There is a hole for the RESET button
15
at the back of the controller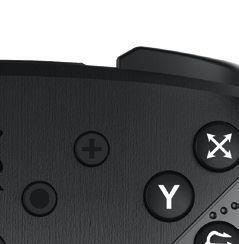
How to connect the controller to the console and how to start a game:
1. When connecting the device for the first time, please follow the instructions below:
   A) To detect and match the controller, hold the HOME button for 5 seconds; all LED Indicators
   will blink quickly.
   B) When LED Indicator 1 is lit up and steady, matching is successful.
2. When connecting the device a second time or more, simply hold the HOME button to turn
   the controller on and it will get automatically connected.
3. To enter a game: Press HOME to enter the game menu. Choose a game that you have
   already played. Press A to start a game.
4. To turn the controller off: Hold the HOME button for 10 seconds.

Connection Instructions:
1. Press the Power button to turn the Switch console on.

2. Press A or the HOME button to enter the main menu.

3. Choose “Controllers.”
4. After entering the “Controllers” page, click “Change Grip/Order”.

5. After entering the “Change Grip/Order page”, press and hold the HOME button for 5 seconds to search and sync.
**Note: The controller’s 4 Led indication lights will be flashing fast while searching is in progress.

6. You will see the image of a controller on the page. Once connected, it will be displayed on the “Grip/Order” page.
**Note: Once the connection is made, only the first LED light (the furthest to the left) will be on.

7. Lastly and most importantly: press A to complete the connection process. After this, the Switch console will go back
to the “Controllers” page and you are all set!
FAQ for Trident Controller for Nintendo SwitchTM console

If the controller does not work with the Nintendo SwitchTM console:
1. Some games are not compatible with the Pro Controller or the Trident PRO-S Controller.
2. For other games:
       a) If using the Nintendo SwitchTM with the dock: both the Pro Controller and the Trident PRO-S Controller are
       compatible when connected to a TV.
       b) If using the Nintendo SwitchTM in handheld mode: Joy-ConTM needs to be switched off or removed in order to
       use the Pro Controller or the Trident PRO-S Controller.

Instructions for the 4 LED lights on the Nintendo SwitchTM Controller:
1. Connecting the controller to the games console:
       a) When the HOME button is pressed to connect, the four LED lights will flash quickly. Once connected the
       relevant LED will stay ON
       b) When the HOME button is pressed to connect but connection is unsuccessful, the four LED lights will flash
       slowly
2. LED light indications:
   When connected, the first LED light on the left will be on (indicating Player 1). The second LED light on the left
   indicates Player 2, and so on.
3. Charging indication: All four LED lights will flash slowly. If the controller is charging whilst playing,
   only one LED will flash slowly.
4. Low battery alert: If the controller battery is low, the relevant LED light will flash slowly

Other remarks:
1) Using the HOME button on the Trident PRO-S Controller will NOT turn on the console.
2) Motion control and NFC functions are not supported on Game Devil Nintendo SwitchTM Trident PRO-S
3) Please try to reset the controller if it gets stuck at any time. You will find the reset button in a small
   hole on the back of the controller.
4) To hard boot your console, press and hold the POWER button for 12 seconds.

SAFETY PRECAUTIONS
• Do NOT expose the product to hot or cold temperatures or close to any heat source such as elements,
ovens or direct sunlight, high humidity
• Do NOT use in areas of high humidity or if wet from water or other liquids
• Do NOT open, bend, service else trying to modify the product in any way, as this can cause electrical shocks,
fire or damage.
• Only clean with a soft, dry cloth, not using any type of solvents or chemicals

HEALTH PRECAUTIONS
• If you experience any discomfort from the use of the product, stop using it and seek medical help. If it caused
by the vibration function of the product, switch this function of in your console settings, if it is caused by strong
lights, stop playing and turn off the console and seek medical help
• Don’t forget to take breaks when playing for a long time

CUSTOMER SUPPORT / TECHNICAL SUPPORT
Email: support@game-devil.com
Website: www.game-devil.com
Instructions pour le raccordement du Trident PRO-S à la console Switch

Boutons sur le devant de la manette :
1. Pavé directionnel (la manette + peut être changée)       7. Bouton Turbo : Activer et désactiver: appuyez et
2. Boutons (Y, X, B, A) = X, = B                               maintenez enfoncé tout bouton, puis appuyez sur Turbo
3. Stick analogique gauche et bouton L3                     8. Capture d’écran /SHARE
4. Stick analogique droit et bouton R3                      9. Sélection de menus
5. Bouton Home                                              10. Sélection de menus
6. Témoin 1, 2, 3, 4                                        11. Bouton L
                                                            12. Bouton R

                                    9     7     5       8   10

11                                                                                              12

 1                                                                                              2

 3                                                                                              4

                                                6

Boutons sur le côté et l’arrière de la manette :

13                                                               14
                                                                      13. Gâchette RZ
                                                                      14. Gâchette LZ
                                                                      15. Il y a un trou pour le bouton RESET
15
                                                                          à l’arrière du contrôleur
Comment connecter la manette à la console et comment démarrer un jeu : 1. Lorsque vous connectez l’appareil pour la première fois, veuillez suivre les instructions ci-dessous : A) pour détecter et connecter la manette, maintenez le bouton HOME appuyé pendant 5 secondes ; tous les témoins clignotent rapidement. B) lorsque le témoin 1 s’allume et s’arrête de clignoter, la connexion est réussie. 2. Lorsque vous connectez l’appareil les fois suivantes, il suffit de presser le bouton HOME pour activer la manette et elle se connecte automatiquement. 3. Pour entrer dans un jeu : Appuyez sur HOME pour entrer dans le menu du jeu. Choisissez un jeu auquel vous avez déjà joué. Appuyez sur A pour commencer un jeu. 4. Pour éteindre la manette : Pressez le bouton HOME pendant 10 secondes. Instructions de connexion : 1. Appuyez sur le bouton d’alimentation pour allumer la console Switch 2. Appuyez sur A ou sur le bouton HOME pour accéder au menu principal 3. Choisissez « Manettes ».
4. Une fois sur la page « Manettes », cliquez sur « Changer de prise en main / ordre ».

5. Une fois sur la page « Changer de prise en main / ordre », maintenez le bouton HOME appuyé durant 5 secondes
pour rechercher et synchroniser. ** Remarque : les 4 témoins de la manette clignoteront rapidement lorsque la recherche est en cours.

6. Vous verrez l’image d’une manette sur la page. Une fois connectée, elle s’affichera sur la page « Prise en main /
ordre ». ** Remarque : une fois la connexion effectuée, seul le premier témoin (le plus éloigné sur la gauche) s’allumera.

7. Enfin et surtout : appuyez sur A pour terminer le processus de connexion. Après cela, la console Switch reviendra
sur la page « Manettes » et vous serez prêt !
FAQ de la Manette Trident pour console Nintendo SwitchTM

Si la manette ne fonctionne pas avec la console Nintendo SwitchTM :
1. Certains jeux ne sont pas compatibles avec la manette Pro ou la manette Trident PRO-S.
2. Pour les autres jeux :
   a) Si vous utilisez la Nintendo SwitchTM avec la station d’accueil : la Manette Pro et la manette Trident PRO-S sont
   toutes deux compatibles en cas de connexion à une TV.
   b) Si vous utilisez la Nintendo SwitchTM en mode portable : Le Joy-ConTM doit être éteint ou retiré afin de pouvoir
   utiliser la manette Pro ou la manette Trident PRO-S.

Instructions concernant les 4 témoins sur la manette Nintendo SwitchTM :
1. Connexion de la manette à la console de jeu :
   a) Lorsque le bouton HOME est appuyé pour effectuer la connexion, les quatre témoins clignotent rapidement. Une
   fois la connexion effectuée, le témoin correspondant restera sur ON.
   b) Lorsque le bouton HOME est appuyé mais que la connexion n’est pas établie, les quatre témoins clignotent
   lentement.
2. Indications des témoins :
une fois la connexion effectuée, le premier témoin sur la gauche sera allumé (indiquant le Joueur 1). Le second témoin
sur la gauche indique le Joueur 2, et ainsi de suite.
3. Indicateur de charge : les quatre témoins clignotent lentement. Si la manette est en charge durant le jeu, un seul
témoin clignote lentement.
4. Avertissement de batterie faible : si la batterie de la manette est faible, le témoin correspondant clignote lentement.

Autres remarques :
1. L’utilisation du bouton HOME sur la manette Trident PRO-S n’allumera PAS la console.
2. Les fonctions Motion Control et NFC ne sont pas prises en charge par la Game Devil Nintendo SwitchTM Trident
PRO-S.
3. Veuillez essayer de réinitialiser la manette en cas de blocage. Vous trouverez le bouton de réinitialisation dans un
petit trou à l’arrière de la manette.
4. Pour forcer le démarrage de votre console, maintenez appuyé le bouton d’alimentation pendant 12 secondes.

PRÉCAUTIONS D’USAGE
• ÉVITEZ d’exposer le produit à des températures élevées, à la lumière directe du soleil, à l’humidité, ou à de
sources de chaleur comme un four ou des foyers de cuisson
• ÉVITEZ d’utiliser le produit dans des conditions de haute humidité, ou bien de le mouiller à l’eau ou à
d’autres liquides
• ÉVITEZ d’ouvrir, de plier ou de tenter de modifier le produit de quelle façon que ce soit, car cela pourrait
provoquer des chocs électriques, des incendies ou des dégâts
• Nettoyez uniquement avec un chiffon doux et sec, sans utiliser un quelconque dissolvant ou autre
produit chimique

PRÉCAUTIONS SANITAIRES
• Si l’utilisation du produit provoque un quelconque inconfort, arrêtez de l’utiliser et consultez un médecin.Si cet
inconfort est dû à la fonction de vibration du produit, désactivez cette option dans les paramètres devotre console.
Si l’inconfort est causé par de trop fortes lumières, arrêtez de jouer, éteignez votre console et consultez un médecin
• N’oubliez pas de faire des pauses lors de longues sessions de jeu

SERVICE CLIENT / ASSISTANCE TECHNIQUE
Email: support@game-devil.com
Site internet : www.game-devil.com
Istruzioni per la connessione di Trident PRO-S alla console Switch

Pulsanti sulla parte anteriore del controller:
1. Croce direzionale (croce direzionale intercambiabile)   7. Pulsante Turbo: Attivare & Disattivare: tenere premuto
2. Pulsanti azione (Y, X, B, A) = X, = B                      un bottone qualsiasi e premere Turbo
3. Levetta analogica sinistra e pulsante L3                8. Cattura/CONDIVIDI
4. Levetta analogica destra e pulsante R3                  9. Selezione menu
5. Pulsante HOME                                           10. Selezione menu
6. Indicatore LED 1, 2, 3, 4                               11. Pulsante L
                                                           12. Pulsante R

                                     9     7     5     8   10

11                                                                                               12

 1                                                                                               2

 3                                                                                               4

                                                 6

Pulsanti sul lato dorsale e posteriore del controller:

13                                                              14
                                                                      13. Grilletto RZ
                                                                      14. Grilletto LZ
                                                                      15. C’è un foro per il pulsante RESET nella
15
                                                                          parte posteriore del controller
Come collegare il controller alla console e come avviare un gioco: 1. Quando si collega il dispositivo per la prima volta, seguire le seguenti istruzioni: a) Per rilevare e collegare il controller, mantenere premuto il pulsante HOME per 5 secondi; tutti gli indicatori LED lampeggeranno rapidamente. b) Quando l’indicatore LED 1 è acceso in modo permanente, il controller è collegato. 2. La volta successiva che si collega il controller, sarà sufficiente mantenere premuto il pulsante HOME per accenderlo e il dispositivo si collegherà automaticamente. 3. Per accedere a un gioco: Premere HOME per acceder al menu di gioco. Selezionare un gioco a cui si è già giocato. Premere A per avviare il gioco. 4. Per spegnere il controller: Mantenere premuto il pulsante HOME per 10 secondi. Istruzioni di connessione: 1. Premere il pulsante POWER per accendere la console Nintendo Switch. 2. Premere il pulsante A o il pulsante HOME per accedere al menu principale 3. Selezionare “Controller”.
4. Nella pagina “Controller”, fare clic su “Cambia impugnatura/ordine”.

5. Nella pagina “Cambia impugnatura/ordine”, premere e mantenere premuto il pulsante HOME per 5 secondi per
cercare e sincronizzare. **Nota: Le 4 luci LED del controller lampeggeranno velocemente mentre la ricerca è in corso.

6. Sullo schermo vedrai l’immagine di un controller. Una volta connesso, sarà visualizzato nella pagina “Impugnatura/
Ordine”. **Nota: Una volta connesso il controller, solo la prima luce LED (quella più a sinistra) resterà accesa.

7. Infine, la cosa più importante: premere A per completare il processo di connessione. Dopodiché, la console Switch
tornerà alla pagina “Controller” e potrai iniziare a giocare!
Domande frequenti sul controller Trident per la console Nintendo SwitchTM

Se il controller non funziona con la console Nintendo SwitchTM:
1. Alcuni giochi non sono compatibili con il controller Pro o il controller Trident PRO-S.
2. Per gli altri giochi:
    Se si sta usando la console Nintendo SwitchTM con il Dock: sia il controller Pro che il Trident PRO-S sono
   compatibili quando connessi a una TV.
    Se si sta usando la console Nintendo SwitchTM in modalità portatile: il Joy-ConTM deve essere spento e rimosso
   per poter usare il controller Pro o il controller Trident PRO-S.

Istruzioni relative alle 4 luci LED sul controller Nintendo SwitchTM:
1. Collegare il controller alla console di gioco:
    A) Premendo il pulsante HOME per collegarsi, le quattro luci LED lampeggeranno velocemente. Una volta collegato,
    la luce LED relativa resterà ACCESA
    B) Quando il pulsante HOME viene premuto per collegarsi ma la connessione non va a buon fine, le quattro luci LED
    lampeggeranno lentamente
2) Indicazioni delle luci LED:
una volta collegato il controller, la prima luce LED sulla sinistra resterà accesa (a indicare il Giocatore 1). La seconda
luce LED sulla sinistra indica il Giocatore 2, e così via.
3) Indicazione di carica: tutte le quattro luci LED lampeggeranno lentamente. Se il controller si sta caricando durante
il gioco, solo una luce LED lampeggerà lentamente.
4) Avviso batteria scarica: se la batteria del controller è scarica, la luce LED relativa lampeggerà lentamente

Altre considerazioni:
1. premendo il pulsante HOME sul controller Trident PRO-S, la console NON si accende.
2. Il controllo del movimento e le funzioni NFC non sono supportate su Trident PRO-S di Game Devil per Nintendo
SwitchTM
3. Riconfigurare il controller se si blocca, in qualsiasi momento. Il pulsante per la riconfigurazione si trova in un foro
sul retro del controller.
4. Per riavviare forzatamente la console, premere e tenere premuto il pulsante POWER per 12 secondi.

AVVERTENZE PER LA SICUREZZA
• NON esporre il prodotto a temperature calde o fredde o a qualsiasi fonte di calore tra cui gli elementi,
forni o luce diretta, elevata umidità
• NON utilizzare in aree con elevata umidità o in presenza di acqua o altri liquidi
• NON aprire, piegare, riparare o modificare il prodotto in alcun modo, onde evitare shock elettrici, incendi o danni
• Pulire unicamente con un tessuto morbido e asciutto, senza utilizzare alcun tipo di solvente o prodotto chimico

AVVERTENZE PER LA SALUTE
• In caso di fastidio dovuto all’utilizzo del prodotto, interromperlo subito e consultare un medico. Se dovuto alla
funzione di vibrazione del prodotto, disattivare la funzione tramite le impostazioni del sistema di gioco; se dovuto
a luci forti, interrompere di giocare, spegnere il sistema di gioco e consultare un medico
• Effettuare sempre delle pause nel corso di sessioni di gioco prolungate

SUPPORTO CLIENTI/SUPPORTO TECNICO
Email: support@game-devil.com
Sito Web: www.game-devil.com
Anleitung zur Verbindung des Trident PRO-S mit der Nintendo Switch-Konsole
Tasten vorne auf dem Controller:
1. Steuerkreuz (veränderbar) 7. Turbo-Knopf: Aktivieren & Deaktivieren: Drücken und
2. Aktionsknöpfe (Y, X, B, A) = X, = B halten Sie die gewünschte Taste drücken Sie dann die
3. Linker Analog-Stick und L3-Taste Turbo-Taste.
4. Rechter Analog-Stick und R3-Taste 8. Screenshot/SHARE (Teilen)
5. HOME-Knopf 9. Menüauswahl
6. LED-Anzeige 1, 2, 3, 4 10. Menüauswahl
11. L-Taste
12. R-Taste
9 7 5 8 10
11 12
1 2
3 4
6
Schultertasten und Tasten hinten am Controller:
13 14
13. RZ-Trigger
14. LZ-Trigger
15. Hinten auf dem Controller befindet sich ein
15
Loch für den RESET-KnopfSo verbinden Sie den Controller mit der Konsole und starten ein Spiel: 1. Folgen Sie beim ersten Anschließen des Geräts bitte dieser Anleitung: A) Halten Sie den HOME-Knopf 5 Sekunden lang gedrückt, um den Controller zu erkennen und zu verknüpfen. Alle LED-Anzeigen werden dann schnell blinken. B) Sobald die LED-Anzeige 1 durchgehend leuchtet, wurde der Controller erfolgreich verbunden. 2. Wenn Sie das Gerät die darauf folgenden Male verbinden möchten, halten Sie einfach die HOME- Taste gedrückt, um den Controller einzuschalten. Er wird dann automatisch verbunden. 3. Zum Spielen: Drücken Sie HOME, um das Spielmenü aufzurufen. Wählen Sie ein Spiel, das Sie zuvor schon gespielt haben. Drücken Sie A, um ein Spiel zu starten. 4. Zum Ausschalten des Controllers: Halten Sie HOME 10 Sekunden lang gedrückt. Verbindungsanleitung: 1. Drücken Sie den POWER-Knopf, um die Nintendo Switch-Konsole einzuschalten. 2. Drücken Sie den A-Knopf oder den HOME-Knopf, um das Hauptmenü 3. Wählen Sie „Controller“.
4. Wählen Sie auf dieser Seite „Griffweise/Reihenfolge ändern“.

5. Halten Sie danach den HOME-Knopf 5 Sekunden lang gedrückt, um zu suchen und zu synchronisieren.
**Hinweis: Während die Suche läuft, werden die 4 LED-Anzeigen des Controllers schnell blinken.

6. Sie sehen ein Bild eines Controllers auf der Seite. Sobald er verbunden wurde, wird er auf der Seite „Griffweise/
Reihenfolge ändern“ angezeigt. **Hinweis: Sobald die Verbindung hergestellt ist, wird nur die erste LED-Anzeige (ganz links) erleuchtet sein.

7. Zu guter Letzt, und am wichtigsten: Drücken Sie den A-Knopf, um den Verbindungsvorgang abzuschließen. Danach
kehrt die Nintendo Switch-Konsole zurück zur Seite „Controller“ und Sie sind startklar!
FAQs für den Trident-Controller für Nintendo SwitchTM

Falls der Controller nicht mit der Nintendo SwitchTM-Konsole funktionieren sollte:
1. Manche Spiele sind nicht mit dem Pro Controller oder dem Trident PRO-S Controller kompatibel.
2. Bei anderen Spielen:
    Bei Verwendung von Nintendo SwitchTM mit Station: Sowohl der Pro Controller als auch der Trident PRO-S
   Controller sind bei Anschluss an ein TV-Gerät kompatibel.
    Bei Verwendung von Nintendo SwitchTM im Handheld-Modus: Joy-ConTM muss ausgeschaltet oder entfernt
   werden, um den Pro Controller oder den Trident PRO-S Controller verwenden zu können.

Anweisungen für die 4 LED-Anzeigen am Nintendo SwitchTM Controller:
1. Verbinden des Controllers mit der Spielekonsole:
   A) Wenn der HOME-Knopf zum Verbinden gedrückt wird, blinken die LED-Anzeigen schnell. Sobald der Anschluss
   erfolgt ist, leuchtet die entsprechende LED durchgehend.
   B) Wenn der HOME-Knopf zum Verbinden gedrückt wird, die Verbindung aber fehlschlägt, blinken die LED-Anzeigen
   langsam.
2. LED-Anzeigen:
Bei Verbindung leuchtet die erste LED-Anzeige auf der linken Seite (Spieler 1). Die zweite LED-Anzeige auf der linken
Seite zeigt Spieler 2 an und so weiter.
3. Ladeanzeige: Alle vier LED-Anzeigen blinken langsam. Wenn der Controller während des Spielens aufgeladen wird,
blinkt nur eine LED-Anzeige langsam.
4. Hinweis für niedrigen Ladestand: Wenn der Controller-Akku einen niedrigen Ladestand hat, blinkt die entsprechende
LED-Anzeige langsam.

Weitere Anmerkungen:
1. Mit dem HOME-Knopf auf dem Trident PRO-S Controller kann die Konsole NICHT eingeschaltet werden.
2. Bewegungssteuerung und NFC-Funktionen werden vom Game Devil Nintendo SwitchTM Trident PRO-S nicht unterstützt.
3. Bitte versuche den Controller zurückzusetzen, falls er hängenbleiben sollte. Du findest den RESET-Knopf in einem
kleinen Loch auf der Rückseite des Controllers.
4) Für einen Hard Reset der Konsole hältst du den POWER-Knopf mindestens 12 Sekunden lang gedrückt.

SICHERHEITSVORKEHRUNGEN
• SCHÜTZEN Sie das Produkt vor heißen und kalten Temperaturen und hoher Luftfeuchtigkeit und halten
Sie es fern von Wärmequellen wie Wetter, Öfen und direkte Sonneneinstrahlung.
• Benutzen Sie das Gerät NICHT bei hoher Luftfeuchtigkeit oder wenn es nass bzw. feucht ist.
• Das Produkt NICHT öffnen, verbiegen, auf eigene Faust zu reparieren versuchen oder auf andere
Weise bearbeiten, da dies Elektroschocks, Feuer oder Schäden verursachen kann.
• Nur mit einem weichen, trockenen Tuch reinigen – keine Lösungsmittel oder Chemikalien verwenden.

ZUM SCHUTZ IHRER GESUNDHEIT
• Wenn bei der Verwendung des Produkts Beschwerden auftreten, beenden Sie diese und suchen Sie einen
Arzt auf. Sollten die Beschwerden durch die Vibrationsfunktion des Produkts verursacht worden sein, schalten
Sie diese Funktion in den Einstellungen Ihrer Konsole aus; wenn die Beschwerden durch grelles Licht
verursacht wurden, hören Sie auf zu spielen und suchen Sie einen Arzt auf
• DDenken Sie daran, beim längeren Spielen Pausen einzulegen.

CUSTOMER SUPPORT / TECHNICAL SUPPORT
Email: support@game-devil.com
Website: www.game-devil.com
Instrucciones para conectar Trident PRO-S a la consola Switch
Botones en la parte frontal del mando:
1. Pad direccional (cruceta intercambiable) 7. Botón Turbo: Activar y desactivar: presione y mantenga
2. Botones de acción (Y, X, B, A) = X, = B presionado cualquier botón y presione Turbo
3. Joystick derecho y botón R3 8. Captura de pantalla/COMPARTIR
4. Right Analog Stick and R3 button 9. Selección del menú
5. Botón INICIO 10. Selección del menú
6. Indicador LED 1, 2, 3, 4 11. Botón L
12. Botón R
9 7 5 8 10
11 12
1 2
3 4
6
Botones superiores y en la parte posterior del mando:
13 14
13. Botón RZ
14. Botón LZ
15. En la parte posterior del mando hay un
15
agujero para el botón de REINICIOCómo conectar el mando a la consola y empezar a jugar: 1. Cuando conectes el dispositivo por primera vez, debes seguir las siguientes instrucciones: A) Mantén pulsado el botón INICIO durante 5 segundos para detectar y conectar el mando. Todos los indicadores LED parpadearán rápidamente. B) Cuando el indicador LED 1 esté encendido y fijo, significa que el proceso de conexión se ha realizado correctamente. 2. Cuando conectes el dispositivo otra vez, mantén pulsado el botón INICIO para encender el mando y este se conectará de forma automática. 3. Para acceder a un juego: Pulsa INICIO para acceder al menú de juegos. Elige un juego al que ya hayas jugado. Pulsa A para iniciar un juego. 4. Para apagar el mando: mantén pulsado el botón INICIO durante 10 segundos. Instrucciones de conexión: 1. Pulsa el botón de encendido para encender la consola Switch. 2. Pulsa el botón INICIO o A para acceder al menú principal. 3. Elige «Mandos».
4. Una vez que hayas entrado en la página «Mandos», haz clic en «Cambiar ajuste/orden».

5. Una vez que hayas entrado en la página «Cambiar ajuste/orden», mantén pulsado el botón INICIO durante cinco
segundos para buscarlos y sincronizarlos. **Nota: Los cuatro indicadores LED del mando parpadearán rápidamente durante el
proceso de búsqueda.

6. Podrás ver la imagen de un mando en la página. Una vez que se haya conectado, se mostrará en la página «Ajuste/
Orden». **Nota: Una vez que se haya establecido la conexión, solo la primera luz LED (la del extremo izquierdo) estará encendida.

7. Por último, es muy importante que pulses A para poder completar el proceso de conexión. A continuación, la consola
Switch vuelve a la página «Mandos» y ya está todo listo.
Preguntas frecuentes del mando Trident para la consola Nintendo SwitchTM

Si el mando no funciona con la consola Nintendo SwitchTM:
1. Algunos juegos no son compatibles con el mando Pro o el mando Trident PRO-S.
2. Para otros juegos:
    Si usas tu Nintendo SwitchTM con su base: tanto el mando Pro como el Trident PRO-S son compatibles al
   conectarse a un televisor.
    Si usas tu Nintendo SwitchTM en modo portátil: Debes apagar o retirar el Joy-ConTM para poder usar el mando
   Pro o el mando Trident PRO-S.

Instrucciones para los cuatro indicadores de jugador del mando de Nintendo SwitchTM:
1. Cómo conectar el mando a la consola:
   A) Si pulsas el botón HOME para conectarte, los cuatro indicadores parpadearán rápidamente. Una vez te hayas
   conectado, el indicador con tu número de jugador permanecerá encendido.
   B) Si pulsas el botón HOME para conectarte y la conexión no llega a realizarse, los cuatro indicadores parpadearán
   lentamente.
2. Señales de los indicadores:
Al conectarte, el primer indicador de la izquierda (el del jugador 1) se encenderá. El segundo indicador empezando por
la izquierda corresponde al jugador 2 y así sucesivamente.
3. Señales de carga: Los cuatro indicadores parpadearán lentamente. Si cargas el mando mientras juegas, solo
parpadeará lentamente uno de los indicadores.
4. Aviso de poca batería: Si al mando le queda poca batería, el indicador del jugador que lo esté usando parpadeará
lentamente.

Otros comentarios:
1. No podrás encender la consola pulsando el botón HOME del mando Trident PRO-S.
2. Las funciones de sensor de movimiento y NFC no son compatibles con el mando Trident PRO-S de Game Devil para
Nintendo SwitchTM.
3. Trata de reiniciar el mando si este no responde en algún momento. Encontrarás el botón de reinicio en un pequeño
agujero de la parte posterior del mando.
4) Para reiniciar tu consola, mantén pulsado el botón POWER durante 12 segundos.

PRECAUCIONES DE SEGURIDAD
• NO expongas el producto a temperaturas altas ni muy bajas ni a fuentes de calor como radiadores,
hornos o la luz directa del sol, ni a niveles altos de humedad.
• NO uses el producto en zonas con mucha humedad o si se moja con agua u otros líquidos.
• NO abras, dobles ni efectúes otras acciones para modificar el producto, ya que podría ocasionar daños
eléctricos o materiales o fuego.
• Limpia el producto solo con un trapo seco y suave sin ningún disolvente o producto químico.

PRECAUCIONES DE SALUD
• Si experimentas cualquier molestia al usar el producto, para inmediatamente y consulta con tu médico.
Si la molestia es causada por la función de vibración, desactiva la función en los ajustes del sistema.
Si la causa son las luces brillantes, deja de jugar, desconecta el sistema y consulta con tu médico.
• No olvides descansar ocasionalmente si juegas mucho tiempo.

CUSTOMER SUPPORT / TECHNICAL SUPPORT
Email: support@game-devil.com
Sitio web: www.game-devil.com
Instruktioner för att ansluta Trident PRO-S handkontroll till Switch konsol
Knappöversikt på handkontrollen:
1. Styrkors (utbytsbara styrkors 2 x 3 olika) 7. Turboknapp: För att aktivera & inaktivera, håll ner valfri
2. Actionknappar (Y, X, B, A) = X, = B knapp och sedan Turbo.
3. Vänstra analogspak samt L3 8. Skärmdump/Delning
4. Högra Vänstra analogspak samt R3 9. Menyval
5. HEM-knappen 10. Menyval
6. LED Indikator spelare 1, 2, 3, 4 11. L-knapp
12. R-knapp
9 7 5 8 10
11 12
1 2
3 4
6
Sidoknappar/Triggers samt baksidan:
13 14
13. RZ-avtryckare
14. LZ-avtryckare
15. Resetknapp (använd gem för att komma åt)
15Anslut din handkontroll och starta ett spel: 1. Vänligen följ nedanstående instruktioner för att koppla PRO-S handkontrollen till Switch för första gången A) För att synka/ansluta handkontrollen, tryck och håll ner Hemknappen i 5 sekunder. Samtliga LED lampor kommer blinka snabbt. B) När den första LED-lampan lyser, utan att blinka, är synkningen slutförd Fortsättningsvis behöver du bara trycka på HEM-knappen för att starta handkontrollen, som därmed ansluts automatiskt. 2. För att starta ett spel, tryck på HEM och sedan A för att komma till spelmenyn. Välj fortsätta eller starta ett nytt spel, genom att trycka på A knappen. 3. För att stänga av handkontrollen, håll ner HEM-knappen för 10 sekunder. Anslutnings instruktioner: 1. Tryck på Powerknappen för att starta Switch konsolen. 2. Tryck på A eller Hemknappen för att komma till huvudmeny. 3. Välj «Controller».
4. I «Controllers» menyn, välj «Change Grip/Order».

5. I «Change Grip/Order» menyn, tryck och håll ner HEM-knappen i 5 sekunder
**Notera att samtliga LED-lampor kommer blinka snabbt under sökningen.

6. När synkning/anslutningen är klar kommer du att se en bild på en handkontroll,
** Notera att när handkontrollen är ansluten till konsolen kommer den första LED-lampan lysa konstant.

7. Tryck på A för att slutföra synkning/anslutning.
FAQ for Trident Controller for Nintendo SwitchTM console (Endast Engelska)

If the controller does not work with the Nintendo SwitchTM console:
1. Some games are not compatible with the Pro Controller or the Trident PRO-S Controller.
2. For other games:
    If using the Nintendo SwitchTM with the dock: both the Pro Controller and the Trident PRO-S Controller are
   compatible when connected to a TV.
    If using the Nintendo SwitchTM in handheld mode: Joy-ConTM needs to be switched off or removed in order to
   use the Pro Controller or the Trident PRO-S Controller.

Instructions for the 4 LED lights on the Nintendo SwitchTM Controller:
1. Connecting the controller to the games console:
   A) When the HOME button is pressed to connect, the four LED lights will flash quickly. Once connected the relevant
   LED will stay ON
   B) When the HOME button is pressed to connect but connection is unsuccessful, the four LED lights will flash slowly
2. LED light indications:
When connected, the first LED light on the left will be on (indicating Player 1). The second LED light on the left indicates
Player 2, and so on.
3. Charging indication: All four LED lights will flash slowly. If the controller is charging whilst playing, only one LED
will flash slowly.
4. Low battery alert: If the controller battery is low, the relevant LED light will flash slowly

Other remarks:
1) Using the HOME button on the Trident PRO-S Controller will NOT turn on the console.
2) Motion control and NFC functions are not supported on Game Devil Nintendo SwitchTM Trident PRO-S
3) Please try to reset the controller if it gets stuck at any time. You will find the reset button in a small
   hole on the back of the controller.
4) To hard boot your console, press and hold the POWER button for 12 seconds.

FÖRSIKTIGHETSÅTGÄRDER
• Utsätt INTE produkten för varma eller kalla temperaturer eller nära värmekällor såsom element, ugnar eller direkt
solljus, hög luftfuktighet
• Använd den INTE på platser med hög luftfuktighet eller om den är våt av vatten eller andra vätskor
• Öppna eller bänd den INTE för att försöka modifiera den på något sätt då detta kan orsaka elchock,
brand eller skada.
• Rengör den endast med en mjuk, torr trasa, använd inte någon typ av lösningsmedel eller kemikalier

HÄLSOVARNINGAR
• Om du upplever obehag när du använder produkten bör du sluta använda den och söka läkarhjälp.
Om det orsakas av produktens vibrationsfunktion kan du stänga av den i din konsols inställningar.
Om det orsakas av starkt ljus, sluta spela och stäng av konsolen och sök läkarhjälp
• Glöm inte bort att göra pauser när du spelar under en längre tid

KUNDSUPPORT/TEKNISK SUPPORT
Email: support@game-devil.com
Hemsida: www.game-devil.com
Declaration of Conformity
ENG::
Herby, Game Devil, PO Box 5083, 65005 Karlstad, Sweden, declares that this product is in compliance with the
essential requirements and other relevant provisions of Directives 2014/53/EU, 2014/30/EU, 2011/65/EU...
FR::
Par la présente, Game Devil, PO Box 5083, 65005 Karlstad, Sweden, déclare que ce produit est conforme aux
principales exigences et aux autres dispositions des directives 2014/53/EU, 2014/30/EU, 2011/65/EU.
DE::
Hiermit erklärt die Game Devil, PO Box 5083, 65005 Karlstad, Sweden, dass dieses Produkt die grundlegenden
Anforderungen und übrigen einschlägigen Bestimmungen der Richtlinien 2014/53/EU, 2014/30/EU, 2011/65/EU.
IT::
Con la presente, Game Devil, PO Box 5083, 65005 Karlstad, Sweden, dichiara che questo prodotto è conforme ai
requisiti essenziali e alle altre disposizioni pertinenti stabilite dalle direttive 2014/53/EU, 2014/30/EU, 2011/65/EU.
ES::
Por la presente, Game Devil, PO Box 5083, 65005 Karlstad, Sweden, declare que este product cumple los requisitos
esenciales de otras disposiciones relevantes de las Directivas 2014/53/EU, 2014/30/EU, 2011/65/EU.
SE::
Härmed intygar Game Devil, PO Box 5083, 65005 Karlstad, Sweden, att den här produkten överensstämmer med de
grundläggande kraven och andra relevanta delar av direktiven 2014/53/EU, 2014/30/EU, 2011/65/EU.
GameDevilTM © 2017 Game Outlet Europe AB. GameDevil and the GameDevil logo are registered trademarks or trademarks of Game Outlest
Europe AB. Nintendo, Nintendo Switch are registered trademarks of Nintendo of Europe GMBH. Bluetooth is a registered trademark of
Bluetooth SIG Inc. All other mentioned trademarks are either trademarks or registered trademarks of their respective owners. This product
is not endorsed, manufactured, produced, sponsored or licensed by Nintendo of Europe GMBH, or Bluetooth SIG Inc.
Game Outlet Europe AB, PO Box 5083, SE-65005 Karlstad, Sweden.Vous pouvez aussi lire