MONTAGEANLEITUNG PROFILGATEAQUA - PROFILGATE AQUA MONTAJ TALIMATI INSTRUCCIONES DE INSTALACIÓN DE PROFILGATEAQUA
←
→
Transcription du contenu de la page
Si votre navigateur ne rend pas la page correctement, lisez s'il vous plaît le contenu de la page ci-dessous
Montageanleitung ProfilGate®aqua
Assembly manual ProfilGate® aqua
ProfilGate® aqua montaj talimatı
Instructions de montage ProfilGate®aqua
Instrucciones de instalación de ProfilGate®aqua
Istruzioni di montaggio ProfilGate® aqua

                                                  03.2021
Schnittzeichnungen zur Grubentiefe
Sectional drawing for depth of pit
Çukur derinliği kesit çizimleri
Plan de coupe pour la profondeur de la fosse
Planos de sección a la profundidad de la cavidad
Sezione per la realizzazione del vano
A ProfilGate® ProfilGate®
i45 aqua / sti 45 aqua – Typ 1 i45 aqua / sti 45 aqua – Typ 2
4 - 8 mm 0.16 to 0.32” 4-8 mm 0.16 to 0.32”
60-200 mm 60-200 mm
2.4 to 8” 2.4 to 8”
45 mm 45 mm
1.77” 1.77”
1- 5 mm 1-5 mm
up to 0.2” up to 0.2”
B ProfilGate® ProfilGate®
i55 aqua / sti 55 aqua – Typ 1 i55 aqua / sti 55 aqua – Typ 2
4 - 8 mm 0.16 to 0.32” 4-8 mm 0.16 to 0.32”
60-200 mm 60-200 mm
2.4 to 8” 2.4 to 8”
55 mm 55 mm
2.17” 2.17”
1- 5 mm 1-5 mm
up to 0.2” up to 0.2”
Wanne V2A Füller/Kleber 1-5mm unter der Wanne
Stainless-steel tray Beachten Sie unbedingt die Mindestverarbeitungstemperatur des Klebstoffs!
Paslanmaz çelik tepsi V2A Filling/adhesive 1-5 mm / up to 0.2” under the tray
Bac en inox It is essential to observe the minimum processing temperature of the adhesive!
Cubeta en inox Tepsi altında dolgu/yapıştırıcı 1-5 mm
Vasca in acciaio inossidabile Yapıştırıcının minimum işlem sıcaklığınından emin olunuz!
Colle beton/métal 1-5 mm sous le bac
Ausgleichsmasse Il est essentiel de respecter la température minimale de la mise en oeuvre de l'adhésif!
Levelling compound Relleno/pegamento 1-5mm debajo de la cubeta
Dengeleme kütlesi ¡Es fundamental respetar la temperatura mínima de procesamiento del adhesivo!
Masse de compensation Riempitivo/adesivo 1-5 mm al di sotto della griglia
Mortero autonivelante È fondamentale rispettare la temperatura minima di lavorazione dell'adesivo!
Primer autolivellante
Optional nach Herstellerempfehlung des verwendeten Randverfugungsmaterials:
Fugenfüllung 60 -200 mm rings um das gesamte Reinigungsfeld (Außenrand) Wartungsfuge 4-8 mm Polyurethan
Joint filling 60-200 mm / 2.4 to 8” – around the whole cleaning field (outer edge) Optional according to manufacturer's recommendation of the edge grouting material used:
Bağlantı dolgusu tüm temizlik alanında yaklaşık 60 -200 mm (dış kenarı) maintenance joint of 4-8 mm polyurethane
Pâte d´échantéité pour joints 60 – 200 mm autour du champ de nettoyage (bord Opsiyonel olarak kenar derz dolgu malzeme üreticisinin tavsiyesine göre: dolgu derzi 4-8 mm poliüretan
extérieur) Relleno junta 60-200 mm alrededor de toda la banda de limpieza (borde Vue en coupe: Option selon la recommandation du fabricant du matériau: joint entre 4-8 mm de
exterior) polyuréthane
Riempimento congiunto 60-200mm – attorno alla fascia esterna del campo di pulizia De forma opcional, a recomendación del fabricante, utilice junta de mantenimiento de poliuretano
(bordo esterno) en los laterales con un espesor de 4-8 mm
In opzione, come da suggerimenti del costruttore installare un giunto di dilatazione in poliuretano
da 4-8mm lungo il contorno dello scasso.1 2
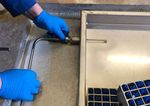
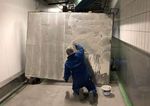
Grubenmaße anzeichnen und ausschneiden. Berücksichtigen Sie unbedingt die Anschlüsse. Bodenplatte stückweise entfernen.
Define pit measurements and cut. Remove floor plate bit by bit.
Çukur ölçülerini işaretleyip kesiniz. Bağlantıları dikkate aldığınızdan emin olunuz. Taban plakasını parça parça sökünüz.
Marquez et découpez les dimensions de la fosse. Veillez à tenir compte des connexions. Enlevez la plaque de fond pièce par pièce.
Defina las medidas en el suelo para cortar. Quitar la placa de base poco a poco.
Delimitare il perimetro del sistema ed eseguire il taglio. Rimuovere i blocchi di pavimento.
3 4
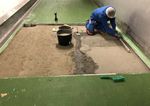
Grube mit Ausgleichsmasse auf Sollmaß begradigen. Abfluss-Untertopf auf Niveau einsetzen und an Abwassersystem anschließen.
Prepare pit with self-levelling material to preferred measurements. Install drain bucket to level and attach the draining system to it.
Çukuru dolgu ile gerekli seviyeye getiriniz. Tahliye kabını düz bir şekilde yerleştirip tahliye sistemine bağlayınız.
Redressez la fosse à la dimension de consigne à l'aide d'une masse de compensation. Insérez la soucoupe de vidange au niveau et la raccordez au réseau d'égout.
Prepare el foso con cemento autonivelante. Instalar el sistema de desagüe a nivel y conectar el sistema de drenaje a él.
Preparare il vano alla profondità richiesta usando materiale autolivellante. Installare la piletta livello e collegarla con l’impianto di scarico.
5 6 52 mm 2.04”
26 mm 26 mm
1.02” 1.02”
45 mm 1.77”
55 mm 2.17”
Kleber/Füller ganzflächig mit Zahnspachtel auf Boden oder Wannenunterseite auftragen. Optional müssen Sie mit Wannenverbindungen arbeiten, wenn mehrere Wannen in Reihe
Wannen aufkleben. Mindestverarbeitungstemperatur des Klebstoffs beachten! installiert werden. Nivellieren Sie die Wannen und Verbindungsprofile exakt aus.
Apply glue/filler material on bottom of tray with a comb spattle. Please observe the minimum In case you install several trays in a row you will have to join the trays using the connecting
processing temperature of the adhesive! bar. Make sure that they are levelled.
Yapıştırıcı/ dolgu maddesini tepsinin tabanına taraklı mala ile tüm yüzeye uygulayınız. Y apıştırıcının Opsiyonel olarak birden fazla tepsi kurarken tepsi bağlantılarıyla çalışmanız gerekir. Tepsi ve bağlantı
minimum işlem sıcaklığına dikkat ediniz! profillerini tam olarak hizalayınız.
Appliquez la colle sur toute la surface en bas du bac ou sur la surface du sol de la fosse avec En option, vous devez travailler avec des joints de liaison si plusieurs bacs sont installés l ún
une spatule à dents. Tenez compte de la température minimale de la mise en oeuvre de l'adhésif! à côté de l´autre.
Aplique el pegamento/material de relleno en la cara inferior de la bandeja con una espátula En caso de instalar varias bandejas, deberán estar conectadas por los perfiles de conexión a
peine. Respete la temperatura mínima de procesamiento del adhesivo. nivel del suelo.
Stendere l’adesivo sul fondo della vasca con una spatola dentata. Rispettare la temperatura In opzione nel caso di vasche contigue livellare le vasche e connetterle con i profili di
minima di lavorazione dell'adesivo! collegamento dedicati.7 8
Mediumzufuhr anschließen. Randbereiche bündig mit VA-Wanne und Fußboden verfüllen (optional Polyurethanfuge
Attach liquid supply. verwenden).
Sıvı bağlantısını ekleyiniz. Fill in the sites between the stainless steel trays and floor with elastic grout.
Connectez l´alimentation d´eau. Çelik tepsi ile zemin arasındaki boşlukları düz şekilde doldurunuz. (opsiyonel olarak poliüretan derz
Conecte la alimentación de líquidos. kullanınız).
Collegare la mandata del liquido. Remplissez l´endroit entre les bords du bac et les bord de la fosse avec polyuréthane.
Rellene los huecos entre las bandejas y el suelo con mortero.
Riempire l’eccesso dello scasso con malta elastica.
9 10
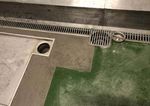
Grubenrand um die VA Wanne ausgießen und sauber anpassen. Einsatzbereites ProfilGate® aqua Feld.
Fill in the edges of the pit and make sure the material is connecting the stainless steel trays. Ready installed ProfilGate® aqua field.
Çelik tepsi kenar boşluklarını temiz şekilde doldurunuz. Kullanıma hazır ProfilGate® aqua alanı.
Ajustez proprement l´endroit entre le sol et le bac. ProfilGate® aqua prêt à l´emploi.
Rellene los laterales comprendidos entre bandejas y laterales del foso, asegurándose que Sistema Profilgate® Aqua listo.
las bandejas queden fijas. Il sistema ProfilGate® aqua è installato e pronto all’uso.
Riempire il contorno dello scasso assicurandosi che il riempitivo aderisca alle vasche in
acciaio inox.Ablaufvarianten
Outlet variants
Tahliye seçenekleri
Variantes de drain
Variantes del sistema de desagüe
Varianti di scarico
A B
Seitlicher Ablauf DN 70 Typ1, Variante A Ablauf unten DN70 Typ1, Variante B
Side outlet DN 70 type1, variant A Outlet bottom DN70 type1, variant B
Yan tahliye DN 70 Tip1, seçenek A Alt tahliye DN70 Tip1, seçenek B
Drain latérale DN 70 Type1, variante A Drain en bas DN70 Type1, variante B
Sistema de desagüe lateral DN 70 tipo1, variante A Sistema de desagüe inferior DN70 tipo1, variante B
Scarico laterale DN 70 Tipo 1, Variante A Scarico sotto DN70 Tipo 1, Variante B
höhenverstellbar höhenverstellbar
height-adjustable height-adjustable
Yüksekliği ayarlanabilir Yüksekliği ayarlanabilir
Réglable en hauteur Réglable en hauteur
Regulable en altura Regulable en altura
Regolabile in altezza Regolabile in altezza
245 mm 9.65” 245 mm 9.65”
ø48,3 x 2 mm ø1.9 x 0.79” ø 48,3 x 2 mm ø1.9 x 0.79”
45 mm
55 mm
1.77”
2.16”
45 mm 55 mm
3.74 - 4.72”
3.35 - 4.33”
95-120 mm
85-110 mm
105-125 mm
3.70- 4.53”
4.13 - 4.92”
95-115 mm
1.77” 2.16”
ø 196 mm
ø 7.72” ø155 mm ø6.10” ø 196 mm ø 7.72”
142 mm 5.59”
160 mm 6.30”
120 mm
4.73”
ø2.95 x 0.79”
ø75 x 2 mm
ø 153 mm ø6.02”
99 mm
3.90”
ø 153 mm ø6.02”
ø 75 mm ø 2.95”
HEUTE Maschinenfabrik GmbH & Co. KG · Höhscheider Weg 37 · 42699 Solingen · Germany
Tel.: +49 (0) 212 - 380 310 · Fax: +49 (0) 212 - 380 31 39 · info@profilgate.de · www.profilgate.comTipps und Hinweise zur Montage
Dos und Don’ts
İpuçları ve kurulum talimatları
Instructions pour obtenir une bonne installation
Consejos para el montaje
Indicazioni per una corretta installazione
Aussparung muss groß genug sein, um eine ordnungsgemäße
✘ ✔
Angleichung zwischen Boden und Wanne zu gewährleisten.
Please make sure that the recess is large enough for
a proper adjustment between the floor and the tray.
Zeminde açılan çukur ve tepsilerin yüksekliği aynı olması ve,
çukurun kenarlarındaki dolguda zeminde gömülü tepsilerle aynı
hiza sağlanması gerekiyor.
La réservation dans le sol doit être suffisante pour permettre de mettre
exactement à niveau la partie supérieure du bac avec la surface du sol.
La cavidad tiene que ser suficientemente grande para poder armonizar
el canto del cubeto al mismo nivel como el suelo que le rodea.
Assicurarsi che il vano sia sufficientemente profondo per un corretto
allineamento a livello fra vasche e pavimento.
Wannen und Bodenabläufe dürfen nicht mit rostigen Nägeln, oder
✘ ✔
sonstigen eisenhaltigen Materialien wie Schleifstaub, Spänen und
Bauschutt etc. in Berührung kommen (Kontaktkorrosion). Bei
Schleifarbeiten ist die komplette Einheit gut abzudecken!
Trays and ground drains may not come into contact with rusty nails
or other materials containing iron such as grinding dust, chips and
rubble (contact corrosion). The complete unit must be covered well
during grinding work!
Tepsiler ve zemin tahliyeleri paslı çiviler veya metal talaş, çapak ve yapı artıkları gibi
demir içeren diğer malzemelerle temas etmemelidir (temas korozyonu). Taşlama
çalışmalarında tüm birimin üzeri iyi şekilde örtülmelidir!
Les bacs et les drains de plancher ne doivent pas entrer en contact avec des clous
rouillés ou d'autres matériaux ferreux tels que la poussière de meulage, les copeaux
et les gravats de construction, etc. Lors du meulage, l'ensemble de l'appareil doit être
bien recouvert !
Las cubetas y los desagües del suelo no deben entrar en contacto con clavos oxi-
dados u otros materiales ferrosos, como polvo de esmerilado, virutas y escombros,
etc. (corrosión por contacto). ¡Durante los trabajos de esmerilado, se debe cubrir
completamente toda la unidad!
Le vasche e gli scarichi a pavimento non devono venire a contatto con chiodi arrug-
giniti o altri materiali ferrosi come polvere di rettifica, trucioli e detriti edilizi, ecc.
(corrosione da contatto). Durante la rettifica, l'intera unità deve essere ben coperta!
Wanne muss ganzflächig verklebt werden. Punktuelle Verklebung
✘ ✔
führt zu Unebenheiten – eine vollflächige Verklebung der Wannen
mit dem Untergrund ist zwingend erforderlich.
The floor underneath the tray has to be fully covered with glue,
unlike to be seen in the picture above. Missing support from
underneath may lead to loud noises and dents in this tray.
Tepsi altları tüm yüzeye yapıştırılmalıdır. Noktasal yapıştırma
düzensizliğe yol açar. Tepsi altlarının zemine tamamen yapıştırılması önemlidir.
Il est indispensable que le dessous du bac est collé dans sa totalité de la surface.
Des collages ponctuels provoqueront des différences de niveau.
Hay que aplicar el adhesivo por toda la parte inferior del cubeto en vez de hacer lo
solo puntualmente. La aplicaión en algunos puntos complicaria mucho la alineación
posterior.
Incollare le vasche sull’intera superficie del fondo altrimenti c’è un elevato rischio
di renderle instabili e difficili da allineare.
HEUTE Maschinenfabrik GmbH & Co. KG · Höhscheider Weg 37 · 42699 Solingen · Germany
Tel.: +49 (0) 212 - 380 310 · Fax: +49 (0) 212 - 380 31 39 · info@profilgate.de · www.profilgate.comVous pouvez aussi lire


