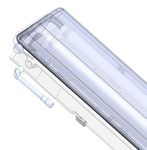
Luminaire fluorescent étanche / weatherproof fluorescent light fitting
←
→
Transcription du contenu de la page
Si votre navigateur ne rend pas la page correctement, lisez s'il vous plaît le contenu de la page ci-dessous
—
N OT I C E D ’ I N S TA L L AT I O N E T D ’ E N T R E T I E N
M A I N T E N A N C E A N D I N S TA L L AT I O N I N S T R U C T I O N S
NT29 REV5

Luminaire fluorescent étanche /
weatherproof fluorescent light fitting

                                                                                               Caractéristiques / Features
                                                                                               • Double verrouillage pour une meilleure étanchéité /
                                                                                                 Double central locking for ingress protection
                                                                                               • Ensemble des composants montés sur platine
                                                                                                 pour son remplacement aisé lors de la
                                                                                                 maintenance / All components mounted on hinged
                                                                                                 and removable gear tray which gives easy access
                                                                                                 for maintenance
                                                                                               • Accessoires inclus (presse-étoupe, bouchon &
                                                                                                 fixations) / Including accessories (cable gland,
                                                                                                 plug & fixing brackets)

—
01

—                            —                                                                              —
01 Luminaire fluorescent     Dimensions                                                                     Certifications / Approvals & certifications
étanche / weatherproof
fluorescent light fitting
EVT - Industrial                                                                                             IP66 IK10
applications

                             1. Encombrement / Dimensions

                             Référence / Reference                                    A±3                B±3                C±3     Poids max. / Max. weight kg
                             EVT 120
                             EVT 220
                             EVT 120emB
                             EVT 220emB                                                785               400                 432                           5,8 / 6

                             EVT 140
                             EVT 240
                             EVT 140emB
                             EVT 240emB                                               1370                                                                8,5 / 8,7
                             EVT 165
                             EVT 265
                             EVT 165emB
                             EVT 265emB                                               1670               700                 900                           9 / 9.3

                                       Laisser un espace de 250 mm autour de l’appareil / Allow a 250 mm space all around the luminaire
2
2. Caractéristiques / Technical Specifications
Référence / Reference: EVT 120… EVT 220… EVT 140… EVT 240… EVT 165... EVT 265…
Tension (Vca) / Voltage
(Vac) 110 / 260 ±10%
Intensité (A) / Rated
current (A) 230Vac 0,09 0,17 0,18 0,33 0,26 0,48
Fréquence (Hz)/
Frequency (Hz) 50 / 60
Facteur de puissance /
Power factor: > 0,98
Puissance à 230V - 110V /
Rating at 230V -110V: 18W 2x18W 36W 2x36W 58W 2x36W
Classe de protection
diélectrique /
Dielectric protection class: Classe I / Class I
Degré de Protection/
Ingress Protection: IP66
3. Installation/Maintenance 3. Installation/Maintenance
• Toutes transformations et/ou modifications sont • Transformation and/or modification are
interdites et toute utilisation incorrecte annule la forbidden. This will avoid all warranties.
garantie. • Check the product’s rating label to ensure that the
• Vérifier la concordance de la tension d’alimentation fixture is suitable for the mains power supply.
avec celle mentionnée sur l’étiquette. • To ensure a proper functioning of the light fitting,
• Afin d’assurer le bon fonctionnement du luminaire, it is highly recommended to replace the defective
il est vivement recommandé de remplacer lamp.
systématiquement les lampes défectueuses. • Transportation and storage must be done within
• Le transport et le stockage doivent être effectués the original packing. We recommend to store our
dans l’emballage d’origine. Nous recommandons un products in a clean, dry and aerated environment
stockage de nos produits dans un environnement at a temperature between -10 ° C and + 55 °C
propre, sec et aéré à une température comprise
entre -10°C et +55°C.
4. Presse etoupe 4. Cable gland
• Pour garantir l’étanchéité du raccordement, le • To ensure weatherproof connection, tightening
serrage du câble dans le presse étoupe ne doit pas the cable in the cable gland must not allow
permettre le glissement. slippage.
• Livré en standard avec 1 presse étoupe polyester • The standard configuration is delivered with 1
ISO M20 (capacité de serrage 6 à 12mm pour câble nylon cable gland ISO M20 (sealing range capacity
non armé) et 2 bouchons polyester M20. diameter 6 to 12mm for nonarmored cable) and 2
nylon stopping plugs M20.3
—
02 Ouverture de
l’appareil / Opening
of the light fitting
5. Ouverture de l’appareil 5. Opening of the light fitting
• Ouvrir le capuchon protecteur pour accéder à l’axe • Open the protection cap to access to the locking
de verrouillage. pin.
• Actionner l’axe vers la droite à l’aide d’une clé à • Turn the locking shaft on the right with a 10 mm
pipe de 10 pour déverrouiller le diffuseur. socket wrench to unlock the diffuser.
—
02
—
03 Acces a
l’appareillage/ access 6. Accès à l’appareillage 6. Access to control gear
to control gear Dévisser les 2 vis CHC M6 (clé 6 pans n° 5) pour Remove the 2 CHC M6 screws (5 mm Allen key) to
dégager la platine. Ces vis sont imperdables. clear the gear tray. These screws are captive screws.
Conseil d’installation: dévisser 1 vis, puis tenir la Installation recommendation: remove 1 screw,
platine au bord et au centre pendant le dévissage maintain the gear tray at the centre and remove
de la deuxième vis, afin d’éviter le basculement the second screw, to avoid the brutal swivelling
brutal de la platine. of the tray.
Vérifier que la platine ne s’échappe pas de la charnière
Be careful that the plate doesn’t escape the hinge
—
034
7. Accès au bornier 7. Access to the terminal block
Cet appareil est livré en standard avec un This device is fitted with a permanent connection
raccordement permanent du secteur à la platine from the mains supply to the gear tray. Upon
appareillage. En option, il peut être équipé d’un mini request, it can be fitted with a mini switch which
interrupteur permettant de couper l’alimentation de disconnects the gear tray supply when opening
la platine appareillage à l’ouverture de la vasque. the canopy.
Cablage standard: Cablage en oucle: Cablage traversant:
1 entrée de câble & 2 bouchons / 2 entrées de câble & 1 bouchon / 2 entrées de câble & 1 bouchon /
Normal wiring: Looping wiring: Through wiring:
1 cable entry & 2 plugs 2 cables entries & 1 plug 2 cable entries & 1 plug
8. Changement des lampes 8. Lamp mounting
Introduire la lampe dans la fente de la douille et Engage the lamp in the lamp holder and rotate a
tourner d’ ¼ de tour jusqu’au cran de maintien. NE ¼ turn to the locking position.
MONTER QUE DES LAMPES NEUVES! FIT WITH NEW LAMPS ONLY!
—
04 Remplacement 9. Remplacement de la vasque 9. Diffuser changing
de la vasque /
Diffuser changing
—
045
—
05 Fermeture de la
10. Fermeture de la vasque 10. Closing of the light fitting
vasque / Closing of
the light fitting • Pivoter la vasque en la maintenant par le centre, • Rotate the diffuser holding it by the center to close
pour fermer l’appareil. the unit.
• Vérifier le bon positionnement du joint dans la • Check the correct positioning of the gasket in the
vasque. diffuser.
• Maintenir fermement la vasque en son milieu sur le • Firmly maintain the diffuser at its center and
corps du luminaire et verrouiller à l’aide de la clé à swivel to close.
pipe n° 10 en tournant dans le sens des aiguilles • Press the diffuser on the enclosure and turn the
d’une montre à fond et SANS FORCER. locking pin clockwise with the tubular wrench
• La vasque est verrouillée après le passage du cran N° 10, BUT DO NOT FORCE.
de sécurité (claquement). • The diffuser is locked after the safety position
• Vérifier que tous les crochets de fermeture sont (clap sound).
bien en prise. • Check that all locking hooks are engaged.
—
Couple / Torque 18N.m max
05
11. Etanchéité 11. Weatherproof
• Pour préserver le dégrée de protection IP • In order to maintain the Ingress Protection (IP)
maximum de l’appareil, il est recommandé de rating of the enclosure, it is recommended to check
vérifier l’état du joint de la vasque et de le changer the state of the gasket of the diffuser, looking for
périodiquement, tous les 2 ans dans le cas d’une cracks or signs of wear and replace if necessary,
utilisation intensive. every 2 years in case of intensive use.
• S’assurer aussi de la parfaite étanchéité du câble • Also, check the correct mounting of the cable in the
dans le presse-étoupe, et du presse-étoupe dans cable gland waterproofness), and the tightening of
le corps de l’appareil. the cable gland body into the enclosure.
• Le degré d’étanchéité ne peut être garanti en • The ingress protection can’t be guaranteed id the
éclairage position vers le haut. lighting is in upward position.
12. Fixations 12. Mounting details
Patte et Collier de fixation
pour tube / Pipe clamp for
Clip / Clip Patte / Bracket Ø1” 1/4” et / and 1”1/2 Grenouillère / Piton / Eye
(VO14) (VO15 / V016) (VO18 / V021) Latch (V023) screw (V024)
Couple pour insert M8/ Torque for M8 insert 24.5 N.m
13. Pièces détachées 13. Spare Parts
Se reporter au catalogue ABB/DTS. Refer to ABB/DTS catalog.6
—
ANNEX 1
Luminaire fluorescent étanche secouru
/ Emergency weatherproof fluorescent light fitting
EVT emB
1. Caractéristiques de la fonction secourue 1. Specifications of the emergency function
Référence/Reference: EVT 120emB EVT 220emB EVT 140emBB EVT 240emB EVT 165emB EVT 265emB
Ni-Cd 6V 7 Ah en boitier antidéflagrant
Batterie / Battery: Ni-Cd 6V 4 Ah en boitier antidéflagrant / in flameproof case / in flameproof case
5 à 7 ans en fonction des conditions d’utilisation et d’environnement 5 to 7 years depending on the
Durée de vie / Battery Life time: environment and intensity of use
Flux lumineux (1 tube allumé)
Lumen output (1 tube lit): 40% 24% 40% 24% 33% 18% 33% 18% 15% 14% 15% 14%
Autonomie / Battery duration: 2h 3h 2h 3h 2h 3h 2h 3h 2h 3h 2h 3h
La batterie neuve est en charge complète après environ 24h de charge minimum / New battery is fully charged after about 24h minimum
Auto testable Preventive maintenance mode:
Chargement de la batterie : tous les 4 mois Battery charge: 4 months
Capacité de la charge pendant 3h : une fois par Battery charge capacity during 3hr: quarterly
trimestre Clear system test display by LED
Chargement de la batterie contrôlé par LED
2. Contrôle de charge par LED 2. Battery charge monitoring with LED
2.1. Secteur ON 2.1. Mains ON
LED verte allumée LED verte LED s’allume LED rouge LED clignote alternativement
Green LED lit clignotante alternativement en vert clignotante en jaune et autre couleur
Sans défaut Green LED flashing et rouge (2s) Red LED flashing Yellow & other color LED
(Test OK) Batterie en charge Green &red LED light Défaut batterie flashing alternately (2s)
Batteries are loaded up alternately (2s) Fault (replace Echec test batterie
Test batterie en cours battery) Battery Test Fault
Battery test in progress
2.2. Secteur OFF 2.2. Mains OFF
LED rouge allumée LED rouge clignotante
Red LED light up Red LED flashing
Sans défaut Batterie déchargée
(Test OK) Battery discharge7
Notice No. NT29 rev5 02.07.2019 - 6IMP00047
— —
ABB Ltd. We reserve the right to make technical We reserve all rights in this document and
31-33 rue des Clotais changes or modify the contents of this in the subject matter and illustrations con-
Parc d’activités de Maisons rouges document without prior notice. With re- tained therein. Any reproduction, disclo-
94360 Bry sur Marne gard to purchase orders, the agreed par- sure to third parties or utilization of its
France ticulars shall prevail. ABB AG does not ac- contents – in whole or in parts – is forbidden
cept any responsibility whatsoever for without prior written consent of ABB AG.
potential errors or possible lack of infor- Copyright© 2017 ABB
mation in this document. All rights reserved
abb.com/lowvoltageVous pouvez aussi lire


