CAUTION - ELECTRIC TRAIN - Märklin
←
→
Transcription du contenu de la page
Si votre navigateur ne rend pas la page correctement, lisez s'il vous plaît le contenu de la page ci-dessous
CAUTION - ELECTRIC TRAIN
N0T RECOMMENDED FOR CHILDREN UNDER 15 YEARS OF AGE. AS
WITH ALL ELECTRIC PRODUCTS; PRECAUTIONS SHOULD BE OBSER-
VED DURING HANDLING AND USE TO PREVENT ELECTRIC SHOCK.
TRANSFORMER RATINGS-INPUT: 120 VAC, 60 HZ:
OUTPUT: SEE SIDE PANEL
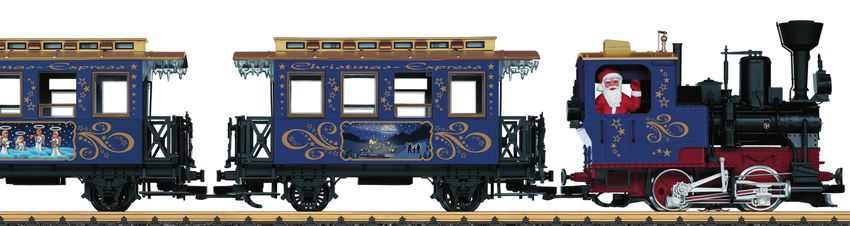
Modell der Dampflokomotive „Stainz“
723052
Table of Contents:                      Page        Inhoudsopgave:                Pagina
Safety Notes                               4        Veiligheidsvoorschriften           7
Important Notes                            4        Belangrijke aanwijzing             7
Functions                                  4        Functies                           7
Service and maintenance                    4        Onderhoud en handhaving            7
Spare parts                               10        Onderdelen                        10

Inhaltsverzeichnis:                     Seite       Indice de contenido:          Página
Sicherheitshinweise                         5       Aviso de seguridad                 8
Wichtige Hinweise                           5       Notas importantes                  8
Funktionen                                  5       Funciones                          8
Wartung und Instandhaltung                  5       El mantenimiento                   8
Ersatzteile                                10       Recambios                         10

Sommaire :                              Page        Indice del contenuto:         Pagina
Remarques importantes sur la sécurité      6        Avvertenze per la sicurezza        9
Information importante                     6        Avvertenze importanti              9
Fonctionnement                             6        Funzioni                           9
Entretien et maintien                      6        Manutenzione ed assistere          9
Pièces de rechange                        10        Pezzi di ricambio                 10

                                                3
Safety Notes SERVICE
• This model may only be used with the operating system designed for it. Lubrication
• Use only switched mode power supply units and transformers that are designed The axle bearings and the side rod bearings should be lubricated occasionally with a
for your local power system. small amount of Märklin-Oil (7149).
• This locomotive must never be supplied with power from more than one power pack.
• Pay close attention to the safety notes in the instructions for your operating system. Replacing the light bulbs
• Not for children under the age of 15. Carefully pry the lens away from the lantern. Using tweezers, remove and replace the
• WARNING! Sharp edges and points required for operation. bulb. Reassemble.
Important Notes Replacing the traction tire (E126 174)
• The operating instructions are a component part of the product and must therefore • Remove the two hex head screws that attach the side rods to the rear wheels.
be kept in a safe place as well as included with the product, if the latter is given to Remove the side rods from the rear wheels.
someone else. • Use a small, straight-blade screwdriver to replace the traction tire: Pry the old
• Please see your authorized LGB dealer for repairs or spare parts. traction tire out of the wheel groove.
• The warranty card included with this product specifies the warranty conditions. • Gently insert the new traction tire into the wheel groove.
• Disposing: www.maerklin.com/en/imprint.html • Make sure that the traction tire is seated properly in the wheel groove.
General Note to Avoid Electromagnetic Interference:
A permanent, flawless wheel-rail contact is required in order to guarantee operation
for which a model is designed. Do not make any changes to current-conducting parts.
Functions
• This model is designed for operation on LGB two-rail DC systems with conventio-
nal LGB DC train controllers or power packs (DC, 0 – 24 volts).
4Sicherheitshinweise WARTUNG
• Das Modell darf nur mit einem dafür bestimmten Schmierung
Betriebssystem eingesetzt werden.
Die Achslager und die Lager des Gestänges hin und wieder mit je einem Tropfen
• Nur Schaltnetzteile und Transformatoren verwenden, Märklin-Öl (7149) ölen.
die Ihrer örtlichen Netzspannung entsprechen.
• Das Modell darf nur aus einer Leistungsquelle versorgt werden. Austauschen der Glühlampen
• Beachten Sie unbedingt die Sicherheitshinweise in der Bedienungsanleitung zu Vorsichtig das Glas von der Laterne hebeln. Mit einer Pinzette die eingesteckte
Ihrem Betriebssystem. Glühlampe aus der Fassung ziehen. Neue Glühlampe einsetzen. Modell wieder
• Nicht für Kinder unter 15 Jahren. zusammenbauen.
• ACHTUNG! Funktionsbedingte scharfe Kanten und Spitzen. Austauschen des Haftreifens (E126 174)
Wichtige Hinweise • Sechskantschrauben entfernen, mit denen die Kuppelstangen an den hinteren
• Die Bedienungsanleitung ist Bestandteil des Produktes und muss deshalb aufbe- Treibrädern befestigt sind. Kuppelstangen abnehmen.
wahrt sowie bei Weitergabe des Produktes mitgegeben werden. • Mit einem kleinen flachen Schraubendreher den alten Haftreifen entfernen: Den
• Für Reparaturen oder Ersatzteile wenden Sie sich bitte an Ihren LGB-Fachhändler. alten Haftreifen aus der Rille (Nut) im Treibrad hebeln.
• Gewährleistung und Garantie gemäß der beiliegenden Garantieurkunde. • Vorsichtig den neuen Haftreifen über das Rad schieben und in die Rille (Nut) des
• Entsorgung: www.maerklin.com/en/imprint.html Rads einsetzen.
Allgemeiner Hinweis zur Vermeidung elektromagnetischer Störungen: • Überprüfen, dass der Haftreifen richtig sitzt.
Um den bestimmungsgemäßen Betrieb zu gewährleisten, ist ein permanenter,
einwandfreier Rad-Schiene-Kontakt der Fahrzeuge erforderlich. Führen Sie keine
Veränderungen an stromführenden Teilen durch.
Funktionen
• Das Modell ist für den Betrieb auf LGB-Zweileiter-Gleichstrom-Systemen mit
herkömmlichen LGB-Gleichstrom-Fahrpulten vorgesehen (DC, 0 – 24 V).
5Remarques importantes sur la sécurité ENTRETIEN
• La locomotive ne peut être utilisée qu‘avec le système d‘exploitation indiqué. Lubrification
• Utiliser uniquement des convertisseurs et transformateurs correspondant à la Les coussinets des essieux et les articulations des bielles sont à graisser par inter-
tension du secteur local. valles, quelques gouttes d‘huile Märklin (7149).
• La locomotive ne peut être alimentée en courant que par une seule source de
courant. Remplacement des ampoules
• Veuillez impérativement respecter les remarques sur la sécurité décrites dans le Sortir avec précaution la lentille de la lanterne. À l’aide de pincettes, enlever et
mode d’emploi de votre système d’exploitation. remplacer l’ampoule. Remonter le tout.
• Ne convient pas aux enfants de moins de 15 ans. Remplacement du pneu de traction (E126 174)
• ATTENTION! Pointes et bords coupants lors du fonctionnement du produit. • Enlever les deux vis à tête hexagonale de fixation des bielles d’accouplement aux
Information importante roues arrière. Déposer les bielles d’accouplement des roues arrière.
• La notice d‘utilisation fait partie intégrante du produit ; elle doit donc être conser- • À l’aide d’un petit tournevis à lame droite : Sortir avec précaution le vieux pneu de
vée et, le cas échéant, transmise avec le produit. la gorge de la roue.
• Pour toute réparation ou remplacement de pièces, adressez-vous à votre • Placer avec précaution le pneu neuf dans la gorge de la roue.
détaillant-spécialiste LGB. • S’assurer que le pneu de traction est bien assis dans la gorge de la roue.
• Garantie légale et garantie contractuelle conformément au certificat de garantie
ci-joint.
• Elimination : www.maerklin.com/en/imprint.html
Indication d‘ordre général pour éviter les interférences électromagnétiques:
La garantie de l‘exploitation normale nécessite un contact roue-rail permanent et
irréprochable. Ne procédez à aucune modification sur des éléments conducteurs de
courant.
Fonctionnement
• Le modèle est prévu pour être exploité sur des systèmes deux rails c.c. LGB avec
des pupitres de commandes LGB classiques en courant continu (DC, 0 – 24 V).
6Veiligheidsaanwijzingen ONDERHOUD
• Het model mag alleen met het daarvoor bestemde bedrijfssysteem gebruikt wor- Smering
den.
De aslagers en de lagers van de drijfstangen af en toe met een druppel Märklin olie
• Alle trafo’s en netadapters gebruiken die bestemd zijn voor de plaatselijke net- (7149) smeren.
spanning.
• Het model mag slechts vanuit één voedingsbron van stroom worden voorzien. Vervangen van de gloeilampen
• Neem de gebruiksaanwijzingen van uw bedrijfssysteem in acht. Voorzichtig het glas uit de lantaarn wippen. Met een pincet de defecte lamp uit de
• Niet voor kinderen onder 15 jaar. fitting trekken. Nieuwe lamp in de fitting plaatsen. Het model weer in elkaar zetten.
• LET OP! Bevat vanwege de functionaliteit scherpe kanten en punten. Antislipbanden vervangen (E126 174)
Belangrijke aanwijzing • Zeskantschroeven waarmee de drijfstangen aan de achterste drijfwielen beve-
• De gebruiksaanwijzing is een bestandsdeel van het product en dient derhalve stigd zijn losdraaien. De drijfstangen van het wiel nemen.
bewaard en bij doorgegeven van het product meegegeven te worden. • Met een kleine schroevendraaier de oude antislipbanden voorzichtig uit de gleuf
• Voor reparaties en onderdelen kunt u zich wenden tot uw LGB-dealer van het wiel wippen.
• Vrijwaring en garantie overeenkomstig het bijgevoegde garantiebewijs. • De nieuwe antislipband voorzichtig over het wiel schuiven en in de gleuf van het
• Afdanken: www.maerklin.com/en/imprint.html wiel aanbrengen.
Algemene aanwijzing voor het vermijden van elektromagnetische storingen: • Controleren of de antislipband goed is geplaatst.
Om een betrouwbaar bedrijf te garanderen is een permanent, vlekkeloos wielas - rail
contact van het voertuig noodzakelijk. Voer geen wijzigingen uit aan de stroomvoe-
rende delen.
Functies
• Het model is bedoeld voor een bedrijf op het LGB tweerail gelijkstroomsysteem
met de gebruikelijke LGB-gelijkstroom rijregelaars (DC, 0 – 24V).
7Aviso de seguridad MANTENIMIENTO
• Está permitido emplear el modelo en miniatura únicamente con un sistema opera- Lubricación
tivo previsto para tal fin.
Lubricar de vez en cuando con sendas gotas de aceite Märklin (7149) los rodamientos
• Emplear únicamente fuentes de alimentación conmutadas y transformadores que de los ejes y los rodamientos del varillaje.
se ajusten a la tensión de red local.
• Está permitido alimentar eléctricamente el modelo en miniatura únicamente desde Sustitución de las lámparas de incandescencia
una fuente de potencia. Apalancar con cuidado el cristal del farol y retirarlo. Extraer del portalámparas con
• Siempre tenga presentes las advertencias de seguridad recogidas en las instruc- unas pinzas la lámpara de incandescencia enchufada. Insertar una lámpara de
ciones de empleo de su sistema operativo. incandescencia nueva. Rensamblar el modelo en miniatura.
• No apto para niños menores de 15 años. Sustitución del aro de adherencia (E126 174)
• ¡ATENCIÓN! El equipo, debido a sus características funcionales, presenta cantos • Extraer los tornillos hexagonales con los cuales están sujetas las bielas de aco-
y puntas cortantes. plamiento a las ruedas motrices traseras. Desmontar las bielas de acoplamiento.
Notas importantes • Retirar el aro de adherencia antiguo con un destornillador de hoja plana pequeño:
• Las instrucciones de empleo forman parte integrante del producto y, por este Extraer de la acanaladura (ranura) de la rueda motriz el aro de adherencia antiguo
motivo, deben conservarse y entregarse al nuevo comprador en el caso de venta apalancándolo.
del producto. • Colocar con precaución el aro de adherencia nuevo sobre la rueda motriz e
• Para reparaciones o recambios, por favor diríjase a su distribuidor profesional de LGB. insertarlo en la acanaladura (ranura) de la rueda.
• Responsabilidad y garantía conforme al documento de garantía que se adjunta. • Asegurarse de que el aro de adherencia quede correctamente asentado.
• Eliminación: www.maerklin.com/en/imprint.html
Consejo general para evitar las interferencias electromagnéticas:
Para garantizar un funcionamiento según las previsiones se requiere un contacto
rueda-carril de los vehículos permanente sin anomalías. No realice ninguna modifi-
cación en piezas conductoras de la corriente.
Funciones
• El modelo en miniatura se ha previsto para su empleo en sistemas de corriente
continua de dos conductores LGB con consolas de mando de corriente continua
LGB convencionales (DC, 0 – 24 V).
8Avvertenze di sicurezza MANUTENZIONE
• Tale modello deve venire impiegato solamente con un sistema di esercizio destina- Lubrificazione
to a questo scopo.
Oliare di tanto in tanto i cuscinetti degli assi e i supporti dei biellismi con una goccia
• Si impieghino soltanto alimentatori “switching” da rete e trasformatori che corris- di olio Märklin (7149) per ciascuno.
pondano alla Vostra tensione di rete locale.
• Tale modello deve venire alimentato soltanto da parte di una sola sorgente di Sostituzione delle lampadine
potenza. Sollevare con cautela il vetro dal fanale. Con una pinzetta estrarre dallo zoccolo la
• Vogliate attenerVi incondizionatamente alle avvertenze di sicurezza nelle istruzioni lampadina innestata. Innestare una lampadina nuova. Assemblare nuovamente il
di impiego del Vostro sistema di esercizio. modello.
• Non adatto per bambini sotto i 15 anni. Sostituzione della cerchiatura di aderenza (E126 174)
• ATTENZIONE! Spigoli e punte acuminati per esigenze di funzionamento. • Rimuovere le viti esagonali, con le quali le bielle di accoppiamento sono fissate
Avvertenze importanti alle ruote motrici posteriori. Rimuovere le bielle di accoppiamento.
• Le istruzioni di impiego costituiscono parte integrante del prodotto e devono • Con un piccolo cacciavite piatto rimuovere la vecchia cerchiatura di aderenza:
pertanto venire conservate, nonché consegnate in dotazione in caso di ulteriore sollevare la vecchia cerchiatura di aderenza fuori dalla scanalatura (solco) nella
cessione del prodotto. ruota motrice.
• Per riparazioni oppure parti di ricambio Vi preghiamo di rivolgerVi al Vostro rivendi- • Far scorrere con cautela la nuova cerchiatura di aderenza sopra la ruota e inserir-
tore specialista LGB. la nella scanalatura (solco) della ruota.
• Prestazioni di garanzia e garanzia in conformità all’accluso certificato di garanzia. • Verificare che la cerchiatura di aderenza sia alloggiata correttamente.
• Smaltimento: www.maerklin.com/en/imprint.html
Avvertenza generale per la prevenzione di disturbi elettromagnetici:
Per garantire l’esercizio conforme alla destinazione è necessario un contatto ruota-
rotaia dei rotabili permanente, esente da interruzioni. Non eseguite alcuna modifica-
zione ai componenti conduttori di corrente.
Funzioni
• Tale modello è previsto per l’esercizio su sistemi in corrente continua a due rotaie
LGB con i preesistenti quadri di comando LGB a corrente continua (DC, 0 – 24 V).
929 4
1 8
24
8
23
2
8 8
23 6 8
23
23 21
3
6
21
5 7
22
20
22
21 21
21
5
Details in the image may
differ from the model. 30
10Note: Several parts are offered unpainted or in another color. Details in the image may
Parts that are not listed here can only be repaired by the Märklin 26 differ from the model.
repair service department. 25
Hinweis: Einige Teile werden nur ohne oder mit anderer Farbge- 16
bung angeboten.
Teile, die hier nicht aufgeführt sind, können nur im Rahmen einer 28 15
Reparatur im Märklin-Reparatur-Service repariert werden.
Remarque : Certains éléments sont proposés uniquement sans 26
18 14
livrée ou dans une livrée différente. Les pièces ne figurant pas 27
dans cette liste peuvent être réparées uniquement par le service
de réparation Märklin. 20 28
13
27 17
21 26
19
21 9 26
20 25
10
21
11
23 12
11 Opmerking: enkele delen worden alleen kleurloos of in een andere kleur aangebo-
den. Delen die niet in de in de lijst voorkomen, kunnen alleen via een reparatie in
het Märklin-service-centrum hersteld/vervangen worden.
21
9 21 Nota: algunas piezas están disponibles sólo sin o con otro color. Las piezas que no
21 figuran aquí pueden repararse únicamente en el marco de una reparación en el
servicio de reparación de Märklin.
23
23 Avvertenza: Alcuni elementi vengono proposti solo senza o con differente colo-
12 razione. I pezzi che non sono qui specificati possono venire riparati soltanto nel
quadro di una riparazione presso il Servizio Riparazioni Märklin.
111 Kobelschornstein E129 247 Wagen 1
2 Lampe vorne E176 225 Kupplungssatz E130 547
3 Lampe hinten E176 228 Puffer E135 088
4 Pumpen, Ventile E176 229 Schraube 3,0 x 9,5 E124 197
5 Lokpuffer E129 266 Drehgestell 67 302
6 Fenster, Gerätehalter E176 230 Kunstst.-Speichenradsatz 67 301
7 Griffstangen E176 231 Bremse, Luftzylinder E239 961
8 Messingteile E176 232
9 Kupplung E171 327 Wagen 2
10 Motor E126 050 Kupplungssatz E130 547
11 Schleifschuh u. Kohle E171 326 Puffer E135 088
12 Schienenräumer E176 233 Schraube 3,0 x 9,5 E124 197
13 Radsatz E178 288 Drehgestell 67 302
14 Radsatz E178 284 Kunstst.-Speichenradsatz 67 301
15 Haftreifen E126 174 Bremse, Luftzylinder E239 961
16 Gestänge rechts E296 281
17 Gestänge links E296 549
18 Treibstange, Kreuzk. rechts E296 551
19 Treibstange, Kreuzk. links E296 552
20 Schraube E124 014
21 Schraube E124 197
22 Schraube E129 265
23 Schraube E124 010
24 Schraube E129 251
25 Schraube E129 514
This device complies with Part 15 of the FCC Rules.
26 Schraube E126 052
Operation is subject to the following two conditions:
27 Unterlegscheibe E126 053 (1) This device may not cause harmful interference, and
28 Unterlegscheibe E129 250 (2) this device must accept any interference received, including
29 Schonsteindeckel E129 248 interference that may cause undesired operation.
30 Mutter E129 249
Gebr. Märklin & Cie. GmbH
Stuttgarter Straße 55 - 57
73033 Göppingen 293684/0621/Sm2Ef
Germany Änderungen vorbehalten
www.lgb.de www.maerklin.com/en/imprint.html © Gebr. Märklin & Cie. GmbHVous pouvez aussi lire


