Mi Mini préparateur t - Mini processor Instructions - Hinweise - Instructies - Istruzioni - Instrucciones CH4DCE/CH4E
←
→
Transcription du contenu de la page
Si votre navigateur ne rend pas la page correctement, lisez s'il vous plaît le contenu de la page ci-dessous

Minii préparateur
                                                                 Mi      é    t
                                                                     Mini processor

Instructions - Hinweise - Instructies - Istruzioni - Instrucciones          CH4DCE/CH4E
SOMMAIRE

    1. Introduction . . . . . . . . . . . . . . . . . . . . . . . . . . . . . . . . . . . . . . . . . . . . . . . . . . . . . . . . . . . . . . . . . . . . . . . . . . . 5
    2. Caractéristiques produit. . . . . . . . . . . . . . . . . . . . . . . . . . . . . . . . . . . . . . . . . . . . . . . . . . . . . . . . . . . . . . . . . . . . 5
    3. Assemblage . . . . . . . . . . . . . . . . . . . . . . . . . . . . . . . . . . . . . . . . . . . . . . . . . . . . . . . . . . . . . . . . . . . . . . . . . . . 6
       a. Assembler l’appareil . . . . . . . . . . . . . . . . . . . . . . . . . . . . . . . . . . . . . . . . . . . . . . . . . . . . . . . . . . . . . . . . . . . . . 6
       b. Démonter l’appareil . . . . . . . . . . . . . . . . . . . . . . . . . . . . . . . . . . . . . . . . . . . . . . . . . . . . . . . . . . . . . . . . . . . . . 6
    4. Les fonctions de l’appareil . . . . . . . . . . . . . . . . . . . . . . . . . . . . . . . . . . . . . . . . . . . . . . . . . . . . . . . . . . . . . . . . . . 7
    5. Conseils d’utilisation . . . . . . . . . .                      .   .   .   .   .   .   .   .   .   .   .   .   .   .   .   .   .   .   .   .   .   .   .   .   .   .   .   .   .   .   .   .   .   .   .   .   .   .   .   .   .   .   .   .   .   .   .   .   .   .   .   .   .   .   .   .   .   .   .   .   7
       a. Préparation des aliments . . . . . .                         .   .   .   .   .   .   .   .   .   .   .   .   .   .   .   .   .   .   .   .   .   .   .   .   .   .   .   .   .   .   .   .   .   .   .   .   .   .   .   .   .   .   .   .   .   .   .   .   .   .   .   .   .   .   .   .   .   .   .   .   7
       b. Mixer / hacher / réduire en purée                            .   .   .   .   .   .   .   .   .   .   .   .   .   .   .   .   .   .   .   .   .   .   .   .   .   .   .   .   .   .   .   .   .   .   .   .   .   .   .   .   .   .   .   .   .   .   .   .   .   .   .   .   .   .   .   .   .   .   .   .   8
       c. Moudre / concasser . . . . . . . . .                         .   .   .   .   .   .   .   .   .   .   .   .   .   .   .   .   .   .   .   .   .   .   .   .   .   .   .   .   .   .   .   .   .   .   .   .   .   .   .   .   .   .   .   .   .   .   .   .   .   .   .   .   .   .   .   .   .   .   .   .   8
    6. Techniques de fonctionnement et quantités recommandées . . . . . . . . . . . . . . . . . . . . . . . . . . . . . . . . . . . . . . . . . . . . 9
    7. L’avis des chefs. . . . . . . . . . . . . . . . . . . . . . . . . . . . . . . . . . . . . . . . . . . . . . . . . . . . . . . . . . . . . . . . . . . . . . . . . 10
    8. Questions/réponses . . . . . . . . . . . . . . . . . . . . . . . . . . . . . . . . . . . . . . . . . . . . . . . . . . . . . . . . . . . . . . . . . . . . . 11
    9. Nettoyage et rangement . . . . . . . . . . . . . . . . . . . . . . . . . . . . . . . . . . . . . . . . . . . . . . . . . . . . . . . . . . . . . . . . . . 11
    10. Consignes de sécurité . . . . . . . . . . . . . . . . . . . . . . . . . . . . . . . . . . . . . . . . . . . . . . . . . . . . . . . . . . . . . . . . . . . 12

    CONTENTS

    1. Introduction . . . . . . . . . . . . . . . . . . . . . . . . . . . . . . . . . . . . . . . . . . . . . . . . . . . . . . . . . . . . . . . . . . . . . . . . . . 14
    2. Product features. . . . . . . . . . . . . . . . . . . . . . . . . . . . . . . . . . . . . . . . . . . . . . . . . . . . . . . . . . . . . . . . . . . . . . . . 14
    3. Assembly . . . . . . . . . . . . . . . . . . . . . . . . . . . . . . . . . . . . . . . . . . . . . . . . . . . . . . . . . . . . . . . . . . . . . . . . . . . . 15
       a. Assembling the appliance . . . . . . . . . . . . . . . . . . . . . . . . . . . . . . . . . . . . . . . . . . . . . . . . . . . . . . . . . . . . . . . . 15
       b. Dismantling the appliance. . . . . . . . . . . . . . . . . . . . . . . . . . . . . . . . . . . . . . . . . . . . . . . . . . . . . . . . . . . . . . . . 15
    4. Working with the appliance . . . . . . . . . . . . . . . . . . . . . . . . . . . . . . . . . . . . . . . . . . . . . . . . . . . . . . . . . . . . . . . . 16
    5. Tips for better use. . .    .   .   .   .   .   .   .   .   .   .   .   .   .   .   .   .   .   .   .   .   .   .   .   .   .   .   .   .   .   .   .   .   .   .   .   .   .   .   .   .   .   .   .   .   .   .   .   .   .   .   .   .   .   .   .   .   .   .   .   .   .   .   .   .   .   .   .   .   16
       a. Preparing foods. . .     .   .   .   .   .   .   .   .   .   .   .   .   .   .   .   .   .   .   .   .   .   .   .   .   .   .   .   .   .   .   .   .   .   .   .   .   .   .   .   .   .   .   .   .   .   .   .   .   .   .   .   .   .   .   .   .   .   .   .   .   .   .   .   .   .   .   .   .   16
       b. Mix / chop / purée .     .   .   .   .   .   .   .   .   .   .   .   .   .   .   .   .   .   .   .   .   .   .   .   .   .   .   .   .   .   .   .   .   .   .   .   .   .   .   .   .   .   .   .   .   .   .   .   .   .   .   .   .   .   .   .   .   .   .   .   .   .   .   .   .   .   .   .   .   17
       c. Grinding . . . . . . .   .   .   .   .   .   .   .   .   .   .   .   .   .   .   .   .   .   .   .   .   .   .   .   .   .   .   .   .   .   .   .   .   .   .   .   .   .   .   .   .   .   .   .   .   .   .   .   .   .   .   .   .   .   .   .   .   .   .   .   .   .   .   .   .   .   .   .   .   17
    6. Operating techniques and recommended quantities . . . . . . . . . . . . . . . . . . . . . . . . . . . . . . . . . . . . . . . . . . . . . . . . 18
    7. Advice from the chefs . . . . . . . . . . . . . . . . . . . . . . . . . . . . . . . . . . . . . . . . . . . . . . . . . . . . . . . . . . . . . . . . . . . . 19
    8. Questions/answers . . . . . . . . . . . . . . . . . . . . . . . . . . . . . . . . . . . . . . . . . . . . . . . . . . . . . . . . . . . . . . . . . . . . . . 19
    9. Cleaning and storage . . . . . . . . . . . . . . . . . . . . . . . . . . . . . . . . . . . . . . . . . . . . . . . . . . . . . . . . . . . . . . . . . . . . 20
    10. Safety precautions . . . . . . . . . . . . . . . . . . . . . . . . . . . . . . . . . . . . . . . . . . . . . . . . . . . . . . . . . . . . . . . . . . . . . 20

2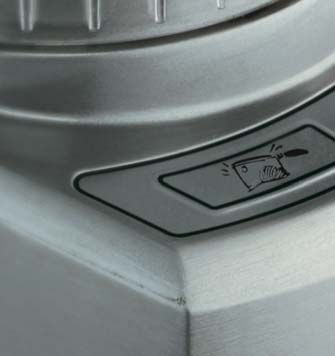
INHALTVERZEICHNIS

1. Einleitung. . . . . . . . . . . . . . . . . . . . . . . . . . . . . . . . . . . . . . . . . . . . . . . . . . . . . . . . . . . . . . . . . . . . . . . . . . . . 22
2. Eigenschaften des produkts . . . . . . . . . . . . . . . . . . . . . . . . . . . . . . . . . . . . . . . . . . . . . . . . . . . . . . . . . . . . . . . . 22
3. Zusammensetzen. . . . . . . . . . . . . . . . . . . . . . . . . . . . . . . . . . . . . . . . . . . . . . . . . . . . . . . . . . . . . . . . . . . . . . . 23
   a. Das Gerät zusammensetzen . . . . . . . . . . . . . . . . . . . . . . . . . . . . . . . . . . . . . . . . . . . . . . . . . . . . . . . . . . . . . . . 23
   b. Das Gerät auseindernehmen . . . . . . . . . . . . . . . . . . . . . . . . . . . . . . . . . . . . . . . . . . . . . . . . . . . . . . . . . . . . . . 23
4. Die Funktionen des Geräts . . . . . . . . . . . . . . . . . . . . . . . . . . . . . . . . . . . . . . . . . . . . . . . . . . . . . . . . . . . . . . . . . 24
5. Gebrauchsinweise . . . . . . . . . .                .   .   .   .   .   .   .   .   .   .   .   .   .   .   .   .   .   .   .   .   .   .   .   .   .   .   .   .   .   .   .   .   .   .   .   .   .   .   .   .   .   .   .   .   .   .   .   .   .   .   .   .   .   .   .   .   .   .   .   .   24
   a. Vorbereiten des Nahrungsmittel                   .   .   .   .   .   .   .   .   .   .   .   .   .   .   .   .   .   .   .   .   .   .   .   .   .   .   .   .   .   .   .   .   .   .   .   .   .   .   .   .   .   .   .   .   .   .   .   .   .   .   .   .   .   .   .   .   .   .   .   .   24
   b. Mixen / Hacken / Pürieren . . . .                .   .   .   .   .   .   .   .   .   .   .   .   .   .   .   .   .   .   .   .   .   .   .   .   .   .   .   .   .   .   .   .   .   .   .   .   .   .   .   .   .   .   .   .   .   .   .   .   .   .   .   .   .   .   .   .   .   .   .   .   24
   c. Mahlen / Zerkleinern . . . . . . .               .   .   .   .   .   .   .   .   .   .   .   .   .   .   .   .   .   .   .   .   .   .   .   .   .   .   .   .   .   .   .   .   .   .   .   .   .   .   .   .   .   .   .   .   .   .   .   .   .   .   .   .   .   .   .   .   .   .   .   .   25
6.Betriebstechniken und empfohlene mengen . . . . . . . . . . . . . . . . . . . . . . . . . . . . . . . . . . . . . . . . . . . . . . . . . . . . . 26
7. Ratschlage der Chefs. . . . . . . . . . . . . . . . . . . . . . . . . . . . . . . . . . . . . . . . . . . . . . . . . . . . . . . . . . . . . . . . . . . . . 27
8. Fragen/Antworten . . . . . . . . . . . . . . . . . . . . . . . . . . . . . . . . . . . . . . . . . . . . . . . . . . . . . . . . . . . . . . . . . . . . . . 28
9. Reinigen and verstauen . . . . . . . . . . . . . . . . . . . . . . . . . . . . . . . . . . . . . . . . . . . . . . . . . . . . . . . . . . . . . . . . . . . 28
10. Sicherheitsinweise . . . . . . . . . . . . . . . . . . . . . . . . . . . . . . . . . . . . . . . . . . . . . . . . . . . . . . . . . . . . . . . . . . . . . 29

INHOUD

1. Inleiding. . . . . . . . . . . . . . . . . . . . . . . . . . . . . . . . . . . . . . . . . . . . . . . . . . . . . . . . . . . . . . . . . . . . . . . . . . . . . 31
2. Productkenmerken . . . . . . . . . . . . . . . . . . . . . . . . . . . . . . . . . . . . . . . . . . . . . . . . . . . . . . . . . . . . . . . . . . . . . . 31
3. Assemblage . . . . . . . . . . . . . . . . . . . . . . . . . . . . . . . . . . . . . . . . . . . . . . . . . . . . . . . . . . . . . . . . . . . . . . . . . . 32
   a. Het toestel in elkaar zetten . . . . . . . . . . . . . . . . . . . . . . . . . . . . . . . . . . . . . . . . . . . . . . . . . . . . . . . . . . . . . . . 32
   b. Het toestel demonteren . . . . . . . . . . . . . . . . . . . . . . . . . . . . . . . . . . . . . . . . . . . . . . . . . . . . . . . . . . . . . . . . . 32
4. De functies van de machine . . . . . . . . . . . . . . . . . . . . . . . . . . . . . . . . . . . . . . . . . . . . . . . . . . . . . . . . . . . . . . . . 33
5. Gebruiksaanwijzingen . . . .        .   .   .   .   .   .   .   .   .   .   .   .   .   .   .   .   .   .   .   .   .   .   .   .   .   .   .   .   .   .   .   .   .   .   .   .   .   .   .   .   .   .   .   .   .   .   .   .   .   .   .   .   .   .   .   .   .   .   .   .   .   .   .   .   33
   a. Bereiding van voedsel. . .       .   .   .   .   .   .   .   .   .   .   .   .   .   .   .   .   .   .   .   .   .   .   .   .   .   .   .   .   .   .   .   .   .   .   .   .   .   .   .   .   .   .   .   .   .   .   .   .   .   .   .   .   .   .   .   .   .   .   .   .   .   .   .   .   33
   b. Mixen / hakken / pureren         .   .   .   .   .   .   .   .   .   .   .   .   .   .   .   .   .   .   .   .   .   .   .   .   .   .   .   .   .   .   .   .   .   .   .   .   .   .   .   .   .   .   .   .   .   .   .   .   .   .   .   .   .   .   .   .   .   .   .   .   .   .   .   .   33
   c. Malen / pletten . . . . . . .    .   .   .   .   .   .   .   .   .   .   .   .   .   .   .   .   .   .   .   .   .   .   .   .   .   .   .   .   .   .   .   .   .   .   .   .   .   .   .   .   .   .   .   .   .   .   .   .   .   .   .   .   .   .   .   .   .   .   .   .   .   .   .   .   34
6. Werkingstechnieken en aanbevolen hoeveelheden . . . . . . . . . . . . . . . . . . . . . . . . . . . . . . . . . . . . . . . . . . . . . . . . . 35
7. De mening van de chefs . . . . . . . . . . . . . . . . . . . . . . . . . . . . . . . . . . . . . . . . . . . . . . . . . . . . . . . . . . . . . . . . . . 36
8. Vragen/antwoorden . . . . . . . . . . . . . . . . . . . . . . . . . . . . . . . . . . . . . . . . . . . . . . . . . . . . . . . . . . . . . . . . . . . . . 37
9. Reiniging en bewaring . . . . . . . . . . . . . . . . . . . . . . . . . . . . . . . . . . . . . . . . . . . . . . . . . . . . . . . . . . . . . . . . . . . 37
10. Veiligheidsadviezen. . . . . . . . . . . . . . . . . . . . . . . . . . . . . . . . . . . . . . . . . . . . . . . . . . . . . . . . . . . . . . . . . . . . . 38

                                                                                                                                                                                                                                                                                                            3
CONTENUTO

    1. Introduzione . . . . . . . . . . . . . . . . . . . . . . . . . . . . . . . . . . . . . . . . . . . . . . . . . . . . . . . . . . . . . . . . . . . . . . . . . . 40
    2. Caratteristiche prodotto. . . . . . . . . . . . . . . . . . . . . . . . . . . . . . . . . . . . . . . . . . . . . . . . . . . . . . . . . . . . . . . . . . . 40
    3. Montaggio . . . . . . . . . . . . . . . . . . . . . . . . . . . . . . . . . . . . . . . . . . . . . . . . . . . . . . . . . . . . . . . . . . . . . . . . . . . 41
       a. Montare l’apparecchio . . . . . . . . . . . . . . . . . . . . . . . . . . . . . . . . . . . . . . . . . . . . . . . . . . . . . . . . . . . . . . . . . . 41
       b. Smontare l’apparecchio . . . . . . . . . . . . . . . . . . . . . . . . . . . . . . . . . . . . . . . . . . . . . . . . . . . . . . . . . . . . . . . . . 41
    4. Le funzioni dell’apparecchio . . . . . . . . . . . . . . . . . . . . . . . . . . . . . . . . . . . . . . . . . . . . . . . . . . . . . . . . . . . . . . . . 42
    5. Istruzioni per l’uso . . . . . . . . . . .           .   .   .   .   .   .   .   .   .   .   .   .   .   .   .   .   .   .   .   .   .   .   .   .   .   .   .   .   .   .   .   .   .   .   .   .   .   .   .   .   .   .   .   .   .   .   .   .   .   .   .   .   .   .   .   .   .   .   .   42
       a. Preparazione degli alimenti . . . .               .   .   .   .   .   .   .   .   .   .   .   .   .   .   .   .   .   .   .   .   .   .   .   .   .   .   .   .   .   .   .   .   .   .   .   .   .   .   .   .   .   .   .   .   .   .   .   .   .   .   .   .   .   .   .   .   .   .   .   42
       b. Frullare / tritare / ridure in purea .            .   .   .   .   .   .   .   .   .   .   .   .   .   .   .   .   .   .   .   .   .   .   .   .   .   .   .   .   .   .   .   .   .   .   .   .   .   .   .   .   .   .   .   .   .   .   .   .   .   .   .   .   .   .   .   .   .   .   .   42
       c. Macinare / triturare . . . . . . . . .            .   .   .   .   .   .   .   .   .   .   .   .   .   .   .   .   .   .   .   .   .   .   .   .   .   .   .   .   .   .   .   .   .   .   .   .   .   .   .   .   .   .   .   .   .   .   .   .   .   .   .   .   .   .   .   .   .   .   .   43
    6. Tecniche di funzionamento e quantità consigliate . . . . . . . . . . . . . . . . . . . . . . . . . . . . . . . . . . . . . . . . . . . . . . . . . . 44
    7. Il parere degli chef . . . . . . . . . . . . . . . . . . . . . . . . . . . . . . . . . . . . . . . . . . . . . . . . . . . . . . . . . . . . . . . . . . . . . . 45
    8. Domande/riposte. . . . . . . . . . . . . . . . . . . . . . . . . . . . . . . . . . . . . . . . . . . . . . . . . . . . . . . . . . . . . . . . . . . . . . . 45
    9. Pulizia e manutenzione . . . . . . . . . . . . . . . . . . . . . . . . . . . . . . . . . . . . . . . . . . . . . . . . . . . . . . . . . . . . . . . . . . . 46
    10. Istruzioni di sicurezza. . . . . . . . . . . . . . . . . . . . . . . . . . . . . . . . . . . . . . . . . . . . . . . . . . . . . . . . . . . . . . . . . . . . 46

    CONTENIDO

    1. Introducción . . . . . . . . . . . . . . . . . . . . . . . . . . . . . . . . . . . . . . . . . . . . . . . . . . . . . . . . . . . . . . . . . . . . . . . . . . 48
    2. Características del producto . . . . . . . . . . . . . . . . . . . . . . . . . . . . . . . . . . . . . . . . . . . . . . . . . . . . . . . . . . . . . . . . 48
    3. Montaje . . . . . . . . . . . . . . . . . . . . . . . . . . . . . . . . . . . . . . . . . . . . . . . . . . . . . . . . . . . . . . . . . . . . . . . . . . . . . 49
       a. Montaje del minirrobot . . . . . . . . . . . . . . . . . . . . . . . . . . . . . . . . . . . . . . . . . . . . . . . . . . . . . . . . . . . . . . . . . . 49
       b. Desmontaje del minirrobot . . . . . . . . . . . . . . . . . . . . . . . . . . . . . . . . . . . . . . . . . . . . . . . . . . . . . . . . . . . . . . . 49
    4. Funciones del robot . . . . . . . . . . . . . . . . . . . . . . . . . . . . . . . . . . . . . . . . . . . . . . . . . . . . . . . . . . . . . . . . . . . . . 50
    5. Consejos de utilización . . . . .        .   .   .   .   .   .   .   .   .   .   .   .   .   .   .   .   .   .   .   .   .   .   .   .   .   .   .   .   .   .   .   .   .   .   .   .   .   .   .   .   .   .   .   .   .   .   .   .   .   .   .   .   .   .   .   .   .   .   .   .   .   .   50
       a. Preparación de los alimentos          .   .   .   .   .   .   .   .   .   .   .   .   .   .   .   .   .   .   .   .   .   .   .   .   .   .   .   .   .   .   .   .   .   .   .   .   .   .   .   .   .   .   .   .   .   .   .   .   .   .   .   .   .   .   .   .   .   .   .   .   .   .   50
       b. Batir / picar / preparar purés.       .   .   .   .   .   .   .   .   .   .   .   .   .   .   .   .   .   .   .   .   .   .   .   .   .   .   .   .   .   .   .   .   .   .   .   .   .   .   .   .   .   .   .   .   .   .   .   .   .   .   .   .   .   .   .   .   .   .   .   .   .   .   50
       c. Moler / picar . . . . . . . . . . .   .   .   .   .   .   .   .   .   .   .   .   .   .   .   .   .   .   .   .   .   .   .   .   .   .   .   .   .   .   .   .   .   .   .   .   .   .   .   .   .   .   .   .   .   .   .   .   .   .   .   .   .   .   .   .   .   .   .   .   .   .   .   51
    6. Técnicas de funcionamiento y cantidades recomendadas . . . . . . . . . . . . . . . . . . . . . . . . . . . . . . . . . . . . . . . . . . . . . 52
    7. Suregencias de los chefs . . . . . . . . . . . . . . . . . . . . . . . . . . . . . . . . . . . . . . . . . . . . . . . . . . . . . . . . . . . . . . . . . . 53
    8. Preguntas y respuestas . . . . . . . . . . . . . . . . . . . . . . . . . . . . . . . . . . . . . . . . . . . . . . . . . . . . . . . . . . . . . . . . . . . 53
    9. Limpiar y guardar . . . . . . . . . . . . . . . . . . . . . . . . . . . . . . . . . . . . . . . . . . . . . . . . . . . . . . . . . . . . . . . . . . . . . . 54
    10. Consignas de seguridad . . . . . . . . . . . . . . . . . . . . . . . . . . . . . . . . . . . . . . . . . . . . . . . . . . . . . . . . . . . . . . . . . . 54
4
1. INTRODUCTION                                           grand soin. Ne jamais toucher les parties métalliques,
                                                          et veiller à toujours saisir la lame par sa tige de
Vous venez de faire l’acquisition d’un mini préparateur   manipulation.
Cuisinart®.
Cet appareil est un produit de qualité qui vous
permettra de réaliser toutes sortes de préparations                                                   5a
rapidement et en toute facilité. Il hache, moud, réduit
en purée, émulsionne et mélange vos aliments en                                                       5
quelques secondes. Sa lame offre un côté aiguisé
permettant de hacher, mélanger ou réduire en purée,
tandis que le côté plus épais permet de moudre des
aliments durs tels que des grains de café ou des noix.
Equipé d’un moteur réversible puissant, il vient à bout
de toutes les préparations en quelques secondes.
                                                                                                      6

2. CARACTERISTIQUES PRODUIT
1. Un moteur réversible ( 2 sens de rotation)
                                                                                                      3
2. Deux touches de commande séquentielles. (
et      )
3. Un bol de préparation de 0,9 L.
4. Une spatule (non illustrée).
5. Un couvercle avec sécurité sur le bol. Muni de deux
   ouvertures (5a) pour ajouter les liquides en cours
   de préparation.
6. Une lame de précision ave tige de manipulation.
   Selon son sens de rotation, la lame vous permet de
   mixer ou de moudre les aliments.

                                                                                                      2
          ATTENTION ! LA LAME EST
EXTREMEMENT COUPANTE. Afin d’éviter tout risque                                                       1
de blessure lors du déballage de votre appareil, nous
vous conseillons de manipuler la lame avec le plus
                                                                                                                   5
3. ASSEMBLAGE                                                   6. Ajouter les aliments souhaités.
                                                                    7. Placer le couvercle sur le bol. La
                                                                       languette du couvercle doit être
                                                                       orientée à droite de la colonne
                                                                       arrière. Faire pivoter le couvercle
                                                                       dans le sens inverse des aiguilles
                                                                       d’une montre pour le verrouiller.

                                                                    N.B. Si le couvercle n’est pas verrouillé, le moteur ne
                                                                         démarrera pas.
                                                                    N.B. S’assurer que le moteur soit complètement à
                                                                         l’arrêt et que la lame ait cessé de tourner avant de
    A . Assembler l’appareil                                             retirer le couvercle.

    1. Placer la base du mini-préparateur sur une surface           8. Brancher l’appareil. Il est maintenant prêt à
       plane, sèche et stable.                                         fonctionner.
    2. Placer le bol de préparation sur la base du moteur, la
       poignée face au coin gauche du produit.
    3. Tourner le bol dans le sens contraire des aiguilles
                                                                    B. Démonter l’appareil
       d’une montre pour le fixer sur le bloc moteur.
    4. Placer délicatement la lame sur l’axe central du bol de      9. Pour retirer le couvercle, maintenir la base de
       préparation en la tenant par sa tige de manipulation.            l’appareil de votre main gauche, saisir le couvercle
       Pousser la lame vers le bas. Un "clic" vous confirmera           et le faire pivoter dans le sens des aiguilles d’une
       qu’elle est bien fermée.                                         montre.
    5. Pour retirer la lame, retirer le dispositif en tirant avec   10. Pour retirer la lame, retirer le dispositif en tirant
       force vers le haut.                                              avec force vers le haut.
                                                                    11. Pour retirer le bol, maintenir la base de l’appareil
    N.B. Toujours tenir le dispositif coupant par la tige de            à l’aide de votre main gauche, tenir la poignée du
         manipulation. Ne jamais toucher la lame car elle               bol avec votre main droite et tourner dans le sens
         est extrêmement coupante.                                      des aiguilles d’une montre tout en soulevant le bol
    N.B. Ne jamais placer la lame directement sur la tige               du socle.
         du moteur avant que le bol ne soit fixé.
    N.B. Toujours insérer la lame dans le bol avant d’ajouter
         les ingrédients.

6
4. LES FONCTIONS DE L’APPAREIL 5. CONSEILS D’UTILISATION
Il suffit de presser la touche choisie après avoir placé les
ingrédients dans le bol pour démarrer la préparation. A. Préparation des aliments
Dès que la touche est relâchée, le moteur s’arrête. La
lame tourne automatiquement dans le sens voulu,
• Couper les aliments en morceaux de 1,5 cm environ.
selon la touche pressée.
Plus les aliments sont coupés gros, plus il faut de
temps pour les hacher.
• Ne pas trop remplir le bol de préparation afin d’éviter
B des résultats irréguliers et une tension inutile au
moteur. En règle générale, les aliments ne doivent
pas dépasser les 2/3 du bol de préparation.
IMPORTANT
A • Nous vous recommandons de maintenir l’appareil
d’une main lorsqu’il fonctionne, afin de l’empêcher
de bouger.
• Ne jamais faire fonctionner l’appareil plus d’une
minute en continu.
A. Mixer / hacher / réduire en purée / • Toujours attendre que la lame cesse de tourner avant
de retirer le couvercle.
émulsionner • Ne jamais tenter de retirer le couvercle et le bol en
même temps.
• Le couvercle doit d’abord être retiré afin de démonter
La s’utilise avec le côté aiguisé de la lame. le bol. Vider d’abord le bol, puis retirer la lame.
• Grâce au système BladeLock qui maintient la lame
B. Moudre / concasser en place, il est possible de verser vos préparations
liquides hors du bol en toute sécurité sans avoir à
retirer les lames.
La s’utilise avec le côté plus épais de la lame.
7B. Mixer / hacher / réduire en purée quelques secondes de plus. Si nécessaire, utiliser
la spatule pour ôter les aliments qui restent sur les
bords.
Couper les aliments en morceaux de 1,5 cm environ. Réduire les aliments en purée :
Plus les aliments sont coupés gros, plus il faut de temps
Hacher grossièrement en procédant par impulsions
pour les hacher.
puis maintenir jusqu’à obtention de la texture
Ne pas trop remplir le bol de préparation afin d’éviter
souhaitée.(NOTE : ce procédé ne convient pas pour
des résultats irréguliers et une tension inutile au
réduire les pommes de terre en purée.)
moteur. En règle générale, les aliments ne doivent pas
dépasser les 2/3 du bol de préparation. Ajouter des liquides :
Presser et relâcher plusieurs fois, en veillant à
ce que les aliments retombent à chaque fois dans le Il est possible d’ajouter des liquides tels que de l’eau,
fond du bol. Utiliser la spatule pour racler les bords du de l’huile ou des arômes pendant le fonctionnement
bol si nécessaire. Vérifier fréquemment la texture afin de l’appareil. Pour cela, verser le liquide à travers l’une
de ne pas hacher trop finement. des deux ouvertures du couvercle. Veiller à laisser
libre l’autre ouverture pour que l’air puisse circuler.
Hacher les herbes fraîches :
Les herbes aromatiques, le bol et la lame doivent être C. Moudre/concasser
parfaitement propres et secs. Couper les tiges des Cette fonction est utile pour les aliments durs tels que
herbes pour ne conserver que les parties tendres. les noix, noisettes, amandes, café en grains, etc.
Placer les herbes dans le bol et presser Procéder de la même manière pour les aliments durs
plusieurs fois, jusqu’à ce que les herbes soient : presser par impulsions, en veillant à ce que
suffisamment hachées. Plus vous hachez d’herbes à la les aliments retombent au fond du bol à chaque arrêt.
fois, plus elles seront hachées finement. Pour une texture plus fine, presser et maintenir
Si elles sont bien sèches lorsqu’elles sont hachées, pendant plusieurs secondes.
les herbes aromatiques se conserveront 4 à 5 jours
au réfrigérateur, placées dans un sachet fermé
hermétiquement. Elles peuvent également être
congelées.
Hacher la viande, la volaille, le poisson et les
crustacés :
Les aliments doivent être très froids, mais pas
congelés. Les couper en morceaux de 1,5 cm environ.
Presser pour hacher grossièrement. Ensuite,
pour hacher plus finement, presser la touche
86. TECHNIQUES DE FONCTIONNEMENT ET QUANTITÉS RECOMMANDÉES
Ingrédients Commentaires
Ail/Oignon/Echalotte ✓
Anchois ✓
Beurre ✓ Pas trop dur et coupé en petits morceaux
Café (en grains) ✓ Max. 50g à la fois
Légumes frais ✓ Coupés en petits morceaux
Chocolat ✓ Max. 30g à la fois et coupés en petits morceaux
Fromage à pâte dure ✓ Max. 60g à la fois et coupés en morceaux de 1,5cm
Fromage à pâte semi-dure ✓
Fromage à pâte semi-molle ✓ Doit être très froid
Fromage à pâte molle ✓ Doit être très froid
Graines (cumin, pavot, etc.) ✓
Herbes fraîches ✓ Doivent être bien sèches
Légumes cuits ✓ Doivent être cuits jusqu’à ce qu’ils soient ramollis
Noix, noisettes, amandes ✓
Olives ✓ Dénoyautées
Poivre (en grains) ✓
Doivent être très froids (mais pas congelés) et décou-
Viandes, volailles, poissons ✓ pés en morceaux réguliers. Max. 150g
Crème fouettée ✓ Environ 45sec par impulsion
Préparation liquide ✓
Mayonnaise ✓ En ajoutant l’huile par la goulotte sur le couvercle
Glaçons ✓ Par petites quantités
97. L’AVIS DES CHEFS
• Pour conserver les saveurs des épices entières, utiliser
des bocaux fermés hermétiquement avec un joint de
caoutchouc.
• Pour élaborer rapidement une crème fouettée,
verser dans le bol du mini préparateur un peu de
crème liquide froide et appuyer sur la touche
par impulsions pendant 40 secondes. Le résultat est
idéal. Ajouter un peu de sucre en fin de préparation
pour obtenir une crème chantilly.
• Le mini préparateur permet d’élaborer rapidement
pour vos enfants des purées de légumes savoureuses.
En mode pour des mélanges légumes et
viandes ou légumes et poissons. En mode pour
des mélanges émulsionnés avec un beurre fondu, de
• Ne pas remplir complètement le bol du mini l’huile d’olive ou bien de la crème.
préparateur afin d’éviter des résultats irréguliers et
une tension inutile au moteur. En règle générale, les
aliments ne doivent pas dépasser les 2/3 du bol.
• Sécher les herbes aromatiques avant de les hacher
afin de les conserver beaucoup plus longtemps. Les
placer dans un sachet fermé hermétiquement, elles
se garderont au réfrigérateur 4 à 5 jours.
• Pour émulsionner une préparation (vinaigrette,
mayonnaise, béarnaise…), utiliser d’abord la touche
pour lier la préparation puis la touche
pour serrer le mélange en incorporant le liquide par
le goutte à goutte du couvercle.
• Lors de vos achats, choisir des épices entières et les
moudre à la minute dans votre mini préparateur pour
en extraire un maximum de parfums et de saveurs.
N.B. : Ne pas moudre de la cannelle et de la noix de
muscade.
108. QUESTIONS/REPONSES 9. NETTOYAGE ET RANGEMENT
QUE FAIRE SI: REPONSES • Débrancher l’appareil lorsqu’il n’est pas utilisé.
Les ingrédients ne sont Attention à ne pas trop IMPORTANT : La lame doit être rangée hors de portée
pas suffisamment hachés, remplir le bol. des enfants.
il reste des morceaux ? • Toutes les pièces, à l’exception du socle du boîtier,
Les aliments restent collés Utiliser le principe peuvent être lavées au lave-vaisselle. Nous vous
sur les parois du bol ? du moteur réversible recommandons de les laver dans le panier supérieur
en appuyant du lave-vaisselle. En effet, si vous les placiez dans le
alternativement sur panier inférieur, le volume important d’eau chaude
la touche hacher puis pourrait, à la longue, endommager le bol, le couvercle
moudre. Cela permet et les accessoires. Placez le bol à l’envers.
aux aliments de mieux • Pour laver la lame à la main, procéder avec une très
se répartir dans le bol. grande prudence, car la lame est très coupante. Ne
Les ingrédients liquides Ils doivent être ajoutés pas la laisser tremper dans de l’eau savonneuse, pour
ne se mélangent pas seulement lorsque ne pas la perdre de vue.
correctement ? l’appareil est en • Faire très attention en plaçant et en retirant la lame
fonction pour une du lave-vaisselle.
meilleure liaison. • Pour simplifier le nettoyage, rincer le bol, le couvercle
et la lame immédiatement après usage afin d’éviter
Mon mini préparateur ne Vérifier que le que les aliments ne sèchent dessus.
fonctionne pas ? système de sécurité • Le fait de hacher certains aliments peut griffer,
du couvercle est opacifier ou décolorer le bol (épices et sucre).
bien enclenché sur la • Ne pas utiliser de produits abrasifs sur le socle du
face arrière du mini boîtier. Utiliser simplement un chiffon humide et
préparateur. sécher ensuite.
• Appliquer le produit d’entretien sur le chiffon, pas sur
le socle du boîtier.
1110. CONSIGNES DE SECURITE l’appareil branché sans surveillance. Pour débrancher,
tirer sur la fiche et jamais sur le cordon.
Comme tout appareil électroménager, votre • Ne pas laisser le cordon dépasser du bord du plan de
préparateur culinaire doit être manipulé avec travail.
précaution. Suivez les conseils ci-dessous afin d’éviter • Ne pas laisser la lame sur l’axe du moteur lorsque
tout risque de blessure. l’appareil n’est pas utilisé. Ranger la lame hors de
• ATTENTION : Les sachets en polyéthylène portée des enfants.
qui entourent l’appareil ou l’emballage • Pour éviter d’endommager le mécanisme, ne pas
peuvent être dangereux. Pour éviter tout ranger l’appareil avec le couvercle complètement
danger de suffocation, conservez ces sachets fermé.
hors de la portée de bébés et des enfants. • Se montrer particulièrement vigilant si l’appareil
Ces sachets ne sont pas des jouets. est utilisé à proximité d’enfants. Le ranger hors de
• Manier la lame avec le plus grand soin. Eviter de portée des enfants. Ne pas laisser les enfants utiliser
toucher les parties métalliques tranchantes. le préparateur culinaire.
• Toujours mettre la lame en place avant d’ajouter les • Ne pas utiliser l’appareil s’il est tombé ou s’il présente
ingrédients. des traces apparentes de dommage.
• Ne jamais placer la lame sur l’axe moteur avant d’avoir • Si le câble d’alimentation est endommagé, il doit être
verrouillé le bol. remplacé par le fabricant, son service après vente ou
• Avant d’allumer l’appareil, s’assurer que la lame est des personnes de qualification similaire afin d’éviter
enfoncée au maximum sur l’axe moteur, et que le un danger.
couvercle est correctement placé. Ne pas forcer ou • Cet appareil n’est pas prévu pour être utilisé par
bloquer le mécanisme du couvercle. des personnes (y compris les enfants) dont les
• Utiliser la spatule uniquement lorsque le moteur capacités physiques, sensorielles ou mentales sont
est à l’arrêt. Eviter tout contact avec les pièces en réduites, ou des personnes dénuées d’expérience
mouvement. ou de connaissance, sauf si elles ont pu bénéficier,
• Toujours attendre que la lame ait cessé de tourner par l’intermédiaire d’une personne responsable de
avant de retirer le couvercle. leur sécurité, d’une surveillance ou d’instructions
• Débrancher l’appareil avant de préalables concernant l’utilisation de l’appareil. Il
le nettoyer, de le mettre en place convient de surveiller les enfants pour s’assurer qu’ils
ou de retirer ou changer les accessoires. ne jouent pas avec l’appareil.
• Retirer le bol de la base avant d’ôter la lame. • Cet appareil est conforme aux exigences de
• Utiliser exclusivement cet appareil avec les accessoires base des Directives 04/108/CEE (Compatibilité
fournis par Cuisinart®. électromagnétique) et 06/95/CEE (sécurité des
• Ne pas immerger la base de l’appareil dans l’eau ou appareils électriques domestiques).
tout autre liquide. • Utiliser cet appareil exclusivement pour cuisiner, en
• Débrancher l’appareil après utilisation, avant de suivant les instructions de ce manuel.
l’assembler ou de le démonter, avant de retirer les • Ne pas utiliser à l’extérieur.
aliments et avant de le nettoyer. Ne jamais laisser • Cet appareil est destiné à être utilisé dans des
12applications domestiques et analogues telles que :
- des coins cuisines réservés au personnel dans
des magasins, bureaux et autres environnements
professionnels ;
- des fermes ;
- l’utilisation par les clients des hôtels, motels et autres
environnements à caractère résidentiel ;
- des environnements du type chambres d’hôtes
Equipements électriques et électroniques
en fin de vie.
Dans l’intérêt de tous et pour participer activement à
l’effort collectif de protection de l’environnement :
• Ne jetez pas vos produits avec les déchets ménagers.
• Utilisez les systèmes de reprise et de collecte qui sont
mis à votre disposition.
Certains matériaux pourront ainsi être recyclés ou
valorisés.
131. INTRODUCTION
Congratulations on the purchase of your Cuisinart®
mini food processor.
This appliance is the perfect partner to help you
prepare all kinds of foods quickly and efficiently. 5a
It dices, grinds, purées, emulsifies and mixes your
food in seconds. Its blade has a sharpened edge for 5
chopping, mixing or puréeing and it has a thicker,
blunt edge for grinding hard foods like coffee beans or
nuts. With a powerful, reversible motor, it will finish all
your preparations in seconds.
2. PRODUCT FEATURES 6
1. A reversible motor (2-way rotation)
2. Two control buttons. ( and )
3. A 0.9 litre work bowl. 3
4. A spatula (not pictured).
5. A security lid for the bowl with two openings (5a)
for adding liquids during preparation.
6. A precision blade with sheath for handling.
Depending on the direction of rotation, the blade lets
you mix or grind foods.
CAUTION! THE BLADE IS EXTREMELY
SHARP.
To avoid all risk of injury when unpacking your
appliance, please handle the blade with extreme 2
care. Never touch the metal parts and always hold the
blade by the handle at the top of its sheath. 1
143. ASSEMBLY 7. Place the lid on the bowl. The tab of
the lid should be positioned to the
right of the rear column. Turn the
lid in an anticlockwise direction to
lock in place.
N.B.: If the lid is not locked, the motor
will not start.
CAUTION! Make sure the motor has stopped
completely and the blade has stopped moving before
removing the lid.
A. Assembling the appliance
8. Plug the appliance in. It is now ready to use.
1. Place the base of the mini food processor on a flat,
dry, stable surface.
2. Place the work bowl on the central stem with the
B. Dismantling the appliance
handle turned to the left corner of the appliance.
3. Turn the bowl in an anticlockwise direction locking it 9. To remove the lid, hold the base of the appliance with
onto the motor base. your left hand, grasp the lid and turn in a clockwise
4. Holding the blade assembly by its sheath, carefully direction.
place it over the central stem in the work bowl. Push 10. To remove the blade, pull the assembly firmly
the blade down. A ‘click’ lets you know that it is upward.
locked into place. 11. To remove the bowl, hold the base of the unit using
5. To remove the blade, pull the assembly firmly your left hand, grasp the handle of the bowl in your
upwards. right hand and turn in a clockwise direction while
lifting the bowl from the base.
CAUTION! Always hold the blade assembly by its
sheath.
Never touch the blade, it is extremely sharp.
CAUTION! Never place the blade directly on the motor
shaft before the bowl is locked in place.
CAUTION! Always insert the blade in the work bowl
before adding ingredients.
6. Add to the bowl the food that you wish to process.
154. WORKING WITH THE APPLIANCE 5. TIPS FOR BETTER USE
A. Preparing foods
B
• Cut the foods into 1.5cm pieces. The larger the pieces
of food, the more time required to chop.
• To avoid inconsistent results and straining the motor,
do not overload the work bowl. Generally ,food
should not reach more than 2/3 of the way up the
A central plastic stem of the blade assembly.
IMPORTANT
• We recommend keeping a firm hold on the appliance
with one hand when it is in operation to stop it from
All you need to do to start the process is press the moving.
desired button after having placed the ingredients in • Never operate the processor continuously for
the work bowl. As soon as you release the button, the more than 1 minute at a time.
motor will stop. The blade will rotate automatically in • Always wait until the blade has stopped turning
the desired direction, depending on the button being before removing the lid.
pressed. • Never try to remove the lid and the bowl at the same
time.
A. Mix/chop/purée/emulsify • The lid should be removed
first before removing the bowl.
Empty the bowl, then remove the blade assembly.
The function uses the sharpened edge of the • Thanks to the BladeLock system, which holds the
knife. blade in place, it is possible to pour out your liquid
preparations from the bowl safely without first having
B. Grind to remove the blades.
The function uses the blunt edge of the knife.
16B. Mix/chop/purée Producing a purée:
Chop roughly using a pulsing action then press and
Cut the food into 1.5 cm pieces. The larger the pieces hold until the desired texture is achieved.
of food, the more time required to chop. (N.B.: this function is not suitable for mashing
potatoes)
To avoid inconsistent results and straining the motor,
do not overload the work bowl. Generally ,food Adding liquids:
should not reach more than 2/3 of the way up the
central plastic stem of the blade assembly. You can add liquids like water, oil and flavouring while
the appliance is running. Pour the liquid through one
Press and release several times, making sure of the two openings in the lid. Make sure you leave
the food falls to the bottom of the work bowl each the other opening free so that air can circulate freely.
time before you press it. Use the spatula to scrape the
side of the bowl if necessary. Check the texture of the C. Grinding
food regularly to avoid chopping the food too fine.
This function can be used for hard foods like walnuts,
Chopping fresh herbs: hazelnuts, almonds, coffee beans, etc.
Use the same procedure for hard foods: press
The aromatic herbs, bowl and blade must all be using a pulse action, ensuring that the food falls to
thoroughly cleaned and dried. Remove the stems the bottom of the bowl each time you stop. For a finer
from the herbs keeping only the tender parts of the texture, press and hold for several seconds.
herbs. Place the herbs in the work bowl and press
and release several times until the herbs are
chopped to the desired consistency. The longer you
chop the herbs, the more finely chopped they will be.
If the herbs have been dried properly before they are
chopped, they may be stored in an airtight bag in the
refrigerator for 4 to 5 days. They may also be frozen.
Chopping meat, poultry, fish and shellfish:
Food should be very cold, but not frozen. Cut the
food into 1.5 cm pieces. Press to chop roughly,
then hold down a few seconds longer to chop finely.
If necessary, use the spatula to remove food that is
stuck to the side of the bowl.
176. OPERATING TECHNIQUES AND RECOMMENDED QUANTITIES
Ingredients Comments
Garlic/Onion/Shallot ✓
Anchovies ✓
Butter ✓ Not too hard and cut in small pieces
Coffee beans ✓ Max. 50g at a time
Fresh vegetables ✓ Cut in small pieces
Chocolate ✓ Max. 30g at a time and cut in small pieces
Hard cheese ✓ Max. 60g at a time and cut in 1.5cm pieces
Firm cheese ✓
Semi-soft cheese ✓ Should be very cold
Soft chesse ✓ Should be very cold
Seeds (cumin, poppy, etc.) ✓
Fresh herbs ✓ Must be well dried
Cooked vegetables ✓ Should be cooked until they are soft
Walnuts, hazelnuts, almonds ✓
Olives ✓ Stoned
Peppercorns ✓
Should be very cold (but not frozen) and cut into
Meats, poultry, fish ✓ equal sized pieces. Max. 150g
Whipped cream ✓ About 45sec per pulse
Liquids ✓
Mayonnaise ✓ Add the oil through the hole in the lid
Ice cubes ✓ In small quantities
187. ADVICE FROM THE CHEFS button using pulsing action for 40 seconds. The result
is perfect. Add a little sugar at the end of the process
for a Crème Chantilly.
• The mini processor lets you create delicious vegetable
purées for your children in no time.
• Using mode for vegetable and meat or
vegetable and fish mixtures. Using mode for
emulsions with melted butter, olive oil or cream.
8. QUESTIONS/ANSWERS
QUE FAIRE SI: REPONSES
The ingredients aren’t Make sure you don’t
chopped enough, there overload the work bowl.
are still pieces?
• Do not completely fill the work bowl of the mini
Food is stuck to the side? Use the reversible
processor to avoid inconsistent results and strain on
motor by pressing
the motor. Generally ,food should not reach more
alternately the CHOP
than 2/3 of the way up the central plastic stem of the
and the GRIND buttons.
blade assembly.
This will distribute the
• Thoroughly dry aromatic herbs before chopping so
food more evenly in the
that they keep much longer. Place them in an airtight
bowl.
bag, they will keep in the refrigerator for 4 to 5 days.
• To emulsify a sauce (dressings, mayonnaise, Bearnaise, Liquid ingredients are not These should only
etc.), first press the button to combine the mixing properly? be added when the
ingredients then press and hold the button appliance is running for
to emulsify the mixture while gradually adding the better mixing.
liquid through the hole in the lid. My mini processor Check that the work
• When shopping for spices, buy whole spices and doesn’t start? bowl and lid are secu-
grind them fresh when you need them in your mini rely locked into place.
processor to extract the flavours and the aromas.
N.B.: Do not grind cinnamon or nutmeg in the
processor.
• To keep the flavours of whole spices, use jars with a
rubber gasket seals.
• To whip cream quickly, pour a little chilled cream into
the work bowl of the processor and press the
199. CLEANING AND STORAGE • Handle the blade with extreme care. Avoid touching
the sharp metal parts.
• Keep the appliance unplugged when it is not in use. • Always put the blade in place before adding the
IMPORTANT: The blade must be kept out of the ingredients.
reach of children. • Never place the blade on the motor shaft until the
work bowl is locked into place.
• All parts, except the housing base, are dishwasher
• Before turning on the appliance, make sure the blade
safe. We recommend washing them on the upper
is pushed down well onto the motor shaft and that
rack of the dishwasher. If they are placed on the
the lid is properly placed. Do not force or block the
lower rack, the amount of hot water could, over time,
lid mechanism.
damage the bowl, the lid and the accessories. Place
• Only use the spatula when the motor has stopped.
the bowl upside down.
Avoid all contact with moving parts.
• If you wash the blade by hand, use extreme care, the
• Always wait until the blade has stopped moving
blade is very sharp. Do not leave it in soapy water as it
before removing the lid.
may disappear from sight.
• Unplug the appliance before cleaning, setting it up,
• Take extra care when loading and unloading the
or removing or changing accessories.
blade in the dishwasher.
• Remove the work bowl from the housing base before
• To make cleaning easier, rinse the work bowl, lid and
removing the blade.
blade immediately after use so food won’t dry on
• Use only the accessories provided or recommended
them.
by Cuisinart® with this appliance.
• Chopping certain foods (e.g. spices and sugar) may
• Do not immerse the housing base of this appliance in
scratch, cloud or discolour the work bowl.
water or any other liquid.
• Do not use abrasive cleaners on the housing base.
• Unplug the appliance after use, before assembling
Simply wipe it with a damp cloth and then dry it.
or dismantling, before removing foods and before
• Apply cleaning agents to the cloth, not the housing
cleaning. Never leave the appliance unattended
base.
when plugged in. To unplug, pull on the plug, never
the cord.
• Do not allow the cord to hang over the edge of the
10. SAFETY PRECAUTIONS table or counter.
• Do not leave the blade on the motor shaft when the
Like any household electric appliance, your mini appliance is not in use. Store the blade out of the
processor must be handled with care. Follow the reach of children.
precautions below to avoid personal injury. • To avoid damage to the mechanism, do not store the
• ATTENTION: The plastic bags in which the
appliance with the lid completely closed.
unit is wrapped or which are used for the
• Be particularly careful if the appliance is used near
packaging may be dangerous. To avoid all
children. Store out of the reach of children. Do not let
risk of suffocation, keep these bags out of the
reach of babies and children. The bags are children use the food processor.
not toys. • Do not use this appliance if it has fallen or shows
20signs of damage.
• If the lead is damaged, it must be replaced by the
manufacturer, its after-sales service or similarly
qualified professionals to avoid danger.
• This appliance should not be used by adults or
children who have reduced physical, sensory or
mental capacities, or by persons who lack experience
or who do not know the appliance, unless they are
adequately supervised or they have been given
instructions beforehand by someone responsible for
their safety. Children should be supervised to make
sure they do not play with the appliance.
• This unit meets the basic requirements of Directives
04/108/EEC (electromagnetic compatibility) and
06/95/EEC (safety of domestic electrical equipment).
• Only use this appliance for cooking, and following the
instructions in this manual.
• For indoor use only.
• This appliance is intended for domestic use and for
similar uses like:
- staff kitchens in shops, offices and other professional
environments;
- farms;
- hotel and motel rooms and similar environments of a
residential nature;
- bed and breakfasts
Electrical and electronic equipment at the
end of life.
In everybody’s interest and to participate actively in
protecting the environment:
• Do not discard these products with your household
waste.
• Use return and collection systems available in your
country.
Some materials can in this way be recycled or
recovered.
211. EINLEITUNG vermeiden empfehlen wir Ihnen, bei der Handhabung
der Klinge besondere Vorsicht walten zu lassen.
Sie haben gerade einen Mini-Küchenhelfer von Berühren Sie nie die Metallteile und halten Sie die
Cuisinart® gekauft. Klinge immer am Haltestift fest.
Dieses Gerät ist ein Qualitätswerkzeug, mit dem Sie
alle Arten von Zubereitungen schnell und ganz einfach 5a
realisieren können.
Er hackt, mahlt, püriert, emulsioniert und mischt Ihre 5
Nahrungsmittel in wenigen Sekunden. Die Klinge
verfügt über eine geschliffene Seite zum Hacken,
Mischen oder Pürieren, während mit der anderen,
dickeren Seite harte Nahrungsmittel wie Kaffeebohnen
oder Nüsse gemahlen werden können. Er ist mit einem
leistungsstarken Umkehrmotor versehen und meistert
alle Aufgaben in wenigen Sekunden.
6
2. EIGENSCHAFTEN DES PRODUKTS
1. Ein Umkehrmotor (2 Drehrichtungen) 3
2. Zwei Sequenz-Bedienungstasten ( und )
3. Ein Zubereitungsgefäß von 0,9 L.
4. Ein Spatel (nicht abgebildet).
5. Ein Deckel mit Sicherheitsvorrichtung auf dem
Gefäß. Versehen mit zwei Öffnungen (5a) zum
Einfüllen von Flüssigkeiten während der Zubereitung.
6. Eine Präzisionsklinge mit Haltestift zur besseren
Handhabung. Je nach Drehrichtung können Sie die
Nahrungsmittel mit der Klinge entweder mischen
oder mahlen.
2
ACHTUNG! VORSICHT, DAS 1
HACKMESSER IST EXTREM SCHARF. Um während
des Auspackens Ihres Geräts jedes Risiko zu
223. ZUSAMMENSETZEN 7. Den Deckel auf das Gefäß legen.
Die Lasche des Deckels muss sich
rechts von der hinteren Säule
befinden. Den Deckel entgegen
dem Uhrzeigersinn drehen, um ihn
zu verriegeln.
Anm. Wenn der Deckel nicht
verriegelt ist, springt der Motor nicht an.
Anm. Vergewissern Sie sich immer, dass der Motor
völlig still steht und die Klinge nicht mehr dreht, bevor
A. Das Gerät zusammensetzen Sie den Deckel entfernen.
1. Den Sockel des Mini-Küchenhelfers auf eine gerade, 8. Das Gerät an den Netzstrom anschließen. Es ist nun
trockene und stabile Oberfläche stellen. betriebsbereit.
2. Das Zubereitungsgefäß auf den Motorsockel stellen,
so dass der Griff auf die linke Ecke des Geräts zeigt.
3. Das Gefäß entgegen dem Uhrzeigersinn drehen, um
B. Das Gerät auseinandernehmen
es auf dem Motorblock zu befestigen.
4. Die Klinge am Haltestift festhalten und vorsichtig auf 9. Zum Entfernen des Deckels mit der linken Hand
die Mittelachse des Zubereitungsgefäßes schieben. den Gerätesockel festhalten, den Deckel greifen
Die Klinge nach unten drücken. Ein Klickgeräusch und im Uhrzeigersinn drehen.
zeigt an, dass sie korrekt befestigt ist. 10. Zum Entfernen der Klinge die Vorrichtung kräftig
5. Zum Entfernen der Klinge die Vorrichtung kräftig nach oben ziehen.
nach oben ziehen. 11. Zum Entfernen des Gefäßes mit der linken Hand
den Gerätesockel festhalten, den Griff des Gefäßes
Anm. Die scharfe Vorrichtung immer am Haltestift mit der rechten Hand halten, im Uhrzeigersinn
festhalten. drehen und dabei das Gefäß abheben.
Berühren Sie nie die Klinge, da sie extrem scharf ist.
Anm. Nie die Klinge direkt auf dem Motorstift stecken,
bevor das Gefäß befestigt wurde.
Anm. Immer die Klinge im Gefäß befestigen, bevor die
Zutaten hinein gegeben werden.
6. Die gewünschten Nahrungsmittel hineingeben.
234. DIE FUNKTIONEN DES GERÄTS 5. GEBRAUCHSHINWEISE
A. Vorbereiten der Nahrungsmittel
B
• Die Zutaten in Stücke von ca. 1,5 cm schneiden.
Je größer die Stücke, desto länger dauert die
Zubereitung.
• Das Zubereitungsgefäß nicht zu sehr füllen, um
ungleichmäßige Resultate zu vermeiden und den
A Motor nicht unnötig zu belasten. Als Faustregel sollten
die Nahrungsmittel 2/3 des Zubereitungsgefäßes
nicht übersteigen.
WICHTIG
Nachdem sich alle Zutaten im Gefäß befinden • Wir empfehlen Ihnen, das Gerät während des Betriebs
brauchen Sie nur noch die entsprechende Drucktaste mit einer Hand fest zu halten, so dass es sich nicht
zu betätigen, um mit der Zubereitung zu beginnen. bewegen kann.
Sobald die Taste losgelassen wird, hält der Motor • Das Gerät nie länger als eine Minute am Stück
an. Die Klinge dreht automatisch je nach betätigter betreiben.
Drucktaste in die gewünschte Richtung. • Vor dem Entfernen des Deckels immer warten, bis die
Klinge still steht.
A. Mixen / Hacken / Pürieren / • Versuchen Sie nie, Deckel und Gefäß gleichzeitig
abzunehmen.
Emulsionieren • Vor dem Demontieren des Gefäßes muss zuerst der
Deckel entfernt werden. Zuerst das Gefäß entleeren,
Die Taste funktioniert mit der geschliffenen dann die Klinge entfernen.
Seite der Klinge. • Dank des BladeLock-Systems, das die Klinge hält,
können Sie Ihre flüssigen Zubereitungen sicher
aus dem Gefäß gießen, ohne vorher die Klingen zu
B. Mahlen / Zerkleinern entfernen.
Die Taste funktioniert mit der dickeren Seite B. Mixen / Hacken / Pürieren
der Klinge.
Die Zutaten in Stücke von ca. 1,5 cm schneiden.
Je größer die Stücke, desto länger dauert die
Zubereitung.
24Das Zubereitungsgefäß nicht zu sehr füllen, Nahrungsmittel pürieren:
um ungleichmäßige Resultate zu vermeiden
und den Motor nicht unnötig zu belasten. Als Durch mehrmaliges, kurzes Drücken grob hacken,
Faustregel sollten die Nahrungsmittel 2/3 des dann Konstant drücken, bis die gewünschte
Zubereitungsgefäßes nicht übersteigen. Beschaffenheit erreicht ist.
Mehrmals drücken und wieder loslassen, wobei (ANMERKUNG: dieser Vorgang ist nicht geeignet, um
Sie darauf achten sollten, dass die Nahrungsmittel Kartoffeln zu pürieren.)
jedes Mal wieder auf den Boden des Gefäßes Flüssigkeiten hinzufügen:
zurückfallen. Gegebenenfalls die Gefäßwände mit
dem Spatel abschaben. Die Beschaffenheit häufig Es ist möglich, während des Betriebs Flüssigkeiten
überprüfen, um nicht zu fein zu hacken. wie Wasser, Öl oder Aromastoffe hinzuzufügen. Dazu
die Flüssigkeit durch eine der beiden Öffnungen des
Frische Kräuter hacken: Deckels gießen. Achten Sie darauf, dass die andere
Die Kräuter, das Gefäß und die Klinge müssen Öffnung frei bleibt, so dass die Luft zirkulieren kann.
vollständig sauber und trocken sein. Die Stiele der
Kräuter entfernen und nur die zarten Teile behalten. C. Mahlen / Zerkleinern
Die Kräuter in das Gefäß geben und mehrmals
Diese Funktion ist geeignet für harte Nahrungsmittel
drücken, bis die Kräuter ausreichend gehackt sind.
wie Walnüsse, Haselnüsse, Mandeln, Kaffeebohnen,
Je mehr Kräuter Sie auf einmal hacken, desto feiner
etc.
werden sie gehackt.
Gehen Sie genauso vor wie für harte Nahrungsmittel:
Wenn sie vor dem Hacken gut abgetrocknet Mehrmals drücken und wieder loslassen und
wurden, halten sich aromatische Kräuter 4 bis 5 dabei darauf achten, dass die Nahrungsmittel jedes
Tage im Kühlschrank, wenn sie in einem luftdicht Mal wieder auf den Boden des Geräts zurückfallen.
geschlossenen Beutel aufbewahrt werden. Sie Für eine feinere Beschaffenheit einige Sekunden
können auch tiefgefroren werden. kontinuierlich fdrücken.
Hacken von Fleisch, Geflügel, Fisch und
Schalentieren:
Die Nahrungsmittel müssen sehr kalt, aber nicht
gefroren sein. In Stücke von ca. 1,5 cm schneiden.
Drücken um sie grob zu hacken. Danach
können Sie die Taste noch einige Sekunden drücken,
um feiner zu hacken. Gegebenenfalls mit dem Spatel
Nahrungsmittel entfernen, die an den Seitenwänden
haften.
256. BETRIEBSTECHNIKEN UND EMPFOHLENE MENGEN
Zutaten Kommentare
Knoblauch/Zwiebeln/Schalotten ✓
Sardellen ✓
Butter ✓ Nicht zu hart und in kleine Stücke geschnitten
Kaffee (in Bohnen) ✓ Höchstens 50g gleichzeitig
Frische Gemüse ✓ In kleine Stücke geschnitten
Höchstens 30g gleichzeitig, in kleine Stücke gesch-
Schokolade ✓ nitten
Höchstens. 60g gleichzeitig, in kleine Stücke gesch-
Hartkäse ✓ nitten
Mittelharter Käse ✓
Halbweicher Käse ✓ Muss sehr kalt sein
Weichkäse ✓ Muss sehr kalt sein
Körner (Kümmel, Mohn, etc.) ✓
Frische Kräuter ✓ Müssen gut abgetrocknet sein
Gekochte Gemüse ✓ Muss weich gekocht sein
Walnüsse, Haselnüsse ✓
Oliven ✓ Entkernt
Pfeffer (Körner) ✓
Muss sehr kalt (aber nicht gefroren sein), in gleich-
Fleisch, Geflügel, Fisch ✓ mäßige Stücke geschnitten.
Höchstens 150g
Schlagsahne ✓ Ungefähr 45 Sek. pro Impuls
Flüssigleiten ✓
Das Öl wird durch die entsprechende Einfüllöffnung
Mayonnaise ✓ im Deckel hinzugefügt
Eiswürfel ✓ In kleinen Mengen
267. RATSCHLAGE DER CHEFS • Um schnell Schlagsahne zuzubereiten, etwas kalte
flüssige Sahne in das Gefäß des Mini-Küchenhelfers
geben und dann 40 Sekunden lang die Taste
abwechselnd drücken und wieder loslassen.
Das Ergebnis ist ideal. Fügen Sie am Ende etwas
Zucker hinzu, falls die Schlagsahne etwas süßer sein
soll.
• Mit dem Miniküchenhelfer können Sie schnell
sehr schmackhafte Gemüsepürees für Ihre Kinder
zubereiten.
• Im Modus für Mischungen von Gemüse und
Fleisch oder Gemüse und Fisch.
• Im Modus für emulsionierte Mischungen mit
geschmolzener Butter, Olivenöl oder auch Sahne.
• Das Gefäß des Miniküchenhelfers nicht vollständig
füllen, um gleichmäßige Resultate zu erzielen und
den Motor nicht unnötig zu belasten. Als Faustregel
sollten die Nahrungsmittel 2/3 des Gefäßes nicht
übersteigen.
• Die aromatischen Kräuter vor dem Hacken gut
trocknen, um sie viel länger aufbewahren zu können.
In einem luftdicht verschlossenen Beutel können sie
4 bis 5 Tage im Kühlschrank aufbewahrt werden.
• Zum Emulsionieren Ihrer Zubereitung (Vinaigrette,
Mayonnaise, Béarnaise…), drücken Sie zuerst die
Taste um die Zubereitung zu binden, und dann
die Taste , um die Mischung zu verdichten und
die Flüssigkeit durch die Eintropföffnung des Deckels
hinzuzufügen.
• Beim Einkaufen können Sie ganze Gewürze wählen
und sie frisch in Ihrem Mini-Küchenhelfer mahlen,
um ein Höchstmaß an Aroma und Geschmack zu
erhalten.
Anm. : Zimt und Muskatnuss nicht mahlen
• Benutzen Sie zum Aufbewahren von ganzen Gewürzen
luftdicht verschlossene Gläser mit Gummidichtung.
278. FRAGEN/ANTWORTEN 9. REINIGEN UND VERSTAUEN
WAS TUN WENN: ANTWORTEN: • Den Netzstecker ziehen, wenn das Gerät nicht
verwendet wird.
Die Zutaten werden nicht Achten Sie darauf, das WICHTIG: Bewahren Sie die Klinge außerhalb der
ausreichend gehackt, es Gefäß nicht zu sehr zu Reichweite von Kindern auf.
bleiben Stücke? füllen. • Alle Bestandteile Ihres Geräts mit Ausnahme des
Die Nahrungsmittel Nutzen Sie das Prinzip Gehäusesockels sind spülmaschinenfest. Wir raten
an den Gefäßwänden des Umkehrmotors Ihnen, sie in dem oberen Korb der Spülmaschine zu
kleben indem Sie abwechselnd reinigen. In der Tat könnte im unteren Korb die große
bleiben? die Taste Hacken und Menge an heißem Wasser langfristig das Gefäß, den
die Taste Mahlen Deckel und die Zubehörteile beschädigen. Geben Sie
drücken. So können das Gefäß umgedreht in die Spülmaschine.
sich die Nahrungsmittel • Lassen Sie Vorsicht walten, falls Sie die Elemente
besser im Gefäß von Hand reinigen, denn die Klinge ist sehr scharf.
verteilen. Vermeiden Sie es, sie im Seifenwasser zu lassen, um
Sich flüssige Zutaten Sie sollten nur Sie nicht aus den Augen zu verlieren.
nicht gut mischen? hinzugefügt werden, • Seien Sie sehr vorsichtig, wenn Sie die Klinge in die
während das Gerät in Spülmaschine geben oder sie wieder herausholen.
Betrieb ist, um eine • Zur einfachen Reinigung sollten das
bessere Bindung Zubereitungsgefäß, er Deckel und die Klinge sofort
der Zutaten zu nach dem Gebrauch abgespült werden, damit die
begünstigen. Nahrungsmittel nicht antrocknen.
• Beim Hacken von bestimmten Nahrungsmitteln
Mein Mini-Küchenhelfer Überprüfen, ob das (Gewürze und Zucker) kann das Gefäß zerkratzt,
nicht funktioniert? Sicherheitssystem undurchsichtiger oder verfärbt werden.
des Deckels korrekt • Keine Scheuermittel für den Gehäusesockel
an der Rückseite des verwenden. Einfach §mit einem feuchten Tuch
Mini-Küchenhelfers abwischen und danach abtrocknen.
eingerastet ist. • Reinigungsmittel auf das Tuch und nicht auf den
Gehäusesockel geben.
2810. SICHERHEITSINWEISE Flüssigkeiten tauchen.
• Nach dem Gebrauch, vor dem Zusammensetzen
Wie mit allen Haushaltsgeräten muss mit dem Mini- und Auseinandernehmen, vor dem Entnehmen der
Küchenhelfer vorsichtig umgegangen werden. Nahrungsmittel und vor dem Reinigen immer den
Befolgen Sie die Ratschläge, um jedes Verletzungsrisiko Netzstecker ziehen. Nie das Gerät unbeaufsichtigt
zu vermeiden. lassen, wenn es an den Netzstrom angeschlossen ist.
• VORSICHT: Die Polyethylenbeutel, die Um den Netzstecker zu entfernen, immer am Stecker
das Produkt oder seine Verpackung ziehen und nicht am Kabel.
enthalten, können gefährlich sein. Um • Lassen Sie das Netzkabel nicht über den Rand der
Erstickungsgefahr zu vermeiden sollten diese Arbeitsplatte hängen.
Beutel außerhalb der Reichweite von Babys • Die Klinge nie im Gerät lassen, wenn es nicht benutzt
oder Kleinkindern aufbewahrt werden. Diese wird. Die Klinge außerhalb der Reichweite von
Beutel sind kein Spielzeug. Kindern aufbewahren.
• Seien Sie im Umgang mit der Klinge immer besonders • Das Gerät nicht mit vollständig geschlossenem
vorsichtig. Vermeiden Sie es, die scharfen Teile zu Deckel verstauen, um den Mechanismus nicht zu
berühren. beschädigen.
• Immer die Klinge einsetzen, bevor die Zutaten hinein • Besondere Vorsicht ist geboten, wenn das Gerät in
gegeben werden. der Nähe von Kindern verwendet wird. Das Gerät
• Nie die Klinge auf der Motorachse befestigen, bevor außerhalb der Reichweite von Kindern aufbewahren.
das Gefäß verriegelt wurde. Lassen Sie Kinder den Küchenhelfer nicht benutzen.
• Überprüfen Sie vor dem Einschalten des Geräts, dass • Das Gerät nicht benutzen, wenn es gefallen ist oder
die Klinge so weit wie möglich auf die Motorachse offensichtliche Spuren einer Beschädigung aufweist.
geschoben ist und dass der Deckel korrekt • Wenn das Kabel beschädigt ist, muss es durch den
angebracht wurde. Den Mechanismus des Deckels Hersteller, seinen Kundendienst oder eine ähnlich
nicht forcieren. qualifizierte Person ersetzt werden, um jede Gefahr
• Benutzen Sie den Spatel nur bei stillstehendem Motor. zu vermeiden.
Jede Berührung mit den Teilen vermeiden, während • Dieses Gerät ist nicht für die Verwendung durch
sie sich bewegen. Personen (einschließlich Kindern) mit eingeschränkten
• Vor dem Entfernen des Deckels immer warten, bis die physischen, sensoriellen oder mentalen Fähigkeiten
Klinge nicht mehr dreht. oder durch Personen ohne jede Erfahrungs- oder
• Den Netzstecker des Geräts vor dem Reinigen Kenntnisgrundlage konzipiert, es sei denn, sie
und Einsetzen bzw. Entfernen oder Wechseln des würden von einer Person, die für ihre Sicherheit
Zubehörs ziehen. verantwortlich ist, beaufsichtigt oder vorher über
• Das Gefäß von dem Sockel entfernen, bevor Sie die die Verwendung des Geräts instruiert. Kinder sollten
Klinge herausnehmen. beaufsichtigt werden, um zu gewährleisten, dass sie
• Benutzen Sie dieses Gerät ausschließlich mit von nicht mit dem Gerät spielen.
Cuisinart® geliefertem oder empfohlenem Zubehör. • Dieses Gerät entspricht den grundlegenden
• Den Sockel des Geräts nicht in Wasser oder andere Anforderungen der Richtlinien 04/108/EG
29Vous pouvez aussi lire