Gas Clay Tandoor Ovens - Models CE-IN-3232, 3434, 2830 Instruction Manual - Omcan
←
→
Transcription du contenu de la page
Si votre navigateur ne rend pas la page correctement, lisez s'il vous plaît le contenu de la page ci-dessous
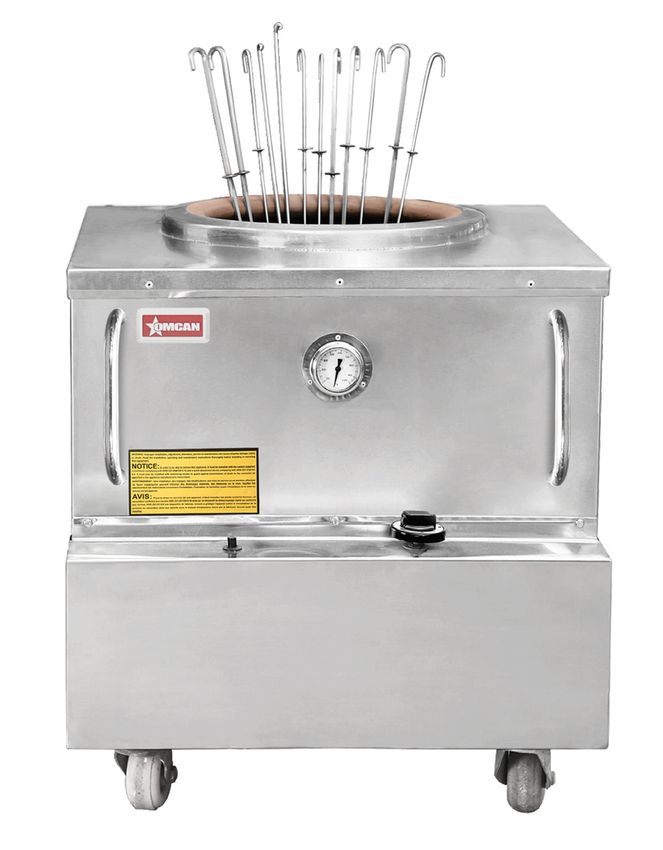
Gas Clay Tandoor Ovens
Models CE-IN-3232, 3434, 2830
 Items 44285, 44385, 44386
   Instruction Manual

         Revised - 03/04/2019

        Toll Free: 1-800-465-0234
            Fax: 905-607-0234
       Email: service@omcan.com
             www.omcan.com
Table of Contents
              Model CE-IN-3232 / Model CE-IN-3434 / Model CE-IN-2830

Section                                                                                          Page

General Information --------------------------------------------------------------------------- 3 - 4

Safety and Warranty --------------------------------------------------------------------------- 4 - 6

Technical Specifications -------------------------------------------------------------------------- 7

Installation -------------------------------------------------------------------------------------- 7 - 10

Operation ------------------------------------------------------------------------------------- 10 - 12

Maintenance --------------------------------------------------------------------------------- 12 - 14

Replacement Parts ------------------------------------------------------------------------- 14 - 16

Instructions Français ----------------------------------------------------------------------- 16 - 28

Notes ------------------------------------------------------------------------------------------- 29 - 30

Warranty Registration ---------------------------------------------------------------------------- 31

                                                    2
General Information
Omcan Manufacturing and Distributing Company Inc., Food Machinery of America, Inc. dba Omcan
and Omcan Inc. are not responsible for any harm or injury caused due to any person’s improper or
negligent use of this equipment. The product shall only be operated by someone over the age of 18, of
sound mind, and not under the influence of any drugs or alcohol, who has been trained in the correct
operation of this machine, and is wearing authorized, proper safety clothing. Any modification to the
machine voids any warranty, and may cause harm to individuals using the machine or in the vicinity of
the machine while in operation.
CHECK PACKAGE UPON ARRIVAL
Upon receipt of an Omcan shipment please inspect for external damage. If no damage is evident on the
external packaging, open carton to ensure all ordered items are within the box, and there is no concealed
damage to the machine. If the package has suffered rough handling, bumps or damage (visible or concealed),
please note it on the bill of lading before accepting the delivery and contact Omcan within 24 hours, so we may
initiate a claim with the carrier. A detailed report on the extent of the damage caused to the machine must be
filled out within three days, from the delivery date shown in the shipping documents. Omcan has no recourse
for damaged products that were shipped collect or third party.
Before operating any equipment, always read and familiarize yourself with all operation and safety
instructions.
Omcan would like to thank you for purchasing this machine. It’s of the utmost importance to save
these instructions for future reference. Also save the original box and packaging for shipping the
equipment if servicing or returning of the machine is required.
---------------------------------------------------------------------------------------------------------------------------------------------------
Omcan Fabrication et distribution Companie Limité et Food Machinery d’Amerique, dba Omcan et
Omcan Inc. ne sont pas responsables de tout dommage ou blessure causé du fait que toute personne
ait utilisé cet équipement de façon irrégulière. Le produit ne doit être exploité que par quelqu’un de
plus de 18 ans, saine d’esprit, et pas sous l’influence d’une drogue ou d’acohol, qui a été formé pour
utiliser cette machine correctement, et est vêtu de vêtements de sécurité approprié. Toute modification
de la machine annule toute garantie, et peut causer un préjudice à des personnes utilisant la machine
ou des personnes à proximité de la machine pendant son fonctionnement.
VÉRIFIEZ LE COLIS DÈS RÉCEPTION
Dès réception d’une expédition d’Omcan veuillez inspecter pour dommages externes. Si aucun dommage
n’est visible sur l’emballage externe, ouvrez le carton afin de s’assurer que tous les éléments commandés
sont dans la boîte, et il n’y a aucun dommage dissimulé à la machine. Si le colis n’a subi aucune mauvaises
manipulations, de bosses ou de dommages (visible ou cachée), notez-le sur le bond de livraison avant
d’accepter la livraison et contactez Omcan dans les 24 heures qui suivent, pour que nous puissions engager
une réclamation auprès du transporteur. Un rapport détaillé sur l’étendue des dommages causés à la machine
doit être rempli dans un délai de trois jours, à compter de la date de livraison indiquée dans les documents
d’expédition. Omcan n’a aucun droit de recours pour les produits endommagés qui ont été expédiées ou cueilli
par un tiers transporteur.
3General Information
Avant d’utiliser n’importe quel équipement, toujours lire et vous familiariser avec toutes les opérations
et les consignes de sécurité.
Omcan voudrais vous remercier d’avoir choisi cette machine. Il est primordial de conserver ces
instructions pour une référence ultérieure. Également conservez la boîte originale et l’emballage pour
l’expédition de l’équipement si l’entretien ou le retour de la machine est nécessaire.
---------------------------------------------------------------------------------------------------------------------------------------------------
Omcan Empresa De Fabricacion Y Distribucion Inc. Y Maquinaria De Alimentos De America, Inc. dba
Omcan y Omcan Inc. no son responsables de ningun daño o perjuicío causado por cualquier persona
inadecuada o el uso descuidado de este equipo. El producto solo podra ser operado por una persona
mayor de 18 años, en su sano juicio y no bajo alguna influencia de droga o alcohol, y que este ha sido
entrenado en el correcto funcionamiento de esta máquina, y ésta usando ropa apropiada y autorizada.
Cualquier modificación a la máquina anúla la garantía y puede causar daños a las personas usando la
máquina mientras esta en el funcionamiento.
REVISE EL PAQUETE A SU LLEGADA
Tras la recepcion de un envio Omcan favor inspeccionar daños externos. Si no hay daños evidentes en el
empaque exterior, Habra el carton para asegurararse que todos los articulos solicitados ésten dentro de la
caja y no encuentre daños ocultos en la máquina. Si el paquete ha sufrido un manejo de poco cuidado, golpes
o daños (visible o oculto) por favor anote en la factura antes de aceptar la entrega y contacte Omcan dentro
de las 24 horas, de modo que podamos iniciar una reclamación con la compañia. Un informe detallado sobre
los daños causados a la máquina debe ser llenado en el plazo de tres días, desde la fecha de entrega que se
muestra en los documentos de envío. Omcan no tiene ningun recurso por productos dañados que se enviaron
a recoger por terceros.
Antes de utilizar cualquier equipo, siempre lea y familiarizarse con todas las instrucciones de
funcionamiento y seguridad.
Omcan le gustaría darle las gracias por la compra de esta máquina. Es de la mayor importancia para
salvar estas instrucciones para futuras consultas. Además, guarda la caja original y el embalaje para el
envío del equipo si servicio técnico o devolución de la máquina que se requiere.
Safety and Warranty
WARNINGS/RECOMMENDATIONS
Warning: Hazardous Fire or explosion may result if these instructions are ignored. It is your
responsibility to ascertain that your new tandoor is properly, assembled, installed and maintained.
Failing in carefully following the instructions of this manual could result in serious bodily injury and/or
property damage.
4Safety and Warranty
1. You will need a certified technician to install and hook your tandoor to the main gas line. Never try to hook
the tandoor yourself.
2. Your technician will require a blue flexible hose and gas regulator that is NSF/CSA certified to connect the
tandoor to the main gas line.
3. Chain the tandoor to the wall.
4. While operating the tandoor, NEVER fully cover the top and side lids. As the extra heat inside will damage
the gas components and crack the clay.
5. Clean the inside floor once every 3-4 days as the burned remains are not good for your customer’s health
and they will damage your gas components.
6. The yellow gas shutoff valve outside the tandoor regulates the inflow of gas to the burner. By adjusting it
you can increase or decrease the heat. Never operate your tandoor at full heat capacity as this will damage
the gas components and crack the clay.
7. Do not store/use gasoline or other flammable vapors close to the Tandoor or any other appliance.
8. The propane models are meant for use with PROPANE gas only at a pressure regulated at 9” wc (for
applicable units only).
9. Always secure the propane cylinder upright in position and do not store unused cylinders in close vicinity of
any gas burning appliance.
FOR YOUR SAFETY:
1. Do not store or use gasoline or other flammable vapors or liquids in the vicinity of this or any other
appliance.
2. A qualified installer must perform installation and service.
WARNING: Improper installation, adjustment, alteration, service or maintenance can cause property
damage, injury or death. Read the installation, operating and maintenance instructions thoroughly
before installing or servicing this equipment.
Please read the entire manual and follow all pertinent instruction when assembling, installing and
operating this appliance. The manual should be retained for future reference. Please post in prominent
location instructions to followed in the event user smells gas.
WARNING: IF YOU SMELL GAS
1. Shut off gas to the appliance.
2. Extinguish any open flames.
3. Do not try to light any appliance.
4. Do not touch any electrical switch; do not use any phone in your building.
5. Immediately call you gas supplier from a neighbor’s phone. Follow the gas Supplier’s instructions.
6. If you cannot reach your gas supplier, call the fire department.
• Do not store or use flammable vapors or liquids in the vicinity of this or not any other appliance.
• Whilst in operation, parts of the appliance will become hot. Suitable precautions must be taken to avoid
accidental burns.
• Keep all combustible products away from the Tandoor.
• This is gas fired Tandoor ONLY. No charcoal use. The oven must not be exposed to rain / water.
• Keep at least 6” (150mm) away from any other equipment.
5Safety and Warranty
• Must be installed by a technically qualified technician.
• At all times keep this manual in the vicinity of the oven.
Models of this tandoor oven suitable for installations in North America, (Canada or the U.S.A.) display a
special marking plate with the ETL logo on the name plate and a reference on the plate to ANSI Z83.11
Standard to indicate compatibility to gas connections devices used in those countries.
These North America designated appliances are suitable for use only on natural gas. For any Canadian
or U.S.A. installations, only the correct version of this appliance can be used and these can be only
operated on natural gas.
This appliance must be installed in accordance with current local regulations and only used in a well
ventilated area.
RETAIN THIS MANUAL FOR FUTURE REFERENCE
ASSEMBLER / INSTALLER: Leave these instructions with the appliance. A copy of these boxed instructions
is to be posted in a prominent location and the instructions are to be followed in the event the user or area
occupant detects gas odors.
1 YEAR PARTS AND LABOUR WARRANTY
Within the warranty period, contact Omcan Inc. at 1-800-465-0234 to schedule an Omcan authorized
service technician to repair the equipment locally.
Unauthorized maintenance will void the warranty. Warranty covers part failures, not improper use.
Please see https://omcan.com/disclaimer for complete info.
WARNING:
The packaging components are classified as normal solid urban waste and can therefore be disposed of
without difficulty.
In any case, for suitable recycling, we suggest disposing of the products separately (differentiated
waste) according to the current norms.
DO NOT DISCARD ANY PACKAGING MATERIALS IN THE ENVIRONMENT!
6Technical Specifications
Model CE-IN-3232 CE-IN-3434 CE-IN-2830
Mouth Diameter 16” / 406mm 18” / 457mm 14” / 356mm
Heat Input 48,000 BTU/Hr.
Inlet Gas Pressure 7” wc / 178mm wc
Maximum Inlet Gas
10.5” wc / 267mm wc
Pressure
Minimum Inlet Gas
6” wc / 152mm wc
Pressure
Manifold Pressure 5.5” wc / 140mm wc
32” x 32” x 36” 34” x 34” x 36” 28” x 30” x 36”
Dimensions
813 x 813 x 914mm 864 x 864 x 914mm 711 x 762 x 914mm
Item Number 44285 44385 44386
Installation
BEFORE STARTING WITH THE INSTALLATION OF THE APPLIANCE, PLEASE READ
AND BE FAMILIAR WITH THE INFORMATION IN THIS MANUAL
Installation of this must be performed by a registered gas – safe gas fitter or in the U.S.A, a qualified installer.
• Appliance installation sites should be provided with safety instructions based on information
supplied by local fuel suppliers. These instructions are to be posted in a prominent area near the
appliance.
• All installations are to conform to local codes. In the absence of local codes, installation should
conform to the National Fuel Gas Code, ANSI Z223.1/NFPA 54, and in Canada the National Gas
Installation Code, CAN/CGA-B149.1.
• The appliance and its individual shutoff valve must be disconnected from the gas supply piping
system during any pressure testing of that system at pressures in excess of psi (3.45 kPa).
• The appliance must be isolated from the gas supply piping system by closing its individual manual
shutoff valve during any pressure testing of the gas supply piping system at test pressures equal
to or less than 1/2 psi (3.45 kPa). In Europe a gas soundness test must be carried out.
• Oven is to be castor mounted for use: The installation shall be made with a connector that complies
with the Standard for Movable Gas Appliances, ANSI Z21.69 CSA 6.16, and a quick disconnect
device that complies with the Standard for Quick-Disconnect Devices for Use With Gas Fuel, ANSI
Z21.41CSA 6.9. Adequate means will be provided on site to limit the movement of the oven without
depending on the connector and the quick-disconnect device or its associated piping to limit the
appliance movement. All castors are fitted with brakes to limit the movement of the tandoor.
• Do not allow untrained operators to use this equipment.
• Exercise extreme care in handling metal parts. Do not touch any metal or other surfaces that
become hot in operation.
7Installation
• NO ATTEMPT SHOULD BE MADE TO OPERATE THIS APPLIANCE DURING AN ELECTRICAL
POWER FAILURE. In the event of the loss of electrical power, exhaust hood will not function. If this
happens turn off the hood power switch and turn off the gas tandoor oven valve(s).
• IF INSTALLATION SITE IS PROVIDED WITH A POWER LOSS INTERLOCK DEVICE, IT WILL ACT TO
SHUT OFF ALL GAS IN THE EVENT OF ELECTRICAL POWER FAILURE. FOLLOWING LOSS OF
POWER MANUAL RELIGHT OF PILOT BURNER WILL BE REQUIRED.
• Refer to local codes for the building fresh air supply requirements. For the U. S. A., in the absence
of local codes, refer to the National Ventilation Code entitled, “Standard for the Installation
of Equipment for the Removal of Smoke and Grease laden Vapors from Commercial Cooking
Equipment”, NFPA-96-latest edition.
• Note: Where servicing may require greater access clearances than those shown on the name plate,
then the greater clearances should be allowed for.
• At installation, adequate clearances should be provided for proper operation and servicing of
the appliance and any field installed optional items. Data plate applies only to tandoor oven as
provided by appliance manufacturer.
• This appliance is for installation only at the clearances indicated on the name plate. Clearances are
specified from combustible and for non-combustible construction.
• Observe clearances from combustible surfaces as marked on name plate. Clearances posted on
unit are for safety reasons and lesser clearances cannot be applied. Additional clearances might be
required for service and operator access.
• Do not block any louvered openings on appliance service panels.
UNPACKING
• Un-crate the unit with extreme care, do not use a hammer or heavy tools to un-crate the unit. Always
remove shipping container parts and panels by only outward prying.
• Make sure the unit is in the upright position before starting to un-crate.
• Before fixing the appliance in place, remove all protective plastic coating from the unit.
• Oven is on 6” (152mm) wheel castors and can be rolled out easily to the designated installation area.
• Unit must be rolled around by hand. Do not use a lift jack.
CLEARANCE AND POSITIONING
• This appliance requires a 6” (150mm) clearance from combustible and non-combustible material and
surfaces.
• Never install propane appliances below grade.
• A clear space, (rear clearance) of at least 6” (150mm) should be maintained at the rear and sides of the
appliance.
• There must be minimum clearances of 32” (813mm) between top of the appliance and any overhanging
shelf. Shelves must be of non-combustible material.
• It is recommended that the appliance is not installed in draughty locations or near doors.
• If the appliance is positioned on a combustible floor, sheet material (preferably stainless steel) equal to the
base area of the appliance must be secured to the floor prior to fixing the appliance in place. NOTE: For
Canadian and U. S. A. installation is authorized only on non-combustible floors.
• Ensure that the appliance is level.
8Installation
• Inspect for damage. If any damage is noted, report damage to the freight company and contact distributor
at the address shown on the cover.
• Verify that the unit marking plate indicates that the unit is set up for service on the type of gas fuels as
found at the installation site. Natural gas units have to be operated on natural gas only and propane units
used only on propane gas.
• Plan location of units in such a manner as to be best accessible to operator. Locate unit so that foot traffic
in area will not interfere with unit operation. When choosing unit location, take into consideration the
operation of overhead and side mounted heating/cooling ducts and fans.
VENTILATION
• The area in which the appliance is to be installed should have sufficient fixed ventilation to comply with
local requirements, with a minimum area of 4.5 cm per 1Kwht (3412 Btu per hr) of total heat input.
• Ventilation hood must be installed above the appliance according to all appliance codes by your local and
state health and fire regulations.
• It is required that the Tandoor be interlocked to the hood ventilation system.
• There must be sufficient low- level ventilation to ensure that the appliance has a good supply of clean fresh
air.
GAS SUPPLY AND CONNECTION
• Check that the gas supply correspondence to that on data plate. Gas connection must be the same size
of the Baba Clay Oven, BSP ½”, (For U. S. A. and Canada NPT ½”). Inlets. Warning: Do not under any
circumstances join NPT to BSP threads when making connections.
• The ½” connection for connection of gas supply is located behind the unit.
• A shut off valve should be installed on the gas service line ahead of the unit in case of emergency and
for serving purposes. The location of the manual shutoff valve should comply with codes in effect at the
installation site.
• Since the appliance is caster mounted, connection of the appliance must be made using suitable flexible
connection devices. Ensure that the hose is suitable for commercial catering appliances and a restraining
wire and wiring label are used.
• Fixed pipe work must not be used with this appliance.
• For the U. S. A. and Canada - Installation shall be made with a connector that complies with the standard
for connectors for Movable Gas Appliance, ANSI Z21.69-CSA 6.16, and a quick Disconnect devices for the
use with gas fuel, ANSI Z21.41- CSA 6.9.
• Connect tandoor to gas supply and conduct gas leakage tests to verify gas tight connections. Check entire
piping system for leaks. A solution consisting of 50% dish washing detergent and water mix can be applied
to all piping parts with a brush.
• Matches, candles or other sources with open flames or sparks shall not be used for this purpose. Gas
controls are provided with outlet settings suitable for the fuel type shown on the name plate. Adjustments, if
needed, to the regulator should only be made by qualified service staff. The regulator outlet pressure must
be the pressure shown on the name plate for the type of gas fuel used.
• Some local codes require that a manual shutoff valve be installed in the same room and within six feet of
the appliance. If because of local code requirements, a manual gas shutoff valve has to be installed on the
appliance, and if it is mounted inside of enclosure by access doors, a label should be provided indicating
9Installation
this construction.
• Proper gas piping: In order to insure proper performance of this unit as well as other gas appliances on the
same gas supply lines, a well-planned and properly sized gas supply system is a must. If the appliances
are to be connected to existing piping, the piping should be checked for adequate capacity enabling full
firing for all of the units that are to use the piping run.
• Pipe thread sealant (joint compound) shall be used sparingly and only on male threads of pipe joint. Such
compounds shall be resistant to the action of L.P. gases.
WARNING: All pipe fittings must be clean and free of dirt or other contaminants. Any loose
particles, such as dirt or metal filing, in gas lines can damage the controls and affect operation.
• Make certain not to obstruct the flow of combustion and ventilation air. Insure that air intake openings
around the appliance jacket are not obstructed.
• Appliance must be connected to suitable exhaust duct in compliance with all applicable local codes.
• Position the appliance to insure that proper clearances for safety and service are provided.
Operation
CURING THE CLAY POT FOR FIRST TIME USE
• You must prepare the tandoor’s clay portion once before starting it for the first time. This seals and treats
the clay, which in turn extends the life of your tandoor.
• For best results, repeat this procedure once every 2-3 months.
INGREDIENTS
• Mustard oil - 1.5 Litres.
• Jaggery (gur) - 1 Kg.
• Spinach (Palak) - 1 Kg.
• Salt - 10 Teaspoons.
DIRECTIONS
1. Mix (grind) the above mentioned ingredients in a pot until it becomes liquid.
2. Rub with a cloth on the clay portion of your tandoor.
3. Let the tandoor absorb the mixture for 30 min.
4. Then repeat steps 2 and 3 another three times.
5. Light up your tandoor on SLOW heat for 48 hours.
6. After the tandoor cools down, remove the remainder of the mixture from your tandoor using a soft moist
cloth.
START UP AND OPERATION
All appliances are operationally checked and adjusted before leaving our factory. These adjustments are
made to verify effective operation and that the appliance meets the requirements of the tests standards. At the
installation site making sure all local codes are met is the responsibility of the installer.
10Operation
Omcan ovens use a safety pilot system to ignite the burner and monitor flames and to shut off the gas supply
in case of loss of burner or pilot flames. The gas supplies to the pilot and burner are fed through a thermo-
magnetic safety valve. A thermocouple is part of the safety systems and it functions to hold the gas valve open
after a proper pilot flame is established.
Before firing of unit, fit burner plate over burner and place a layer of rocks evenly and level onto plate. Only use
rocks as supplied with the appliance.
USER INSTRUCTIONS
1. Make sure that the manual shutoff valve behind the unit is turned off and that the Tandoor gas valves are
turned off.
2. Open the main gas line to the Tandoor oven.
3. On the appliance control valve depress and hold the black knob on the start position indicated by a star for
10 seconds to start pilot gas flow and to clear the air from the gas line.
4. Repeatedly push the piezo igniter until the pilot burner lights. (the pilot light can be seen faintly at 5 o’ clock
below the burner plate).
5. Continue to keep the control knob pressed in for a further 20 seconds for the flame sensing device to
establish itself.
6. If the pilot burner extinguishes itself when the knob is released, repeat the above procedure.
7. If the burner extinguishes for the any reason while the oven is operating, switch control off and WAIT
5 MINUTES BEFORE RELIGHTING. If for any reason burners become extinguished, repeat lighting
instructions beginning with Step 1.
8. After the pilot burner is lit main burner can be turned on. To do so rotate the control knob anti-clockwise,
(counter clock). The burner can now be set to high flame position indicated by the large flame symbol. To
adjust flames to lower flame setting, turn knob to the low position, or anywhere between the two, continue
to turn the control knob anti-clockwise towards the small flame symbol.
9. The main burner should light smoothly and quietly. Burner flames should be predominantly blue.
10. When not in use, the control knob should always be set to the OFF position.
FIRST FIRING
It is important to gradually build up heat within the Tandoor the first time it’s being used. The burner should be
at very low setting (control valve set at LOW) for at least 6 hours before gradually increasing the flame
intensity.
During this procedure the mouth of the Tandoor should be completely exposed. DO NOT cover the
opening with the stainless steel lid. Do not be alarmed if you see small fissures appear on the clay surface it
will not affect the performance of the Tandoor.
SHUTTING DOWN OF THE APPLIANCE
To turn off the appliance, turn the control clockwise until the indicator on the knob is in the off position indicated
by the black dot symbol. Visually confirm that the flames have gone out.
11Operation
WARNING: after the operation the appliance will remain hot for some time, therefore, to avoid injury,
care should be taken to prevent contact with hot surfaces.
Maintenance
ROUTINE MAINTENANCE
Slight hairline cracks are expected to appear in the clay pot during use. A tub of fire cement (furnace cement),
is supplied with the oven to effect repairs as follows (when the Tandoor has cooled down):
• Dampen the affected area with a moist cloth.
• Fill in the crack with the fire cement using a wooden spatula.
• Smooth the foiled area with a soft moist cloth.
• Allow repair to air dry for approximately 6 hours. DO NOT WET THE CLAY LINING.
• Remove rocks and lightly brush clean.
NORMAL CLEANING
Clean all the external panels with a non-abrasive detergent. To safely remove the build-up of grease on the
clay surface, wipe it down with a cloth that has been dampened with a solution of salt and white vinegar.
BURNER
At least twice a year, clean the burner. The burner can be cleaned, by gently scraping with a brass bristle
brush. Ensure that all burner ports (openings) are clear (DO NOT ENLARGE BURNER PORTS). If you find
cracks, abnormal holes, or damage caused by corrosion during your inspection and cleaning, replace burner.
IGNITOR
Clean the ignitor clip lightly using a wire brush to remove rust and grease. If a crack is detected, a replacement
ignitor system will be required.
PLATES
Scrub the plate with a stiff long handled brass brush. The plate can also be washed with a mild detergent. If
rust appears on your plate, remove the rust with a scrub pad. If excessive wear is evident, you might want to
replace your plate.
EXTERNAL STAINLESS STEEL SURFACE
The external area of your tandoor should be cleaned daily to maintain a proper hygiene/cooking environment.
All grease, dust and food particles should be removed from the tandoor surface before lighting the tandoor. It
can be cleaned with a wet cloth and kitchen surface disinfectants.
12Maintenance
SERVICING
The Tandoor oven should be routinely serviced to ensure a long trouble free life. It is recommended that the
appliances are serviced every 6 months by a registered gas – safe fitter/qualified person.
In the event that the ignition is delayed or becomes noisy, turn off the appliance and call for a service.
GENERAL CHECK
Remove the control knob and the 4 screws securing the front cover and cover off over the tap spindle.
1. General check of the appliance, e.g. installation, ventilation, gas connections, gas supply fittings/flexible
hose, restraint wire fitted isolation shut off valve.
2. Check low flame setting, adjust as necessary.
3. Check general burner condition. Clean burner ports with vacuum cleaner or low pressure air.
4. Clean aeration port/air shutter opening and injector of any lint build-up.
5. Carry out gas soundness / gas leakage test.
PERFORMING A LEAK TEST
A leak test ensures that there are no gas leaks prior to lighting your tandoor.
The leak test, must be conducted in a well-ventilated area away from any open flame, heat or ignition sources.
Do not use a match, open flame or smoke during leak testing.
WHAT YOU WILL NEED FOR TESTING:
1. A mixture of, 50% liquid dish soap and 50% water.
2. A brush or cloth to apply the mixture.
AREAS TO LEAK TEST ON NATURAL GAS TANDOOR:
• All flexible connector connections.
• All valve connections.
HOW TO PERFORM LEAK TEST:
1. With the gas supply valve on the Tandoor in the OFF position, twist the valve 1 turn or the main natural gas
valve on. Do not ignite the burners while performing the leak check.
2. Brush your soap and water solution on all connections and components.
3. Observe carefully for growing bubbles, which indicate that a leak is present.
4. If a leak is detected, then DO NOT USE the tandoor. Shut off the gas source at the valve immediately. Call
a certified gas appliance service technician, or a gas dealer for proper repairs
WARNING: FAILURE TO ENSURE THE ABOVE MAY RESULT IN HAZARDOUS FIRE OR EXPLOSION
CAUSING SERIOUS BODILY INJURY AND/OR PROPERTY DAMAGE.
13Maintenance
CHECK TO ENSURE THE BURNER HAS A GOOD FLAME EACH TIME IT IS TURNED ON.
WARNING: Components after cleaning should be replaced in reverse order of removal and verified to
be correctly positioned before Tandoor is fired. If any parts are damaged or lost during cleaning, do not
operate unit until they are replaced. To do so will void warranty.
Replacement Parts
CODES FOR REPLACEMENT PARTS
68120 - LID FOR 28 X 30 INCH TANDOOR OVEN
68162 - LID FOR 32 X 32 INCH TANDOOR OVEN
68163 - LID FOR 34 X 34 INCH TANDOOR OVEN
68122 - EXTRA CLAY (PER PACKET) FOR TANDOOR OVEN
68123 - CLAY BALLS (SET OF 30) FOR TANDOOR OVEN
68124 - SKEWERS (SET OF 12) FOR TANDOOR OVEN
68125 - GADDI FOR TANDOOR OVEN
68126 - TAWA HOT PLATE FOR 28 X 30 TANDOOR OVEN
68869 - TAWA HOT PLATE FOR 34 X 34 TANDOOR OVEN
68871 - TAWA HOT PLATE FOR 32 X 32 TANDOOR OVEN
68127 - 9 INCH GAS BURNER FOR TANDOOR OVEN
68128 - 10 INCH GAS BURNER FOR TANDOOR OVEN
68129 - 12 INCH GAS BURNER FOR TANDOOR OVEN
68130 - COMPLETE SAFETY VALVE KIT FOR TANDOOR OVEN
68132 - 2.95MM JETS/INJECTORS FOR TANDOOR OVEN
68872 - 3.5MM JETS/INJECTORS FOR TANDOOR OVEN
68873 - 4.2MM JETS/INJECTORS FOR TANDOOR OVEN
1. Only qualified persons should conduct service or repair of this equipment.
2. Always disconnect power and fuel when repairing or servicing these appliances.
3. Any service or repair conducted on the unit as covered by the warranty has to be authorized by the
manufacturer.
4. Only the original factory parts are to be used for any repair or replacement.
5. If parts are lost or missing, obtain and install replacement parts before returning unit to service.
6. Following service, be sure to reconnect all parts, and close all panels and covers before power is turned
back on. Do not attempt to bypass any safety controls. Doing so voids warranty and creates dangerous
operating conditions.
7. Access to service most components is gained by removing of the front cover. This is done by undoing the
screws which secure the front cover and then removing cover.
14Replacement Parts
THERMOCOUPLE
1. Loosen the thermocouple and pilot gas supply connection to the valve.
2. Undo the nut holding the pilot light assembly cradle and withdraw.
3. Replace the thermocouple.
4. Replace as above in reverse order.
DO NOT OVERTIGHTEN THE CONNECTION VALVE
The tip of the thermocouple should be 1” (25 mm) from the edge of the main burner and level with the top of
main burner.
The pilot flame should completely envelope the tip of the thermocouple.
IGNITE ELECTRODE
1. Remove the igniter lead from piezo.
2. Undo the nut holding the light assembly cradle and withdraw.
3. Replace the electrode.
4. Replace as above in reverse order.
PILOT BURNER
1. Loosen the thermocouple and pilot gas supply connection to the valve.
2. Undo the nut holding the pilot light assembly cradle/bracket and replace.
GAS TAP ASSEMBLY
1. Loosen and remove connections to burner pipe and gas inlet pipe.
2. Loosen and remove connections to pilot burner.
3. Loosen connection to thermocouple and remove.
4. Loosen and remove the holding plate nut.
5. Withdraw tap/valve assembly.
6. Replace as above in reverse order.
BURNER
1. Remove rocks and plate sitting on the burner.
2. Loosen connection from burner pipe to gas tap/valve and remove.
3. Withdraw burner through top of oven.
4. Replace as above in reverse order.
15Replacement Parts
INJECTOR/ORIFICE SPUD
1. Loosen connection from burner pipe to gas tap/valve and remove.
2. Loosen and remove injector/orifice spud carrier from burner.
3. Loosen and remove injector/orifice spud from injector carrier.
4. If necessary clean out injector with fine wire or air hose.
5. Replace as above in reverse order.
Instructions Français
SECURITE ET GARANTIE
AVERTISSEMENTS / RECOMMANDATIONS
Avertissement: Un non-respect de ces instructions peut provoquer un incendie ou une explosion. Il
est de votre responsabilité de vous assurer que votre nouveau tandoor est correctement assemblé,
installé et entretenu. Si vous ne respectez pas scrupuleusement les instructions de ce manuel, vous
risquez de vous blesser gravement et / ou de subir des dommages matériels.
1. Vous aurez besoin d’un technicien certifié pour installer et raccorder votre tandoor à la conduite de gaz
principale. N’essayez jamais de vous accrocher au tandoor.
2. Votre technicien exigera un détendeur de tuyau flexible bleu et de gaz certifié NSF / CSA pour connecter le
tandoor à la conduite de gaz principale.
3. Chaînez le tandoor au mur.
4. Lorsque vous utilisez le tandoor, ne couvrez JAMAIS complètement les couvercles supérieurs et latéraux.
Comme la chaleur supplémentaire à l’intérieur va endommager les composants du gaz et fissurer l’argile.
5. Nettoyez le plancher intérieur tous les 3 ou 4 jours, car les restes brûlés ne sont pas bons pour la santé de
vos clients et pourraient endommager vos composants gazeux.
6. Le robinet d’arrêt de gaz jaune à l’extérieur du tandoor régule l’entrée de gaz dans le brûleur. En l’ajustant,
vous pouvez augmenter ou diminuer la chaleur. Ne faites jamais fonctionner votre tandoor à pleine
capacité calorifique, car cela endommagerait les composants gazeux et fissurerait l’argile.
7. Ne pas stocker / utiliser d’essence ou d’autres vapeurs inflammables à proximité du Tandoor ou de tout
autre appareil.
8. Les modèles au propane sont conçus pour être utilisés avec du gaz PROPANE uniquement à une pression
régulée à 9 po de colonne d’eau (pour les unités applicables uniquement).
9. Sécurisez toujours la bouteille de propane en position verticale et ne rangez pas les bouteilles non utilisées
à proximité immédiate d’un appareil à gaz.
POUR VOTRE SECURITE:
1. Ne pas conserver ni utiliser d’essence ou autres ou liquides inflammables à proximité de cet appareil ou de
tout autre appareil.
2. L’installation et la mise en service doivent être effectuée par un installateur de service agrée.
16Instructions Français
AVERTISSEMENT: Une installation, des réglages, des modifications, une mise en service ou un
entretien effectué de façon inappropriée peuvent entrainer des dommages matériels, des blessures ou
la mort. Veuillez lire attentivement les instructions concernant d’installation, l’opération, et l’entretien
avant d’installation ou la mise en service de cet appareil.
Veuillez lire le manuel entier et suivre toutes les instructions concernant l’assemblage, l’installation,
et l’opération de cet appareil. Le manuel doit être conservé pour toute référence ultérieure. Veuillez
afficher les instructions dans un endroit bien visible et les suivre en cas de détection d’une odeur de
gaz.
ATTENTION: SI VOUS SENTEZ UNE ODEUR DE GAZ
1. Coupez l’alimentation en gaz de l’appareil.
2. Éteignez toute flamme.
3. N’allumez aucun appareil.
4. Ne touchez à aucun interrupteur électrique; n’utiliser pas de téléphone dans votre bâtiment.
5. Appelez immédiatement le fournisseur de gaz en utilisant le téléphone d’un voisin. Suivez les instructions
du fournisseur le gaz.
6. Si vous ne parvenez pas à joindre le fournisseur de gaz, appelez les pompiers.
• Ne pas entreposer ni utiliser des vapeurs ou des liquides inflammables à proximité de cet appareil ou de
tout autre appareil.
• Pendant la cuisson, certaines parties de l’appareil deviennent brûlantes. Toutes les précautions
nécessaires doivent être prises pour éviter des brûlures accidentelles.
• Gardez tous produits inflammables à l’écart du Tandoor.
• Cet appareil est adapté pour fonctionner au gaz UNIQUEMENT. II n’est pas adapté pour un fonctionnement
au charbon. Le four ne doit pas être exposé à la pluie/l’eau. Placez l’appareil à une distance d’au moins 6»
(150mm) de tout autre appareil.
• L’appareil doit être installe par un technicien hautement qualifie.
• Gardez toujours ce manuel ce manuel à proximité du four.
Les modelés de ce four tandoor dont l’installation est autorisés en Amérique du Nord, (la Canada ou
les Etats-Unis), ont une étiquette spéciale comportant le logo de L’ETL ainsi qu’une référence aux
normes.
ANSI Z83.11 pour indiquer la compatibilité de l’appareil avec les dispositifs de connexion de gaz utilise
dans ces pays. Ces appareils destinés à être utilisés en Amérique du Nord ne fonctionnent qu’au gaz
naturel. Pour toute installation canadienne ou américaine, seules les versions appropriées de cet
appareil peuvent être utilisée et elles ne peuvent être opérées qu’au gaz naturel.
Cet appareil doit être installé conformément aux réglementations locales en vigueur et utilisé
uniquement dans un endroit bien ventilé.
CONSERVEZ CE MANUEL POUR TOUTE RÉFÉRENCE ULTÉRIEURE
ASSEMBLEUR / INSTALLATEUR: Veuillez laisser ces instructions avec l’appareil. Une copie de ces
17Instructions Français
instructions doit être affichée dans un endroit bien visible et les instructions devront être suivies en
cas de détection d’une odeur de gaz par l’utilisateur ou un habitant du quartier.
GARANTIE DE 1 AN SUR LES PIÈCES ET LE TRAVAIL
Pendant la période de garantie, contactez Omcan Inc. au 1-800-465-0234 pour demander à un
technicien de service autorisé Omcan de réparer l’équipement localement.
Un entretien non autorisé annulera la garantie. La garantie couvre les pannes de pièces et non une
utilisation inappropriée.
Veuillez consulter https://omcan.com/disclaimer pour des informations complètes.
ATTENTION:
Les composants de l’emballage sont classés comme déchets urbains solides normaux et peuvent donc être
éliminés sans difficulté.
Dans tous les cas, pour un recyclage approprié, nous suggérons d’éliminer les produits séparément
(déchets différenciés) conformément aux normes en vigueur.
NE PAS JETER DE MATÉRIAUX D’EMBALLAGE DANS L’ENVIRONNEMENT!
SPÉCIFICATIONS TECHNIQUES
Modèle CE-IN-3232 CE-IN-3434 CE-IN-2830
Diamètre De La Bouche 16” / 406mm 18” / 457mm 14” / 356mm
Apport de chaleur 48,000 BTU/Hr.
Pression de gaz
7” wc / 178mm wc
d’admission
Pression maximale du
10.5” wc / 267mm wc
gaz d’admission
Pression minimale du
6” wc / 152mm wc
gaz d’admission
Pression du collecteur 5.5” wc / 140mm wc
32” x 32” x 36” 34” x 34” x 36” 28” x 30” x 36”
Dimensions
813 x 813 x 914mm 864 x 864 x 914mm 711 x 762 x 914mm
Numéro d’article 44285 44385 44386
18Instructions Français
INSTALLATION
AVANT DE COMMENCER À L’INSTALLATION DE L’APPAREIL, VEUILLEZ LIRE ET
ÊTRE FAMILIER AVEC LES INFORMATIONS CONTENUES DANS CE MANUEL
L’installation de ce matériel doit être effectuée par un installateur agréé de gaz sûr ou par l’installateur qualifié
américain.
• Les sites d’installation des appareils devraient recevoir des instructions de sécurité basées sur
les informations fournies par les fournisseurs de carburant locaux. Ces instructions doivent être
affichées dans un endroit bien visible près de l’appareil.
• Toutes les installations doivent être conformes aux codes locaux. En l’absence de codes locaux,
l’installation doit être conforme au code national du gaz combustible, ANSI Z223.1 / NFPA 54, et au
Canada, au code national d’installation du gaz, CAN / CGA-B149.1.
• L’appareil et son robinet d’arrêt individuel doivent être débranchés du système de tuyauterie
d’alimentation en gaz pendant tout test de pression de ce système à des pressions supérieures à
3,45 kPa (psi).
• L’appareil doit être isolé du système de tuyauterie d’alimentation en gaz en fermant son robinet
d’arrêt manuel individuel lors de tout test de pression du système de tuyauterie d’alimentation en
gaz à des pressions de test égales ou inférieures à 3,45 kPa (1/2 psi). En Europe, un test d’intégrité
des gaz doit être effectué.
• Le four doit être monté sur roulettes pour être utilisé: l’installation doit être réalisée avec un
connecteur conforme à la norme ANSI Z21.69 CSA 6.16 de la norme relative aux appareils à gaz
mobiles, ainsi qu’à un dispositif de déconnexion rapide conforme à la norme pour les dispositifs
à déconnexion rapide de Utilisation avec carburant à essence, ANSI Z21.41CSA 6.9. Des moyens
adéquats seront fournis sur place pour limiter les mouvements du four sans dépendre du
connecteur et du dispositif de déconnexion rapide ou de la tuyauterie associée pour limiter les
mouvements de l’appareil. Toutes les roulettes sont équipées de freins pour limiter le mouvement
du tandoor.
• Ne laissez pas des opérateurs non formés utiliser cet équipement.
• Faites très attention lors de la manipulation de pièces métalliques. Ne touchez pas de métal ou
d’autres surfaces qui deviennent chaudes en cours de fonctionnement.
• AUCUNE TENTATIVE NE DOIT ÊTRE EFFECTUÉE POUR FAIRE FONCTIONNER CET APPAREIL
LORS D’UNE PANNE ÉLECTRIQUE. En cas de perte d’alimentation électrique, la hotte d’extraction
ne fonctionnera pas. Si cela se produit, éteignez le capot et les robinets du four à gaz.
• SI LE SITE D’INSTALLATION EST FOURNI AVEC UN DISPOSITIF DE VERROUILLAGE PERTE DE
PUISSANCE, IL SERA ACTION POUR COUPER TOUT GAZ EN CAS DE PANNE DE COURANT
ÉLECTRIQUE. SUIVANT LA PERTE DE PUISSANCE, LE RELIRE MANUEL DU BRÛLEUR PILOTE
SERA OBLIGÉ.
• Reportez-vous aux codes locaux pour connaître les exigences en matière d’approvisionnement
en air frais du bâtiment. Pour les États-Unis, en l’absence de codes locaux, reportez-vous au
code national de ventilation intitulé «Norme pour l’installation d’équipements pour l’élimination
des vapeurs de fumées et de graisses provenant d’appareils de cuisson commerciaux», dernière
édition de la norme NFPA-96.
• Remarque: dans les cas où l’entretien peut nécessiter des dégagements d’accès supérieurs à ceux
19Instructions Français
indiqués sur la plaque signalétique, ces dégagements doivent être autorisés.
• Lors de l’installation, des dégagements suffisants doivent être prévus pour le bon fonctionnement
et l’entretien de l’appareil et de tout élément optionnel installé sur site. La plaque signalétique
s’applique uniquement au four à deux étages fourni par le fabricant de l’appareil.
• Cet appareil doit être installé uniquement dans les espaces libres indiqués sur la plaque
signalétique. Les dégagements sont spécifiés des constructions combustibles et non
combustibles.
• Respectez les distances par rapport aux surfaces combustibles indiquées sur la plaque
signalétique. Les dégagements affichés sur l’unité sont pour des raisons de sécurité et des
dégagements moindres ne peuvent pas être appliqués. Des dégagements supplémentaires peuvent
être nécessaires pour le service et l’accès des opérateurs.
• Ne bloquez pas les ouvertures à lames des panneaux de service de l’appareil.
DÉBALLAGE
• Déballez l’appareil de son carton avec un soin extrême, n’utilisez pas de marteau ni d’outils lourds pour le
déballage. Enlevez toujours les panneaux de conteneurs maritimes en tirant fermement vers l’extérieur.
• Veillez à ce que le conteneur soit en position verticale avant de commencer le déballage.
• Avant de positionner l’appareil, enlevez toute pellicule protectrice en plastique.
• Le four est place sur des roulettes de support de 6» (152mm) de hauteur et peut être facilement déplacé à
l’ endroit désigné
• L’unité doit être déplacée manuellement. N’utilisez pas de vérins.
DÉGAGEMENT ET EMPLACEMENT
• Cet appareil nécessite une distance de séparation de 6» (150mm) des matériaux et des surfaces
inflammables et non inflammables.
• Ne jamais installer d’appareils alimentes au propane qui sont de qualité inférieure aux normes exigées.
• Un espace dégage, (espace à l’arrière) d’au moins 6» (150mm) doit être maintenu à l’arrière et sur les
côtes de l’appareil.
• Un espace minimal de 32» (813mm) entre le dessus de l’appareil et toute étagère en surplomb. Les
étagères devront être en matériaux non inflammables.
• II est recommandé de ne pas installer l’appareil dans des endroits où il y a des courants d’air ou a cote des
portes.
• Si l’appareil est positionne sur un plancher inflammable, prévoir une plaque (de préférence en acier) dont
la surface est égale à la surface de la base de l’appareil et la fixer au plancher avant d’installer l’appareil.
Remarque : Les installations et Amérique et au Canada ne sont autorisées que des planchers non
inflammables.
• Veillez à ce que l’appareil soit nivelé
• Assurez-vous que l’appareil soit intact et vérifiez la présence de dommages. En cas de dommages,
signalez-les a la compagnie de fret et contactez le distributeur a I ‘adresse indiquée sur la couverture.
• Vérifiez que la plaquette signalétique indique que l’appareil est bien configure pour une alimentation au
gaz du type disponible dans le local d’installation. Les appareils alimentes au gaz naturel ne peuvent
fonctionner qu’au gaz naturel et ceux alimentes au propane doivent être opéras au propane seulement.
• Planifiez les locaux d’installation de manière à ce qu’ils soient le mieux possible accessibles à l’opérateur.
20Instructions Français
Situez l’appareil dans un endroit ou la circulation à la circulation à pied n’interfèrera pas avec son
fonctionnement. Au moment de choisir l’emplacement, tenez compte de l’opération des conduits et
ventilateurs de chauffage/refroidissement situes au-dessus et sur les parois de l’appareil.
VENTILATION
• La zone d’installation de l’appareil doit disposer d’une ventilation fixe suffisante pour répondre aux
exigences locales, avec une surface minimale de 4,5 cm par apport de chaleur total de 1 Kwht (3412 Btu
par heure).
• La hotte de ventilation doit être installée au-dessus de l’appareil conformément aux codes locaux, aux
codes des organismes de santé publique et aux codes en cas d’incendie.
• II est nécessaire que le (TANDOOR-e-Grill) soit verrouille avec le système de ventilation de la hotte.
• II est nécessaire d’avoir une source de ventilation suffisante au niveau du sol pour assurer
l’approvisionnement d’air frais et pur.
ALIMENTATION EN GAZ ET RACCORDEMENT
• Vérifiez que la correspondance de l’approvisionnement en gaz à celle sur la plaque les données.
Le raccordement doit être de la même taille que celui du Baba Clay Oven (Tandoor-e-Grill) filetage
d’emmétrée de Whitworth Gaz de 1/2» (Pour les Etats-Unis et le Canada c’est du filetage NPT DE 1/2»).
Attention : Ne jamais joindre les fils NPT au BSP au moment du raccordement.
• Le raccordement mesurant 1/2» pour l’alimentation en gaz est situé derrière l’appareil.
• Le robinet d’arrêt doit être installe sur le tuyau d’alimentation en gaz avant l’appareil en cas d’urgence et
aux fins d’entretien. Le robinet d’arrêt manuel doit être positionne conformément aux codes en vigueur sur
le lieu d’installation.
• Étant donné que l’appareil est monte sur roulettes, il doit être connecté en utilisant de matériaux
de raccordement souples et adaptes. Veuillez-vous assurer que le Conduit convient aux appareils
commerciaux de restauration et qu’un fil de retenu et une étiquette de filetage sont utilisés.
• Une tuyauterie fixe ne doit pas être utilisée pour cet appareil.
• Pour les États-Unis et le Canada -L’appareil doit être installe avec un raccordeur en conformité avec les
normes établies pour les raccordeurs pour «Movable Gas Appliance» (Appareil mobile à gaz) soit ANSI
Z21.69-CSA6.16, et un dispositif de désaccouplage rapide pour être utilise avec le gaz, ANSI Z21.41-CSA
6.9.
• Pour les États-Unis et le Canada - Inclus dans le kit Tandoor est un régulateur de pression de gaz,
conforme à la norme ANSI Z21.18 et CSA 6.3, qui devront être connectés entre la ligne d’alimentation en
gaz et le Tandoor. Les instructions d’installation sont fournies avec l’appareil.
AVERTISSEMENT: Le service et l’installation de l’appareil doivent être effectuées par un technicien qualifié
/ expérimenté.
• Raccordez le tandoor au tuyau d’alimentation et faites d’essais d’étanchéité en vue d’assurer que les
raccordements sont étanches au gaz. Examinez toute la tuyauterie pour vérifier qu’il n’y a pas de fuites.
Une solution comprenant 50% de détergent liquide pour vaisselle et 50% d’eau peut être utilisée avec une
brosse pour toute la tuyauterie.
• Allumettes, bougies, ou toute autre source de flamme ou d’étincelles ne doivent pas titre utilises. Les
dispositifs de réglage du gaz sont fournis avec l’appareil et conviennent au type de combustible utilise tel
qu’indique sur la plaque. Le dispositif de réglage ne doit être ajuste, le cas échéant, que par une personne
21Instructions Français
qualifiée. La pression de sortie du régulateur doit correspondre à la pression indiquée sur la plaque
signalétique pour le type de gaz utilise.
• Certaines codes locaux demandent l’installation d’un robinet d’arrêt manuel dans la même pièce et a une
distance de six pieds de l’appareil. S’il faut installer un robinet d’arrêt manuel sur l’appareil, conformément
aux codes locaux, et s’il est monte dans une enceinte près des portes d’accès, une étiquette doit être
fournie pour indiquer cette construction.
• Une tuyauterie à gaz appropriée : Afin d’assurer une bonne performance de cet appareil ainsi que des
autres appareils raccordes sur les mêmes conduites d’alimentation, il et impératif de mettre en place un
système d’alimentation bien planifie et de taille correcte. Si les appareils doivent être raccordes a une
tuyauterie déjà existante, il faut s’assurer que la tuyauterie a une capacité adéquate pour alimenter tous les
appareils qui sont raccordes.
• Une tuyauterie à gaz appropriée : Afin d’assurer une bonne performance de cet appareil ainsi que des
autres appareils raccordes sur les mêmes conduites d’alimentation, il et impératif de mettre en place
une sterne d’alimentation bien planifie et de taille correcte. Si les appareils doivent titre raccordes a une
tuyauterie OP existante, il faut s’assurer que la tuyauterie a une capacité adéquate pour alimenter tous les
appareils qui sont raccordes.
• Le filetage de tuyau (pête à joint) sera utilisé en petite quantité et uniquement sur le filetage mêle du tuyau.
Ce matériau devra être résistant à l’action des gaz de pétroles liquéfies. Attention : Toute la tuyauterie doit
être propre et sans poussière ou sans autres contaminants.
• Toute particule libre, telle que la poussière ou le limage, qui se trouverait dans les tuyaux peut
endommager les dispositifs de réglage et affecter le fonctionnement.
• Assurez-vous que le passage du gaz et de l’air de ventilation n’est pas bloque. Assurez-vous que les
ouvertures de prise d’air autour de l’enveloppe de l’appareil ne sont pas bloquées.
• L’appareil doit être connecte à un conduit d’évacuation adéquat en conformité avec tous les codes locaux
applicables.
• L’appareil doit être positionne de façon à assurer le libre passage pour répondre aux normes de sécurité et
son utilisation.
OPÉRATION
DURCISSEMENT DU POT EN ARGILE POUR LA PREMIÈRE UTILISATION
• Vous devez préparer la portion d’argile du tandoor une fois avant de la démarrer pour la première fois. Cela
scelle et traite l’argile, ce qui prolonge la vie de votre tandoor.
• Pour de meilleurs résultats, répétez cette procédure tous les 2-3 mois.
INGRÉDIENTS
• Huile de moutarde - 1,5 litres.
• Jaggery (gur) - 1 kg.
• Épinards (Palak) - 1 kg.
• Sel - 10 cuillères à café.
INSTRUCTIONS
1. Mélanger (broyer) les ingrédients mentionnés ci-dessus dans un pot jusqu’à ce qu’il devienne liquide.
2. Frottez avec un chiffon sur la portion d’argile de votre tandoor.
22Vous pouvez aussi lire